Deprecated: the XDK has been replaced by a dedicated build procedure detailed in this article. Developing with Xatkit is easier than ever with the IDE integrated in the main repository!
To deploy the Xatkit GreetingsBot example in Linux running in localhost, run the following commands:
git clone https://github.com/xatkit-bot-platform/xatkit.git
cd xatkit
git submodule update --init --recursive
. install-linux.sh
./build.sh --all --skip-tests --product
. build/xatkit-install-linux.sh
./build/bin/start-xatkit-linux.sh build/examples/GreetingsBots/GreetingsBot/GreetingsBot.properties The Xatkit Development Toolkit (XDK) aims to ease the installation and development of Xatkit core components, eclipse plugins, and platforms.
All systems
- JDK 8 (exact version). XDK requires a JDK to compile the different Xatkit components. Note that the Xatkit engine itself only requires a JRE to run and deploy bots.
- Git
- Maven
- (Optional) Eclipse Modeling Tools to install and edit Xatkit bots. Xatkit is developed on Eclipse Modeling 4.11.
Windows
- A bash interpreter (we recommend the one bundled with Git for Windows)
The XDK is also tested on Ubuntu 18.04.2, other Linux distributions are not officially supported.
1- Clone this repository
git clone https://github.com/xatkit-bot-platform/xatkit-dev.git2- Setup the environment variables
Windows
Enter xatkit-dev and execute the xatkit-dev/install-windows.bat file with administrative rights.
Ubuntu
Enter xatkit-dev and execute xatkit-dev/install-linux.sh, e.g. (note the dot . and the space before install-linux.sh):
cd xatkit-dev
. install-linux.sh
XDK Tip: check your environment variables on Windows
Open your bash interpreter and check that
echo $XATKIT_DEVprints the path of thexatkit-devdirectory. If the printed value is empty you need to close your interpreter and open it again, the newly created environment variables will be reloaded.
3- Clone the Xatkit repositories by running the init.sh script
./init.shThis command will clone several Git repositories under the xatkit-dev/src directory:
xatkit-dev/src/xatkit-runtime: the Xatkit execution enginexatkit-dev/src/xatkit-eclipse: the Xatkit Eclipse-based editorsxatkit-dev/src/xatkit-metamodels/*: the Xatkit base metamodelsxatkit-dev/src/platforms/*: the Xatkit platforms bundled with the base distributionxatkit-dev/src/libraries/*: the Xatkit libraries bundled with the base distribution
Each Git repository contains a maven project that can be imported in your preferred IDE.
4- Build Xatkit projects
./build.sh --all --skip-tests --productThe xatkit-dev/build.sh command provides several options that allows to build part of Xatkit:
-- all: builds all the xatkit components (similar to --metamodels --runtime --eclipse --platforms --libraries)--metamodels: pull and build xatkit-metamodels (the xatkit metamodels used by the execution engine and the editors)--runtime: buildxatkit-runtime--eclipse: buildxatkit-eclipse--platforms: build all the platforms located inxatkit-dev/src/platforms(including custom platforms created from scratch, and platforms not bundled with the base distribution)--platform=<platform directory name>: build the<platform directory name>platform. The provided name must match exactly the name of the platform directory located inxatkit-dev/src/platforms--libraries: build all the libraries located inxatkit-dev/src/libraries(including custom libraries created from scratch, and libraries not bundled with the base distribution)--library=<library directory name>: build the<library directory name>library. The provided name must match exactly the name of the library directory located inxatkit-dev/src/libraries--skip-tests: skip the test execution (similar to maven's-DskipTests)--product: create a product version of the bundled artifacts. This option installs the built platforms inxatkit-dev/build/plugins, allowing the runtime component to use them. Installed platforms can also be imported in the Eclipse editors.--skip-pull: skip the git pull for all repositories during build
XDK Tip: rebuild single platforms
Rebuilding a single platform can be done with
./build.sh --platform=<platform directory name> --product. Yourbuilddirectory will be updated with the latest version of the built platform.
After a few minutes, this command creates two directories:
xatkit-dev/build: contains the built artifacts (if--producthas been specified). The content of this directory is a fully working Xatkit installation (similar to the released bundles available here).xatkit-dev/update-site: contains a zipped update-site that can be used to install the Xatkit editors in Eclipse (if--eclipsehas been specified)
5- Setup the local build environment variable
Navigate to xatkit-dev/build and setup the environment variable for your local Xatkit build. This variable is used to run bots and resolve platform/libraries imports in the Xatkit Eclipse Plugins.
Windows
Execute xatkit-install-windows.bat with administrative rights.
Ubuntu
Execute . xatkit-install-linux.sh, again note the dot and the space before the script file name:
cd build
. xatkit-install-linux.sh
XDK Tip: restart running Eclipse instances
You need to restart your Eclipse instance before installing the Xatkit Eclipse Plugins to reload the defined environment variable.
6- Install the update-site in Eclipse
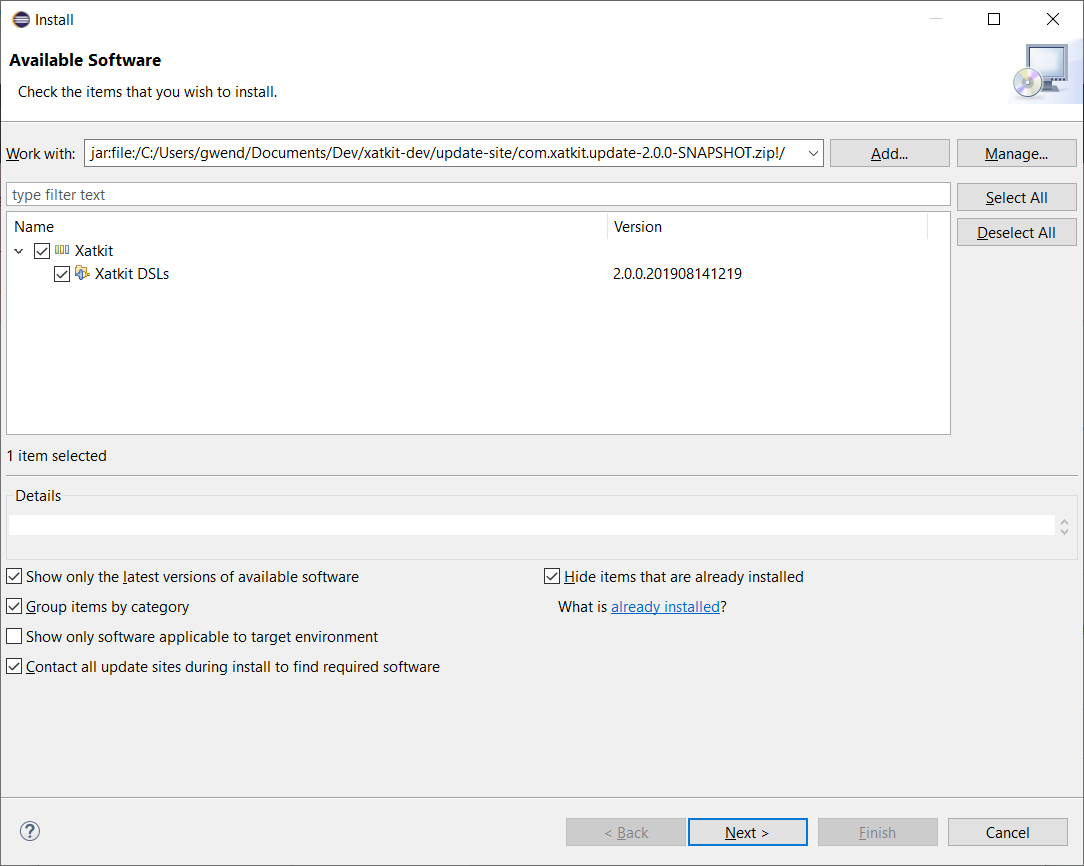
Navigate to Help > Install New Software > Add > Archive and select the zipped update site located in xatkit-dev/update-site. The update site contains a single feature grouping the different language editors. Select it and press Next.
Congratulations! You have now performed all the steps to build your own Xatkit development installation. You can test that everything is correctly setup by navigating to the xatkit-dev/build/bin directory and run the preset GreetingsBot example using the following command:
Windows
cd bin
./start-xatkit-windows.sh ../examples/GreetingsBots/GreetingsBot/GreetingsBot.properties
Ubuntu
cd bin
./start-xatkit-linux.sh ../examples/GreetingsBots/GreetingsBot/GreetingsBot.properties
The console will log some initialization information, and after a few seconds you should see the following message:
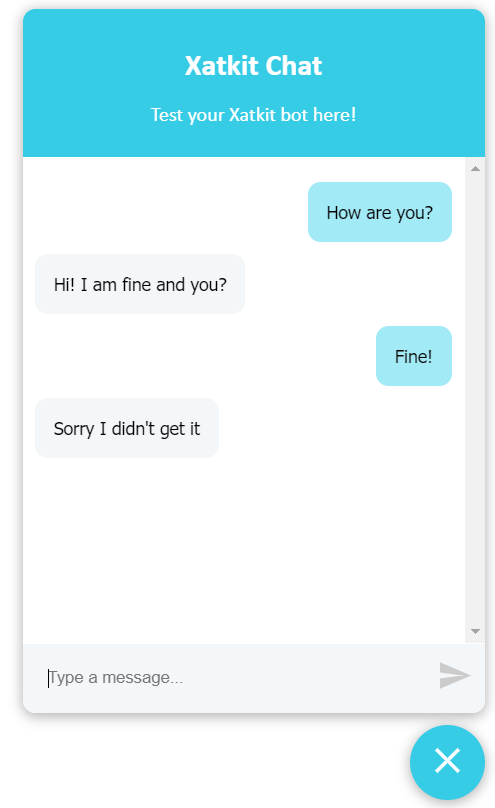
You can test your chatbot here http://localhost:5000/admin (note that the bots behavior can be slightly different on the test page than when it is deployed on a server)Open your browser and navigate to http://localhost:5000/admin to test your deployed chat bot!
XDK Tip: check the Greetings Bot definition
The deployed bot is defined in
xatkit-dev/build/examples/GreetingsBots/GreetingsBot. It contains basic intents and execution rules to test that the installation is working. You can check the tutorial to learn how bots are defined with the Xatkit language, or if you are already familiar with it you can take a look at the documentation for additional information on Xatkit capabilities. See also how to use a real NLP such as DialogFlow instead of the default plain regular expressions based intent matching used in this test example.
To deploy a Xatkit example server in Linux running in localhost, run the following commands:
git clone https://github.com/xatkit-bot-platform/xatkit-dev.git
cd xatkit-dev
. install-linux.sh
./init.sh
./build.sh --all --skip-tests --product
. build/xatkit-install-linux.sh
./build/bin/start-xatkit-linux.sh  build/examples/GreetingsBots/GreetingsBot/GreetingsBot.properties
Open your browser and navigate to http://localhost:5000/admin to test your deployed chat bot!


