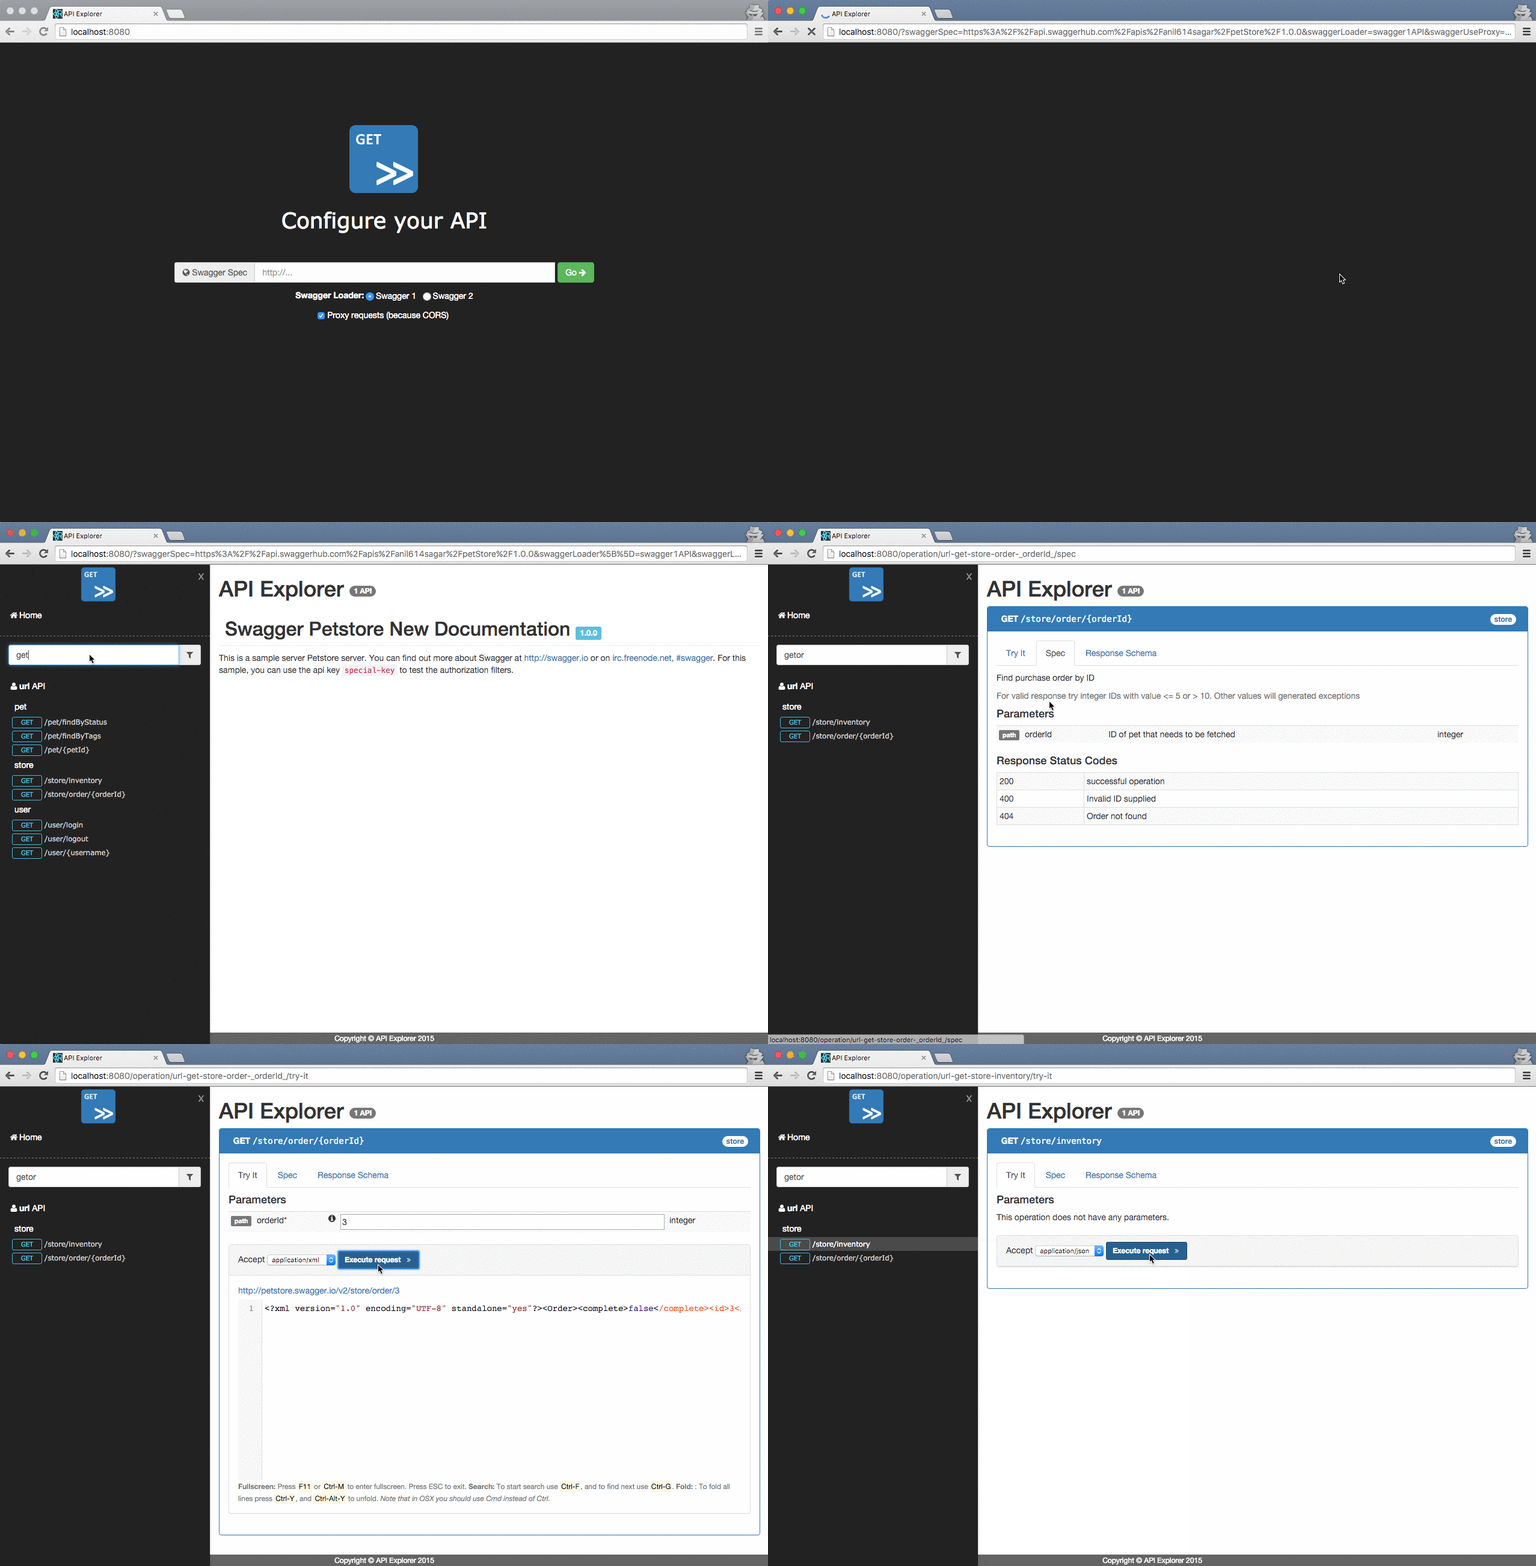
API Explorer is a live documentation client for HTTP APIs that provides a nice and highly customizable UI.
- Extensible: API Explorer provides an extensible system, based on plugins, that allow you to control several aspects of the UI, interactions with your API endpoints and the API Specification.
- API Specification loaders: It is pre-bundled with Swagger (v1, v2) API specification loaded, but can be extended to handle other specifications.
- Multiple APIs: You can have multiple API handled in the same UI for convenience.
- Developer friendly: We provide a built-in development server to test your plugins and settings, with features such as a proxy for bypass CORS restrictions
- Clean UI and user friendly: The UI is focused in the API operation, making it a first class citizen in the UI. Some user friendly aspects are also implemented, like: deep-link to api operations with pre-filled parameters; history for API request responses; API deprecation indicator; custom headers.
Since API Explorer is distributed as a library it won't work out of the box without some configuration. You can opt-in for the following minimum configuration or use an advanced configuration explained in the advanced configuration section.
These are the steps to get API Explorer working for some API that is described in Swagger v2.
- Download the
API.Explorer.*.zipfile from the releases page for this project. - Expand the file to get the
APIExplorer.umd.jsandindex.htmlfiles- The
.jsfile is the API Explorer library bundle - The
index.htmlis a sample HTML index file you can/should use to bootstrap. It contains some CSS/JS external of API Explorer, the DOM hook node and some styles.
- The
- Copy the files to a new folder or to the root of your Server/API
- Edit the
index.htmlfile to configure your API-
Add a
<script ...>tag as the last<body>element with the following: -
Option A) if you are hosting
index.htmlin the same server/api:APIExplorer .addAPI('some-api', 'swagger2', '/path/to/the/api/spec', c => { c.addHeader('X-API-Key', 'Some Value') // You may add custom headers }) .start()
-
Option B) if you are hosting
index.htmlin a distinct server/api:APIExplorer .addAPI('some-api', 'swagger2', 'https://example.com/path/to/the/api/spec', c => { c.addHeader('X-API-Key', 'Some Value') // You may add custom headers }) .configCORS({ credentials: 'omit' }) .start()
-
- To build this project you need to clone the repository and do the following. Note that you can change the port number using the
PORTenvironment variable.
$ npm install -D
$ cd packages/api-explorer
$ npm run demo
open http://localhost:3000
- This project uses StandardJS for linting the code.
npm run lint
- To generate a production build you need to run the following commands:
yarn install
yarn run build
The output files are stored in the dist folder. You can grab the files and place then in your application server.
You can also use a local server to run this application using npm start
APIExplorer uses a fluent API to specify the internal behaviour.
The following example configures two distinct APIs in the same API Explorer instance, with a custom widget HATEOAS,
and a plugin samplePlugin. It also configure how to handle credentials in a CORS scenario.
At the bottom, the start method triggers the API Specification download and subsequent UI render.
APIExplorer
  .addAPI('petstore', 'swagger2', 'https://api.swaggerhub.com/apis/anil614sagar/petStore/1.0.0', c => {
    c.addHeader('X-Foo', 'Some Value')
    c.addHeader('X-Bar', 'Another Value')
    c.useProxy(true)
    c.setRequestTimeoutInMiliseconds(5000)
    c.listOperationsAtWelcome(true)
  })
  .addAPI('github', 'swagger2', 'https://api.apis.guru/v2/specs/github.com/v3/swagger.json', c => {
    c.useProxy(true)
  })
  .addWidgetTab('HATEOAS', APIExplorer.HATEOASWidget)
  .addPlugin(samplePlugin)
  .configCORS({ credentials: 'omit' })
.start()We appreciate any contribution to API Explorer, please check out CONTRIBUTING.md. We keep a list of features and bugs in the issue tracker.
You can check all the contributors of this project here. A special thanks to:
npm version <update_type>
where update_type is minor, major or build.
Circle CI will then publish the new version to NPM triggered by a new tag that is pushed to git.
You can try the application in the online development sandbox that is using the Swagger PetStore API.

