-
Notifications
You must be signed in to change notification settings - Fork 0
Installation Guide
The frontend consists of a Universal Windows App which is installed on the HoloLens.
The frontend can be deployed to the HoloLens as the follow-up step of the app build process. The full workflow from the compilation to the deployment is described here.
Alternatively, the app can be packed as a .apppackage-file in Visual Studio. This file can then be installed via the Device Portal of the HoloLens. This approach bears the advantage that the installation can be performed from any PC as no Visual Studio installation is required once the app package has been generated.
To generate the UWP app package follow these steps:
- Build the app and open the generated Visual Studio solution.
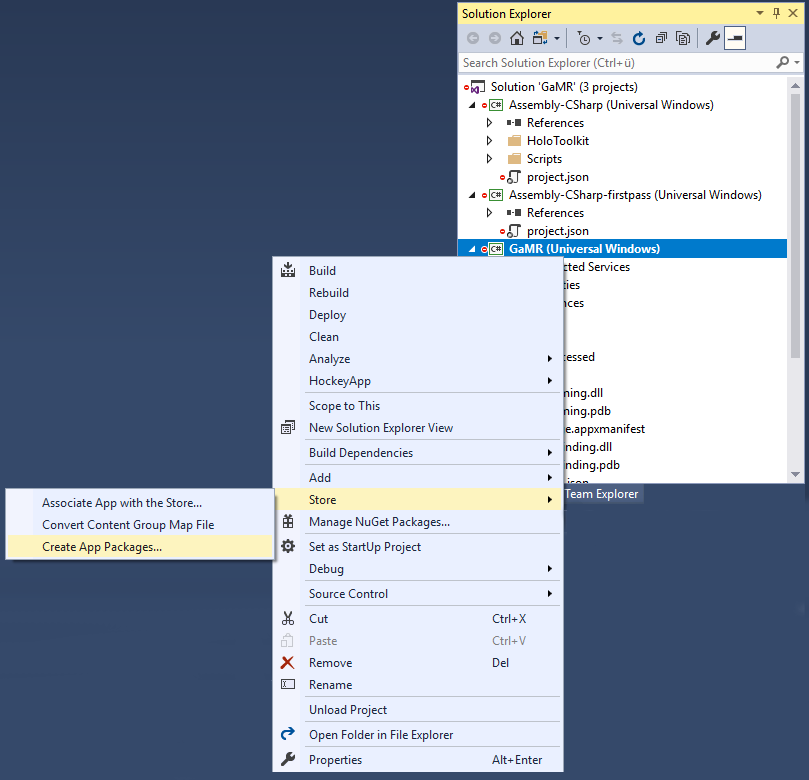
- In Visual Studio's Solution Explorer search for "GaMR (Universal Windows)" and perform a right click on it.
- In the opened context menu, navigate to the entry Store>Create App Packages and click on it.

- The "Create App Packages" window opens. Select "No" at the question "Do you want to build packages to upload to the Windows Store" and proceed.
- Choose the output location and version number. Also make sure to uncheck x86 and ARM target architectures as the HoloLens uses a x64 system.
- Finally click Create.
Installing the app package on the HoloLens:
- Open the Windows Device Portal (Open a web browser and enter the IP address of the HoloLens. This only works if the PC is in the same network as the HoloLens. You may need to set a security exception or install the certificate to access the Windows Device Portal.)
- In the left sidebar navigate to "Apps".
Note that you may have to uninstall any previous versions of the app before installing the new version. Search for the app's name in the dropdown box under "Installed Apps" and select it. Then hit the "Remove" button.
- Under "Install App", upload the app package. Also add and upload any dependencies which have been generated in the same place as the app package.
- Finally click on the "Go" button and wait for the installation to finish.
The backend requires three components which need to be installed:
- The model backend
- The gamification framework
- The sharing server
You will have to build the jar file from the ModelProvider project. Once you have done this, copy all the output files to the installation folder. The installation folder also needs to contain a config file. It contains the folder address where the backend data, i.e. the 3D models are saved.
In order to install the gamification framework, please follow the instructions on its GitHub page. We recommend installing it on a Linux machine.
The sharing server is a .exe file which can be found in the MixedRealityToolkit by Microsoft. It is executed in a console. Open a console and navigate to the folder where the file is located. Start the SharingServer.exe with the additional argument -local.