Hosted on Glitch. To invite the bot to your server you can go to this link.
Kuru Anime's Discord Bot is your one-stop bot for Anime servers! It keeps on growing day by day and if there's a feature that you want to be included we'll be glad to help you add it! Our Discord Bot also follows one of Kuru Anime's main core value which is staying open-source!
Links
Before we can start working on the bot we need to first install some prerequisites.
- Text Editor (We recommend Visual Studio Code if you're new to programming)
- Node.js
- Git
- Yarn
It's also worth mentioning that if you don't know that much about JavaScript then you will have a hard time working on the bot. You can still work on the bot but you'll probably have some problems here and there. If you want to know more, here are a few links where you can do that:
- CodeCademy's interactive JavaScript course
- Eloquent JavaScript, a free online book
- Nodeschool, for both JavaScript and Node.js lessons
- MDN's JavaScript guide and full documentation
- Google, your best friend
Test if the prerequisites are installed properly by checking their current versions in your system.
For Node.js:
node --version
For Git
git --version
For Yarn:
yarn --version
They should, in theory, return their versions if they are properly installed.
Once they are all installed we can then proceed to setting up our own server and bot for testing.
It looks hard but it's actually pretty easy! So don't worry.
- Open up the Discord website and login.
- Hover over the "Developers" drop-down menu and click on the Developer Portal link.
- Click on the "New Application" button.
- Enter a name and optionally select a team (if you want the bot to belong to one). Then confirm the pop-up window by clicking the "Create" button.
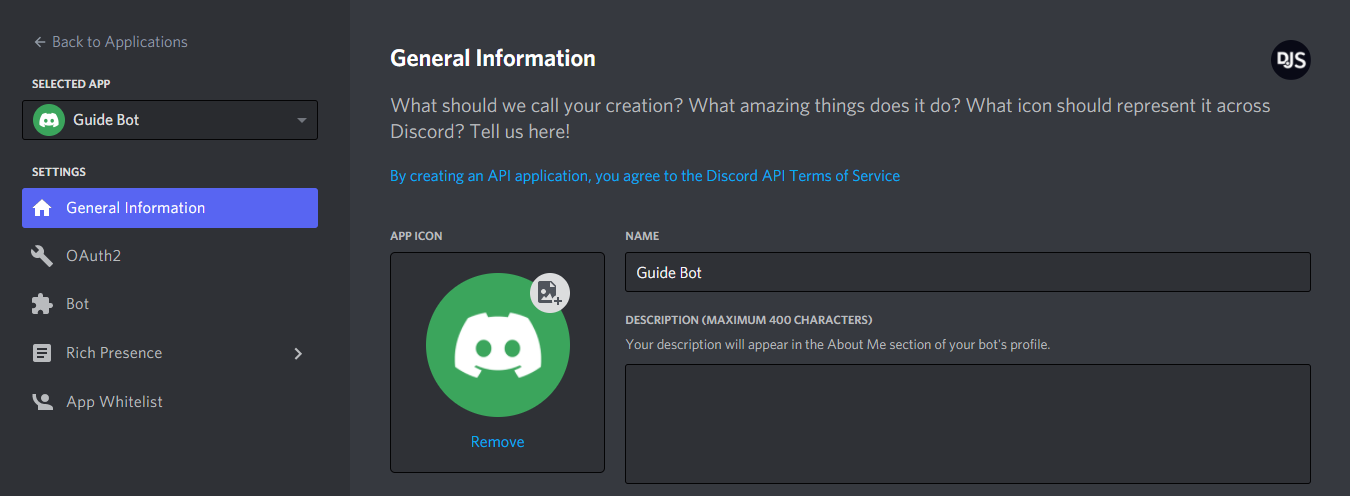
You should see a page like this:
Fill in the necessary details and save it. Once you're done you can move on to the next step by clicking on the "Bot" tab on the left pane.
Click the "Add Bot" button on the right and confirm the pop-up window by clicking "Yes, do it!". You made it! You've created your own Discord Bot! We're not done yet, though.
This is one of the important step on this instruction so please pay close attention.
After creating the bot you'll see a page like this:
In this panel you'll be able to do stuff like, add avatar, set its username or make it public/private. This is also the panel where you can get your bot's token. When you're asked for the bot's token, this is where you'll find it. Just hit copy and you'll have it in your clipboard.
Think of it as your bot's password. The bot uses the token to login to Discord. Just like a normal password, you should not share it to anyone. If someone gets a hold of your bot's token they'll be able to do malicious activities with it.
If everything's been done correctly you should have a bot application set up and an access to its token. It's missing a server, though, so we need to invite it in one.
You'll need a special link to invite your bot. You'll need its client's ID to do so.
An invite link for a bot looks like this:
https://discordapp.com/oauth2/authorize?client_id=123456789012345678&scope=bot
Let's break it down:
- The first part is just Discord's standard structure for authorizing an OAuth2 application (such as your bot application) for entry to a Discord server.
- The second part that says
client_id=...is to specify which application you want to authorize. You'll need to replace this part with your client's ID in order to create a valid invite link. - Lastly, the third part which says
scope=botspecifies that you want to add this application as a Discord bot.
A permissions parameter also exists to restrict or guarantee the permission your bot will have on the server you are adding it to. For ease of use, it is recommended to use this website.
As mentioned above, you'll need to replace the client_id parameter with your client's ID in order to generate your invite link. To find your app's ID, head back to the My Apps page under the "Applications" section once again and click on your bot application.
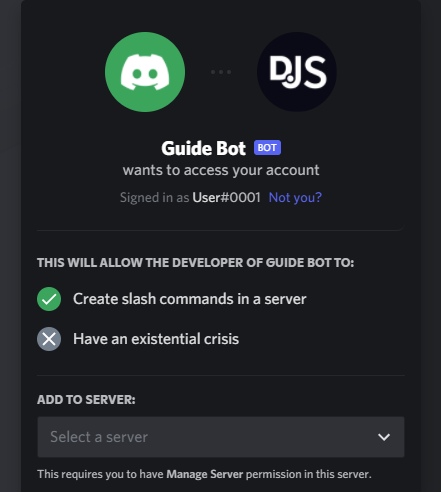
Insert your app's ID into the link template and then access it in your browser. You should see something like this (with your bot's username and avatar):
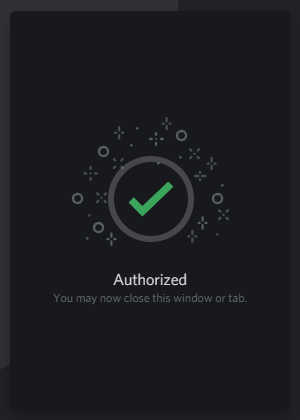
Choose the server you want to add it to and click "Authorize". Do note that you'll need the "Manage Server" permission on a server in order to be able to add your bot there. This should then present you a nice confirmation message:
Congratulations! You've successfully added your bot to your Discord server. It should show up in your server's member list somewhat like this:
To start working on the bot you will need to clone this repository to your system. Once you've done that cd to the repository then copy .sample.env to .env.
cp .sample.env .env
Open .env and replace xxxxx with your bot's token. Your .env should look similar to this afterwards:
BOT_TOKEN="NjYwNzI1NzYwMTg0ODExNTIy.Xnbq9w.e5a7b261eFywwc-WfC7aopD86lM"
We'll now move to installing the dependencies for this project. While inside the directory run the following code to build your node_modules:
yarn install
We can now start working on the bot! Just run the following code below to start the bot for testing on your own server:
yarn watch
That's it! Head over to the issue board for issues that you can work on. Enjoy!


