- 新建
consumer模块和provider模块 provider模块写HelloSever和HelloServiceImpl,consumer写consumer调用HelloServe【注意pom要引用】- 新建
provide-common,把HelloSever放进来【抽离接口】 - SpringBoot启动,接收方法调用,必须通过网络请求的方法来接收【netty/tomcat】--新建一个
rpc模块【pom引用,希望provider在启动的时候能够tomcat,rpc负责】 - 新建protocol包,HttpServer类,start方法;provider在main方法调用start方法
public class HttpServer {

    public void start(String hostname, Integer port) {

        // 读取用户配置:端口号,这里先写死
        //启动tomcat
        Tomcat tomcat = new Tomcat();

        Server server = (Server) tomcat.getServer();
        Service service = server.findService("Tomcat");

        Connector connector = new Connector();
        connector.setPort(port);

        Engine engine = new StandardEngine();
        engine.setDefaultHost(hostname);

        Host host = new StandardHost();
        host.setName(hostname);

        String contextPath = "";
        Context context = new StandardContext();
        context.setPath(contextPath);
        context.addLifecycleListener(new Tomcat.FixContextListener());

        host.addChild(context);
        engine.addChild(host);

        service.setContainer(engine);
        service.addConnector(connector);

        // tomcat.addServlet(contextPath, "dispatcher", new DispatcherServlet());
        // context.addServletMappingDecoded("/*", "dispatcher");

        try {
            tomcat.start();
            tomcat.getServer().await();
        } catch (LifecycleException e) {
            e.printStackTrace();
        }
    }
}- 接收请求后就要处理请求,httpserve加上以下代码【新增
DispatcherServlet类,相当于中转站去处理请求--》新增HttpServerHandler,处理请求的具体方式--》新增Invocation类, 封装了接口名、方法名、参数、参数类型】
// 处理请求
tomcat.addServlet(contextPath, "dispatcher", new DispatcherServlet());
context.addServletMappingDecoded("/*", "dispatcher");-
还是在
HttpServerHandler,我们现在通过Invocation只能获取接口名,是不知道对应的实现类,所以就要通过本地注册的方法存起来LocalRegister类【因为我们要拿到实现类,才能通过getMethod获得对象,才能通过反射调用对象】,注意provider在启动前要先进行本地注册,consumer要先生成invocation对象 -
通过网络把
invocation对象发出去--》httpclient类,send方法--》consumer利用send方法进行发送对象 -
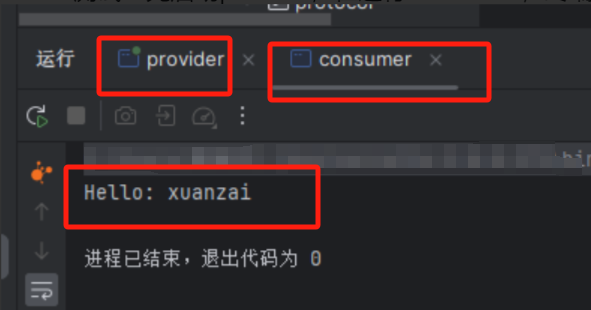
测试:先启动provider,在运行comsumer,终端成功显示!
这样写consumer还是太麻烦了--优化方法:得到具体的HelloService 对象--代理对象
public class consumer {
    public static void main(String[] args) {
        // HelloService helloService = ?;
        // String result = helloService.sayHello("xuanzai");
        // System.out.println(result);

        // 生成invocation对象
        Invocation invocation = new Invocation(HelloService.class.getName(), "sayHello",
                new Class[]{String.class}, new Object[]{"xuanzai"});

        // 利用send方法进行发送对象
        HttpClient httpClient = new HttpClient();
        String result = httpClient.send("localhost", 8080, invocation);
        System.out.println(result);
    }
}proxy包ProxyFactory类,重写invoke方法,consumer改成getproxy
public class ProxyFactory<T> {

    @SuppressWarnings("unchecked")
    public static <T> T getProxy(final Class interfaceClass) {
        // 代理对象:第三个参数是代理逻辑
        return (T) Proxy.newProxyInstance(interfaceClass.getClassLoader(), new Class[]{interfaceClass}, new InvocationHandler() {
            @Override
            // invoke方法干的就是把远程调用的过程封装成Invocation对象,然后通过网络传输给服务端,
            // 服务端接收到Invocation对象后,再通过反射调用本地的实现类,最后把结果返回给客户端
            // 这里的逻辑和之前写在consumer的逻辑是一样的
            public Object invoke(Object proxy, Method method, Object[] args) throws Throwable {
                // 生成invocation对象
                Invocation invocation = new Invocation(interfaceClass.getName(), method.getName(),
                        method.getParameterTypes(), args);

                // 利用send方法进行发送对象
                HttpClient httpClient = new HttpClient();
                String result = httpClient.send("localhost", 8080, invocation);
                return result;
            }
        });
    }
}
send方法的端口地址还是写死的,而且这个地方还是在rpc模块,不可能为了改端口地址还跑到rpc模块去,继续优化!
localhost8080表示的是provider的,也就是要根据接口名字找到当前接口所在的provider的ip--》注册中心:provider在启动的时候把ip存到注册中心里面去
--》RemoteMapRegister类--》新建URL类
provider加注册中心注册ProxyFactory实现服务发现
这里获取的是List,这就涉及到负载均衡--》LoadBalance类
-
容错机制:ee不知道为什么没跑出去
-
重试机制:注意要调用不同的URL
 //【重试机制 -- 注意要调用不同的URL】
    int max = 3;
    while (max > 0) {
        // 记录已经调用过的URL,排除掉
        List<URL> invokedURLs = new ArrayList<>();
        invokedURLs.add(randomURL);
        urls.remove(invokedURLs);

        //【服务调用】
        try {
            result = httpClient.send(randomURL.getHostname(), randomURL.getPort(), invocation);
        } catch (Exception e) {
            if (--max != 0)
                continue;
            //【容错机制】不知道为什么前面的异常抛不出去🤔
            return "服务调用报错";
        }
}- 服务mock:不启动provider也不会报错,直接进入mock
//【服务mock】
String mock = System.getProperty("mock");
if (mock != null&&mock.startsWith("return:")) {
    String result = mock.replace("return:", "");
    return result;
}

