This is the DevOps/CD demo with Tanzu technologies that is shown in this video:
You will want at least one running Kubernetes cluster to install and run the demo. These assets have been tested with TKG Standalone (TKG) and TKG Integrated (TKGI).
This document will refer to a Shared Services Cluster, which will control the build and deployment pipelines, and a Workload Cluster, which will run the user applications that we build and deploy. The Shared Services Cluster and the Workload cluster could be a single cluster if you are tight on demo resources, but in practice a single Shared Services cluster would service many external Workload Clusters.
For ease of execution, it is recommended that you support Load Balancer capability on each of your clusters. If you are running your TKG cluster in a cloud environment, or with integrated NSX-T, then you have Load Balancer support. If not, it is recommended that you install MetalLB with Layer2 Configuration to add LoadBalancer support. This is an extremely simple process that can be completed in minutes:
- Installation: https://metallb.universe.tf/installation/#installation-by-manifest
- Layer2 Configuration: https://metallb.universe.tf/configuration/#layer-2-configuration
-
Install ArgoCD onto the Shared Services cluster. It's a simple install, and the instructions are here: https://argoproj.github.io/argo-cd/getting_started/. If your workload cluster is separate from the Shared Services cluster, you must register the workload cluster as described here: https://argoproj.github.io/argo-cd/getting_started/
-
Install Tanzu Build Service onto the Shared Services cluster. This is the most complicated installation piece, and documentation is here: https://docs.pivotal.io/build-service/0-2-0/index.html. This installation process includes configuring the Docker repository that build service will be publishing images to (and that our deployment engine will be pulling from).
-
Attach your Workload cluster to Tanzu Mission Control. Log into Mission Control and press the Attach Cluster button. Enter information about your Workload cluster, and follow the instructions for installing the agent.
-
Install Contour onto the Workload cluster.
- Base install is as simple as applying a manifest:
kubectl apply -f https://projectcontour.io/examples/kuard.yaml - Create a wildcard A record that maps your application domain (e.g. *.apps.mydomain.com) to the LoadBalancer address for the envoy service in the projectcontour namespace
- Configure TLS support. Generate a cert (LetsEncrypt or self-signed) and execute the following command:
kubectl create secret tls tls-secret --cert=<your cert> --key=<your private key> -n projectcontour. Then enable TLS Delegation by running akubectl apply -fon the following file:
apiVersion: projectcontour.io/v1
kind: TLSCertificateDelegation
metadata:
  name: contour-delegation
  namespace: projectcontour
spec:
  delegations:
    - secretName: contour-tls
      targetNamespaces:
        - "*"
Create a personal fork of the following config repos in Github:
Customize your fork of the repos for your environment:
- Update your version of the files hello-config/base/deployment.yaml and world-config/base/deployment.yaml. Each of these files specifies an image name that uses the registry prefix harbor-lab.pks.corby.cc/development. Replace the prefix with the docker registry/project that you will be using.
- Update your version of the files hello-config/dev/httpproxy.yaml and hello-config/staging/httpproxy.yaml. Each of these files specify a FQDN that uses the base domain contour.tkg.corby.cc. Replace the base domain portion with the wildcard domain that you created during Contour installation (e.g. hello.apps.mydomain.com)
Set up build using Tanzu Build Service. Set your current context to the Shared Services Cluster, and run the following:
kp image create world <your docker registry>/hello --namespace build-service --git https://github.com/cepage/hello
kp image create world <your docker registry>/world --namespace build-service --git https://github.com/cepage/world
The <registry>/hello and <registry>/world paths should match the image names you entered when you customized the deployment.yaml files in your forked repos.
This will kick off builds of the hello and world microservices. You can check the status of the builds with the following commands:
kp build logs hello -b 1
kp build logs world -b 1
Log into ArgoCD, and click the New App button in the Upper Left corner. Fill out the following fields:
Application Name: hello-dev
Project: default
Repository URL: [Your forked version of the hello-config Github Repo]
Path: dev
Hit the Create Button. Repeat the process and create the following 3 additional apps:
Application Name: world-dev
Project: default
Repository URL: [Your forked version of the world-config Github Repo]
Path: dev
Application Name: hello-staging
Project: default
Repository URL: [Your forked version of the hello-config Github Repo]
Path: staging
Application Name: world-staging
Project: default
Repository URL: [Your forked version of the world-config Github Repo]
Path: staging
Your apps will now show on the home page as "Out of Sync" (assuming you selected the default Manual Sync Policy):
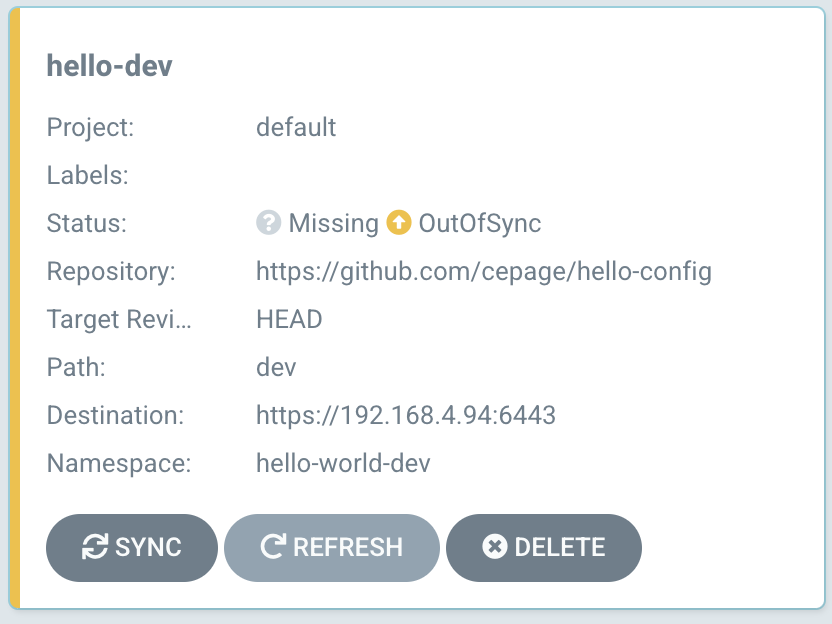
Press the Sync button on the app, and ArgoCD will deploy to your Kubernetes cluster, to match the configuration defined in your forked config repos. Once all four apps have been synced, you can visit the FQDNs that you specified in your Contour HttpProxy configurations, and see the running Dev and Staging deployments of the application:

The Hello-World application consists of two microservices, Hello and World, which are configured and deployed independently of each other. The Hello microservice is a web app that displays a message, using a text color that is a configuration parameter to the microservice. It receives the message text by invoking an endpoint of the World microservice. The World microservice returns the message text, which is a configuration parameter for that service:

By modifying your hello-config and world-config repos, you can make changes to deployment settings such as the number of deployment replicas, the FQDN URL of your application, or the application-specific config parameters. For this example, we will update the ConfigMaps, because the changes are easily observable.
Our changes will be specific to the dev (not staging) deployment of our application. Go to the dev/configmap.yaml file in your hello-config repo, and change the web.color parameter from DarkGoldenrod to Violet. Then, go to the dev/configmap.yaml file in your world-config repo, and change the message.text parameter from Development Land to Deployment City. Commit these changes to your Git Repo.
Now go back to the hello-dev and the world-dev applications in ArgoCD. You might have to hit the "refresh" button on these apps first, but ArgoCD will now register these apps as "Out of Sync". The ConfigMaps in your running deployments no longer match what is specified in your Git Repos. Press Sync for each of these applications, and ArgoCD will redeploy them, injecting new ConfigMaps. Visit the FQDN for your Dev deployment to observe the changes:

Log into Tanzu Mission Control. We will create a Workspace to set policies on our deployments. From the Workspace sidebar menu, select Create Workspace, and name your new workspace hello-world:

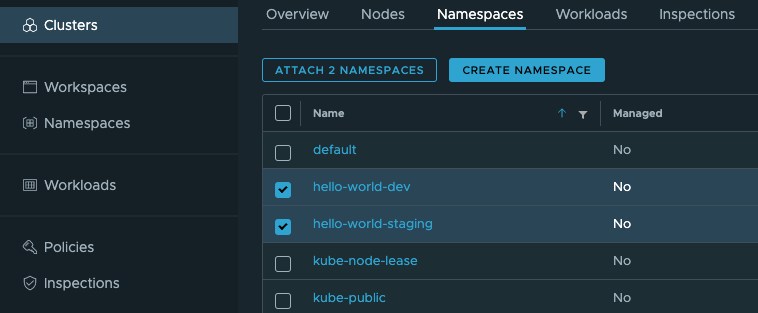
Next, go to the Clusters sidebar menu, select your Workload cluster, and then select the Namespaces top-level menu. Check the 2 namespaces that are being used for the dev and staging deployments, as defined in your config repo, and then select "Attach 2 namespaces":
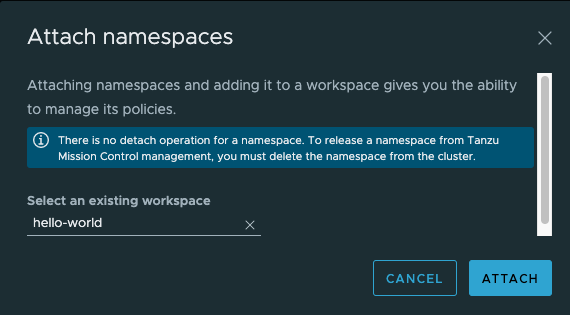
A pop-up menu will ask you to choose which workspace to assign these namespaces to. Select the hello-world workspace you just created:
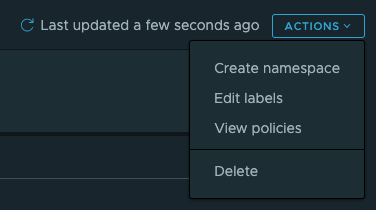
Now, go to the Workspaces sidebar menu, and click on the hello-world workspace. In the top-right corner, you will see an "Actions" drop-down menu. Select "View Policies":
We are going to define a policy that only allows images to be deployed from the trusted registry that Tanzu Build Service publishes to, and presents the execution of arbitrary, untrusted code. In the top-level menu on the Policies screen, select "Image Registry". Click the link that says "Create Image Registry Policy". Enter a name "trusted-registry" for the policy, and for "Image Registry Patterns", put the DNS name of your Docker Registry that Build Service publishes to:
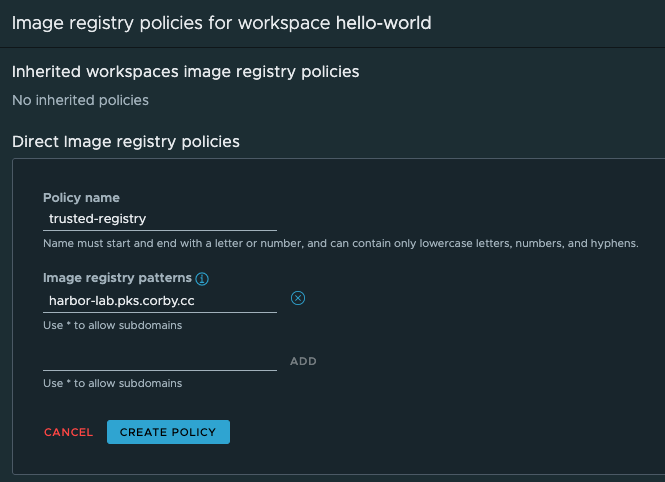
The hello and world microservices can continue to run in these namespaces, because their images were created by Tanzu Build Service and live in the trusted registry. But let's see what happens when we try to run untrusted code. Set the current context of your kubectl config to the hello-world-dev namespace. Then execute the following command:
kubectl run nginx --image=marketplace.gcr.io/google/nginx1
The pod will fail to start, with the following message:
Error from server (failed to match image policies: spec.containers[0].image: Forbidden: no matching image policy): admission webhook "validation.policies.tmc.cloud.vmware.com" denied the request: failed to match image policies: spec.containers[0].image: Forbidden: no matching image policy
