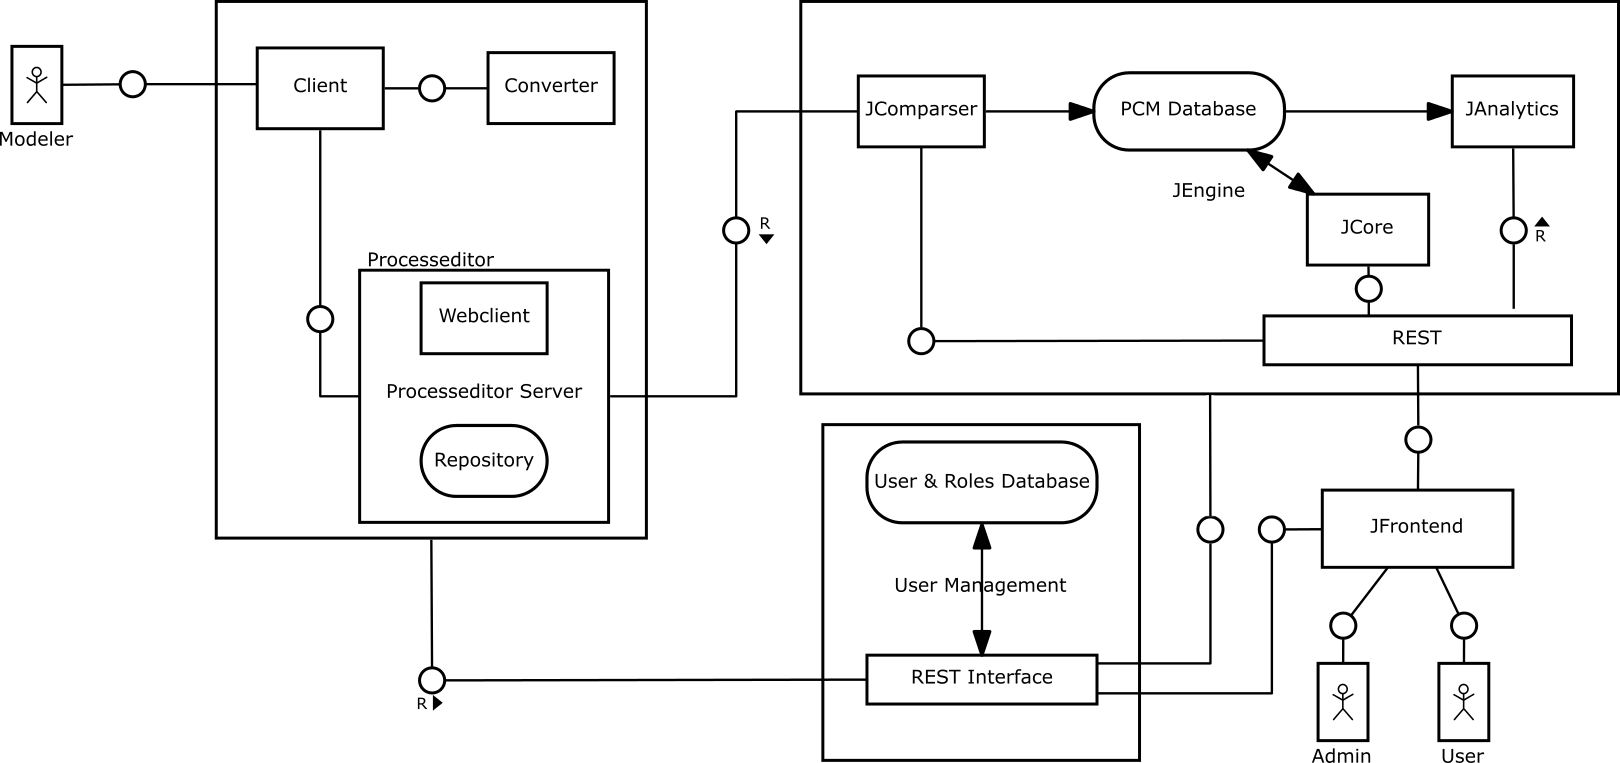
The JEngine is a ProcessEngine to execute Production Case Management (PCM).
The source code of the JEngine is provided under MIT License. Please notice, that the used Antlr framework is published under the BSD License.
See the documentation inside the doc folder.
Update APT
sudo apt-get update
Installing Tomcat, MySQL Server, Maven (>3,2), Java (>1,7), git
sudo apt-get install tomcat7 mysql-server maven git default-jdk
Cloning of this repo
git clone https://github.com/BP2014W1/JEngine
Further a MySQL Database should be created named "JEngineV2" and the SQL file needs to be imported
mysql -u username -p -h localhost JEngineV2 < JEngine\src\main\resources\JEngineV2_schema.sql
Please be aware of the database settings inside the web.xml in
JEngine/src/main/resources/webapp/WEB-INF/web.xml
For the tests you may want to adapt the database_connection in
JEngine/src/main/resources/database_connection
After changing server IPs you may want to update the Config.java in the config package.
In order to deploy the JEngine install [Maven](http://maven.apache.org/ Maven). Then execute the following commands in your command line:
mvn install -Dmaven.test.skip=true
A war file will be created which can be executed using tomcat. Stop tomcat
service tomcat7 stop
copy the JEngine.war in the tomcat webapp dir
cp target/JEngine.war /var/lib/tomcat7/webapps/
remove old JEngine folder in case of an update
rm -r /var/lib/tomcat7/webapps/JEngine
and start tomcat again
service tomcat7 start
Now, you may access the JFrontend via
We are using a AngularJS Template; please be sure to download the AngularJS libs
This JEngine supports the execution of
- email- ,
- webservice- and
- user-tasks
within fragments of a scenario.
For further details we kindly refer to the project site
