Raspberry Pi score counter for games.
- A Python script records every button action with the GPIO implementation from the Raspberry Pi.
- Every action is saved in a SQLite database
- A web interface will connect to that database to offer a UI to the program
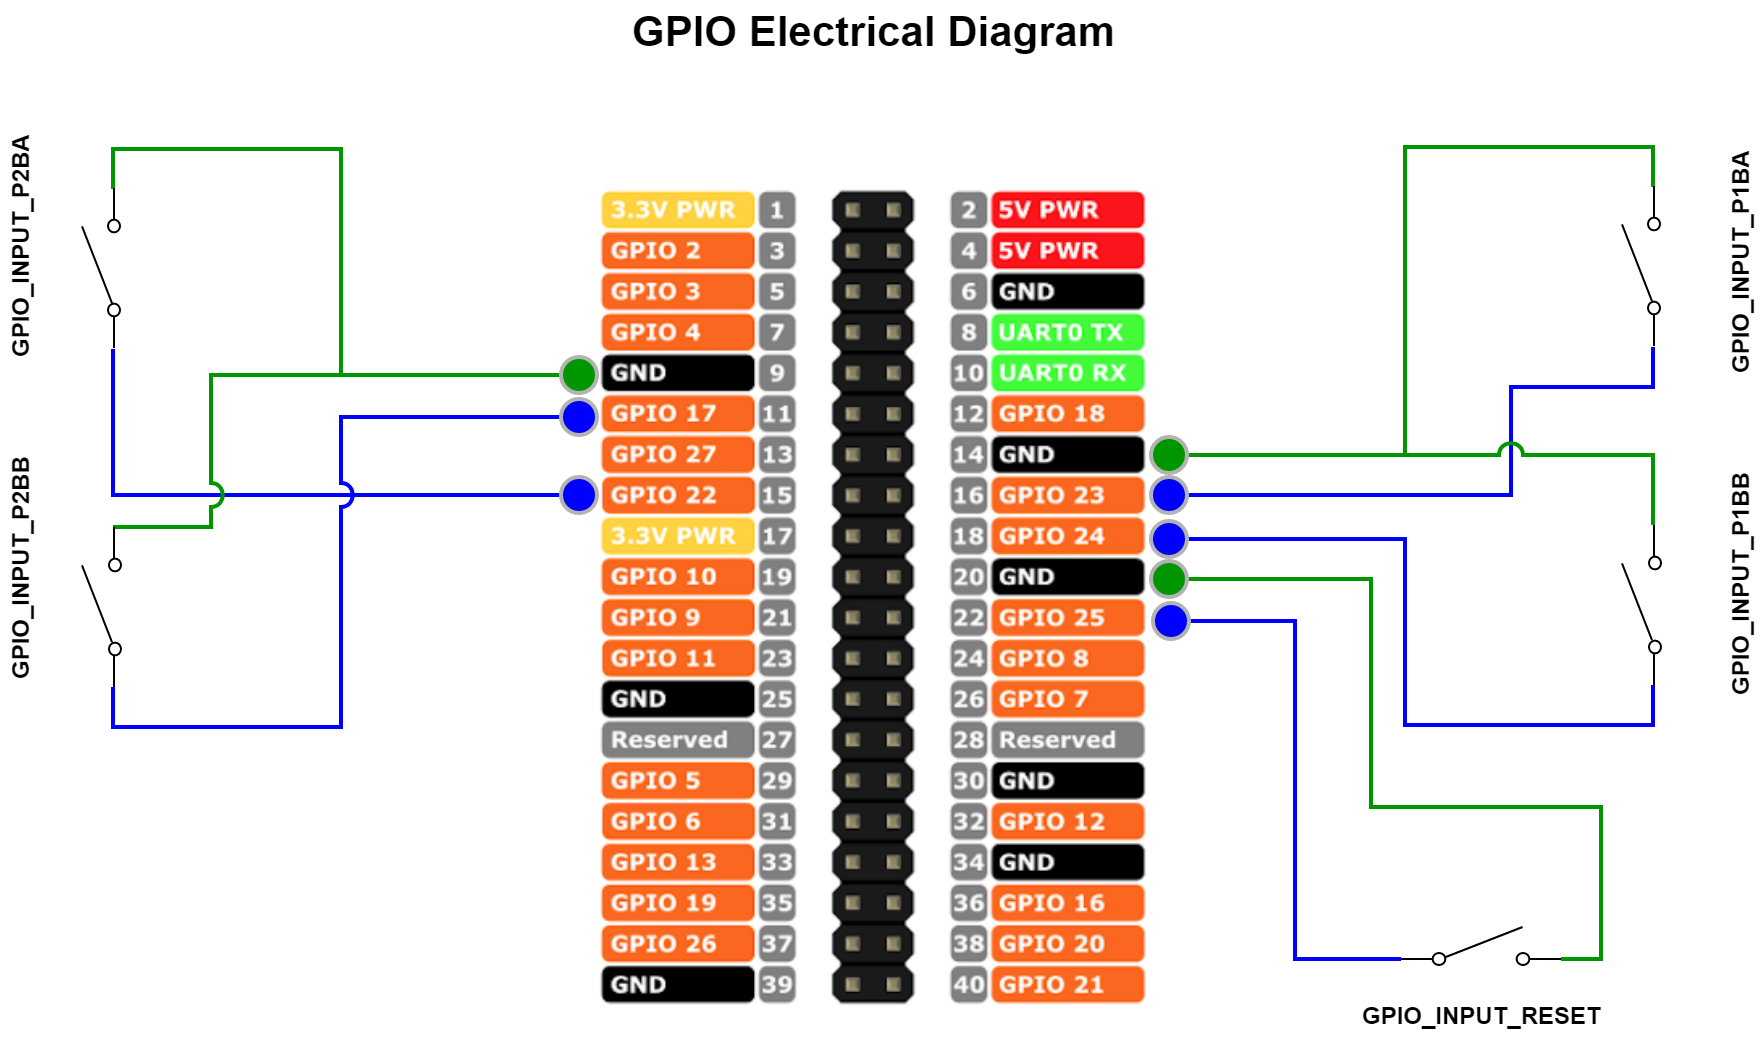
- Player 1 - Button A (GPIO23) was GPIO18 before 1.4.0
- Player 1 - Button B (GPIO24)
- Player 2 - Button A (GPIO22)
- Player 2 - Button B (GPIO17)
- Reset button (GPIO25)
- Always
- Reset button: Resets the system to the home page
- Before a game
- Button A - Change player
- Button B - Select player
- During a game
- Button A - Increase score
- Button B - Decrease score
- Each players selects his name from the list of available players by using the A and B buttons (data will be prefilled)
- When every players has selected his name, the game starts and the score is 0-0
- By using buttons A or B, the players can make increase/decrease their score
- When the game is over, the system returns to the home page when any button is pressed, and the flows restarts
- Any time that the Reset button is pressed, the system returns to the home page
- If the score is 0-0 and a decrease button is pressed, the system will return to main menu and cancel the current game
- The default config is based on Table Tennis Canada rules
- Every games are 11 points
- If there is an equality at 10-10, the game will finish when the difference of points is 2
- Every game is saved in the database with the score
- An ELO based ranking algorithm is implemented to assign a rank to each player
- A leaderboard is also shown after 1 minute of inactivity while in the main menu
- 15 games are required to be ranked
- Season have been implemented in
web/js/season.js - You can change the variables values in this file to enabled season features
- The statistics will be computed within the range of the given dates for the active season
- Only 5 games are required to be ranked during a season
- You can now select a player by using a NFC chip
- You simply have to write the player's id on the NFC chip with the
game/create_player_chip.pyscript (player's id in arguments)sudo python create_player_chip.py [PLAYER_ID]
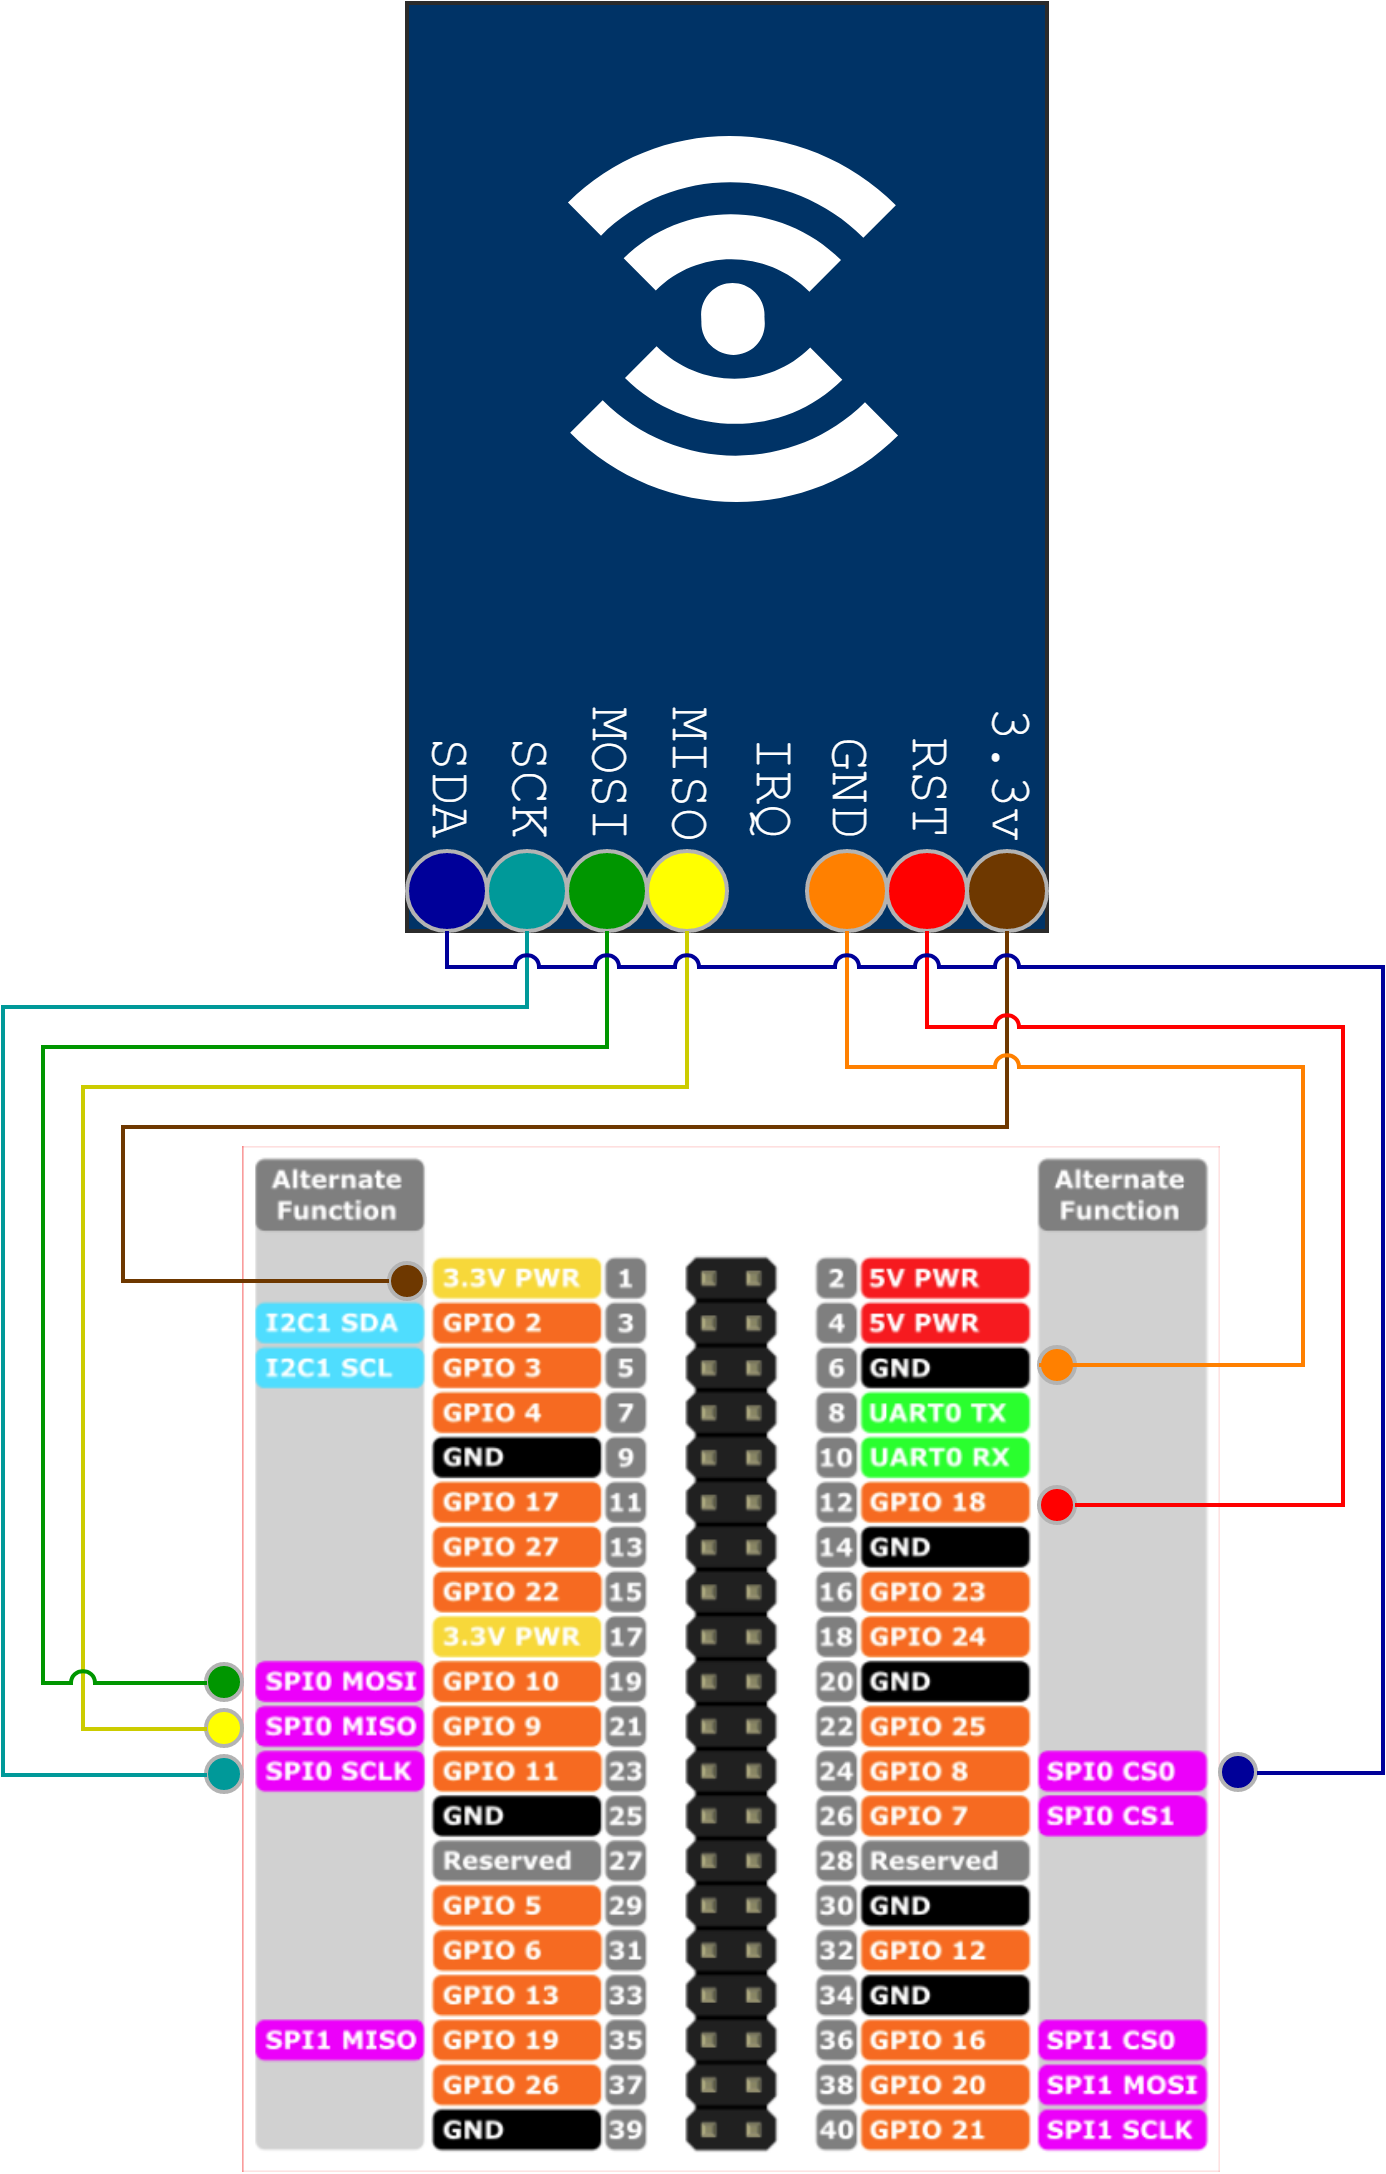
- To setup the NFC Reader, please the section NFC Reader installation
- Simply run install.sh in the install directory
- Make sure
pigpiois installed on your Pi (should already be installed) - Run
whereis pigpiodand add it to your crontab at reboot- Example:
@reboot /usr/bin/pigpiod
- Example:
- If you want to install the NFC reader to choose players faster, please read the next section: NFC Reader installation
GO TRONIC manual gives these instruction to make the NFC Reader work.
See more info at https://www.gotronic.fr/pj2-sbc-rfid-rc522-fr-1439.pdf
For the wiring, please read the section GPIO Electrical Diagram
On a Raspberry Pi, you should already have this installed:
- Run
sudo apt-get install python-pip python-dev build-essential - Run
sudo pip install RPi.GPIO - Run
sudo apt-get install python-imaging
Then follow these steps to enable SPI
- Run
sudo raspi-config - Search for the option
Enable/Disable automatic loading of SPI kernel moduleand enable it (name and menu can differ from a Pi to another) - Reboot your Pi
After reboot, follow these steps:
- Go in the
game/SPI-Pyfolder - Run
sudo python3 setup.py install
- Run start.sh that was copied in /home/pi/Desktop
- Run update.sh in the install folder to update the code directly on your Raspberry Pi

