Attended Check-in empowers your staff or volunteers to provide a welcoming, fast, and personal check-in experience. It adds several features not found in Rock check-in, such as intelligent assignments, room balancing, and new family entry.
Attended Check-in uses the same Check-in Areas, Locations, Schedules, Devices, and Labels as the check-in system that ships with Rock, so you can download Attended Check-in and try both systems simultaneously. If you haven't already read the Checking Out Check-in manual on RockRMS.com, you'll definitely want to start there.
Note: Underneath the hood of Rock, Check-in Areas are stored as GroupTypes (in case you see the two terms used interchangeably).
Quick links:
If you've gotten this far, you've probably already found the Rock Shop. Download Attended Check-in through the Rock Shop to add it to your organization's Rock instance. If you're the adventurous developer type, see Advanced for instructions how to download and run locally.
Once you've installed Attended Check-in, the default route will be [yourrockinstance]/attendedcheckin.
Note: If you don't have a domain set for the internal Rock administration site, you may have issues with Attended Check-in loading when you visit the internal site.

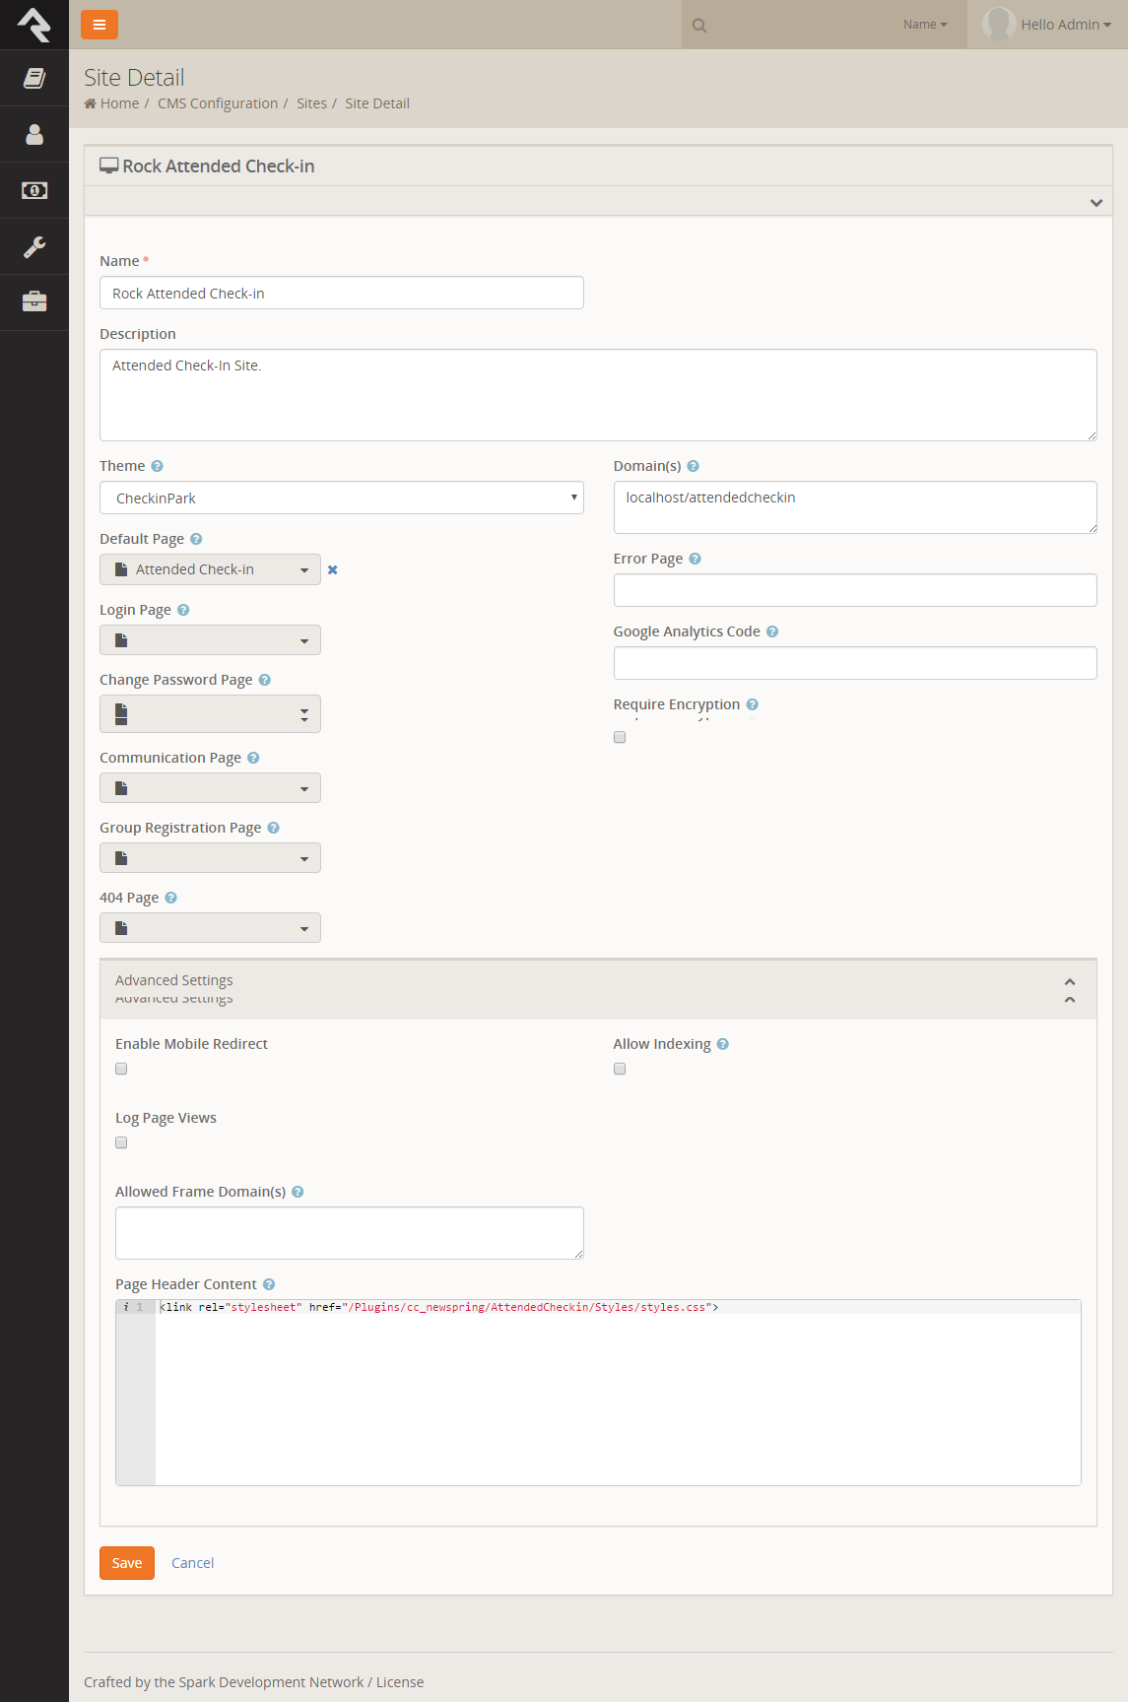
If this happens, visit [yourrockinstance]/page/12 to get back to the internal site.  Go to Admin Tools > CMS Configuration > Sites and verify a domain is set for both the internal site and Attended Check-in site.
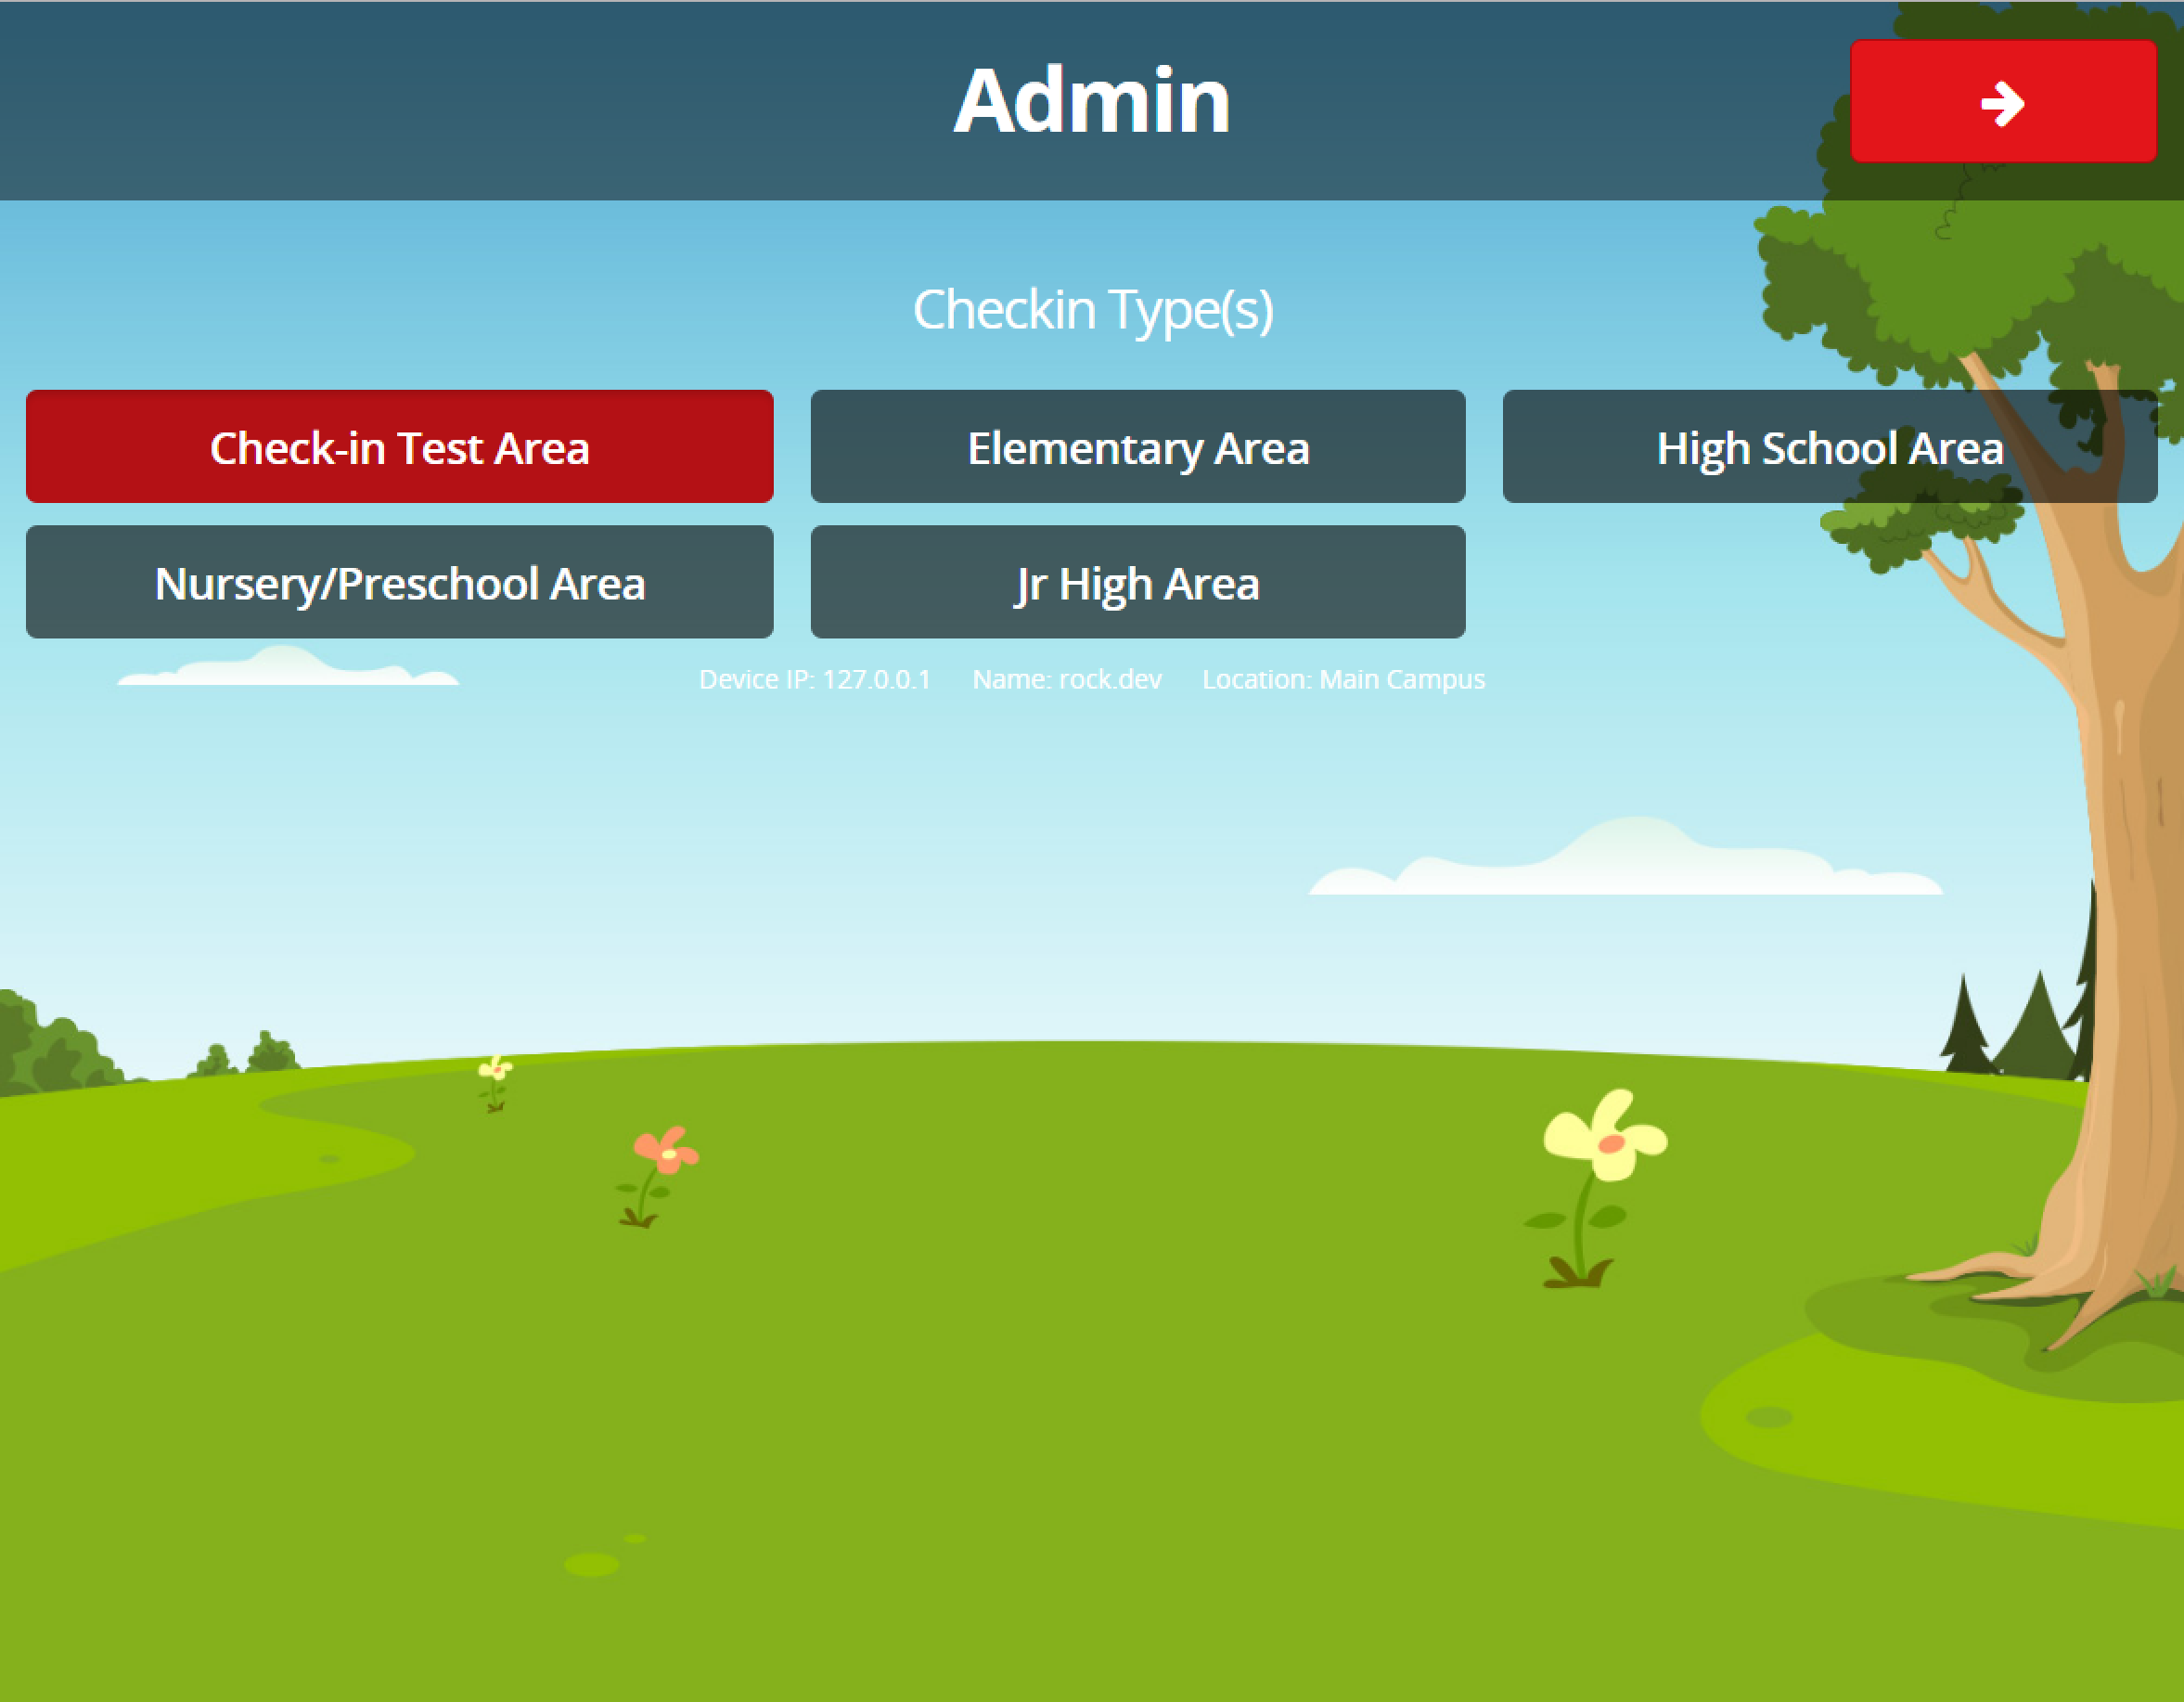
The first page you come to when you launch check-in is the administration screen. This page will display all the Check-in Areas configured for your current Kiosk (Device), based on that Kiosk's Location. This can include children's check-in areas as well as serving group check-in areas. Select the desired Areas, then click the Next arrow (at the top right).
The selections you make on this page will be remembered for future check-in sessions. If you want a test Label to print on the printer configured for this Kiosk, press Ctrl + Shift + I. The test label content can be set in Configuration.
Note: For security reasons, Attended Check-in requires a Rock administrator to preconfigure a device. Your device's IP, Name, and Location are included beneath the Check-in Areas. If you visit the page on an unknown device, you'll get a message "This device has not been set up for check-in".

If your check-in process allows the attendant to select a device manually, you can use the stock Admin block on the Attended Check-in > Administration page instead.
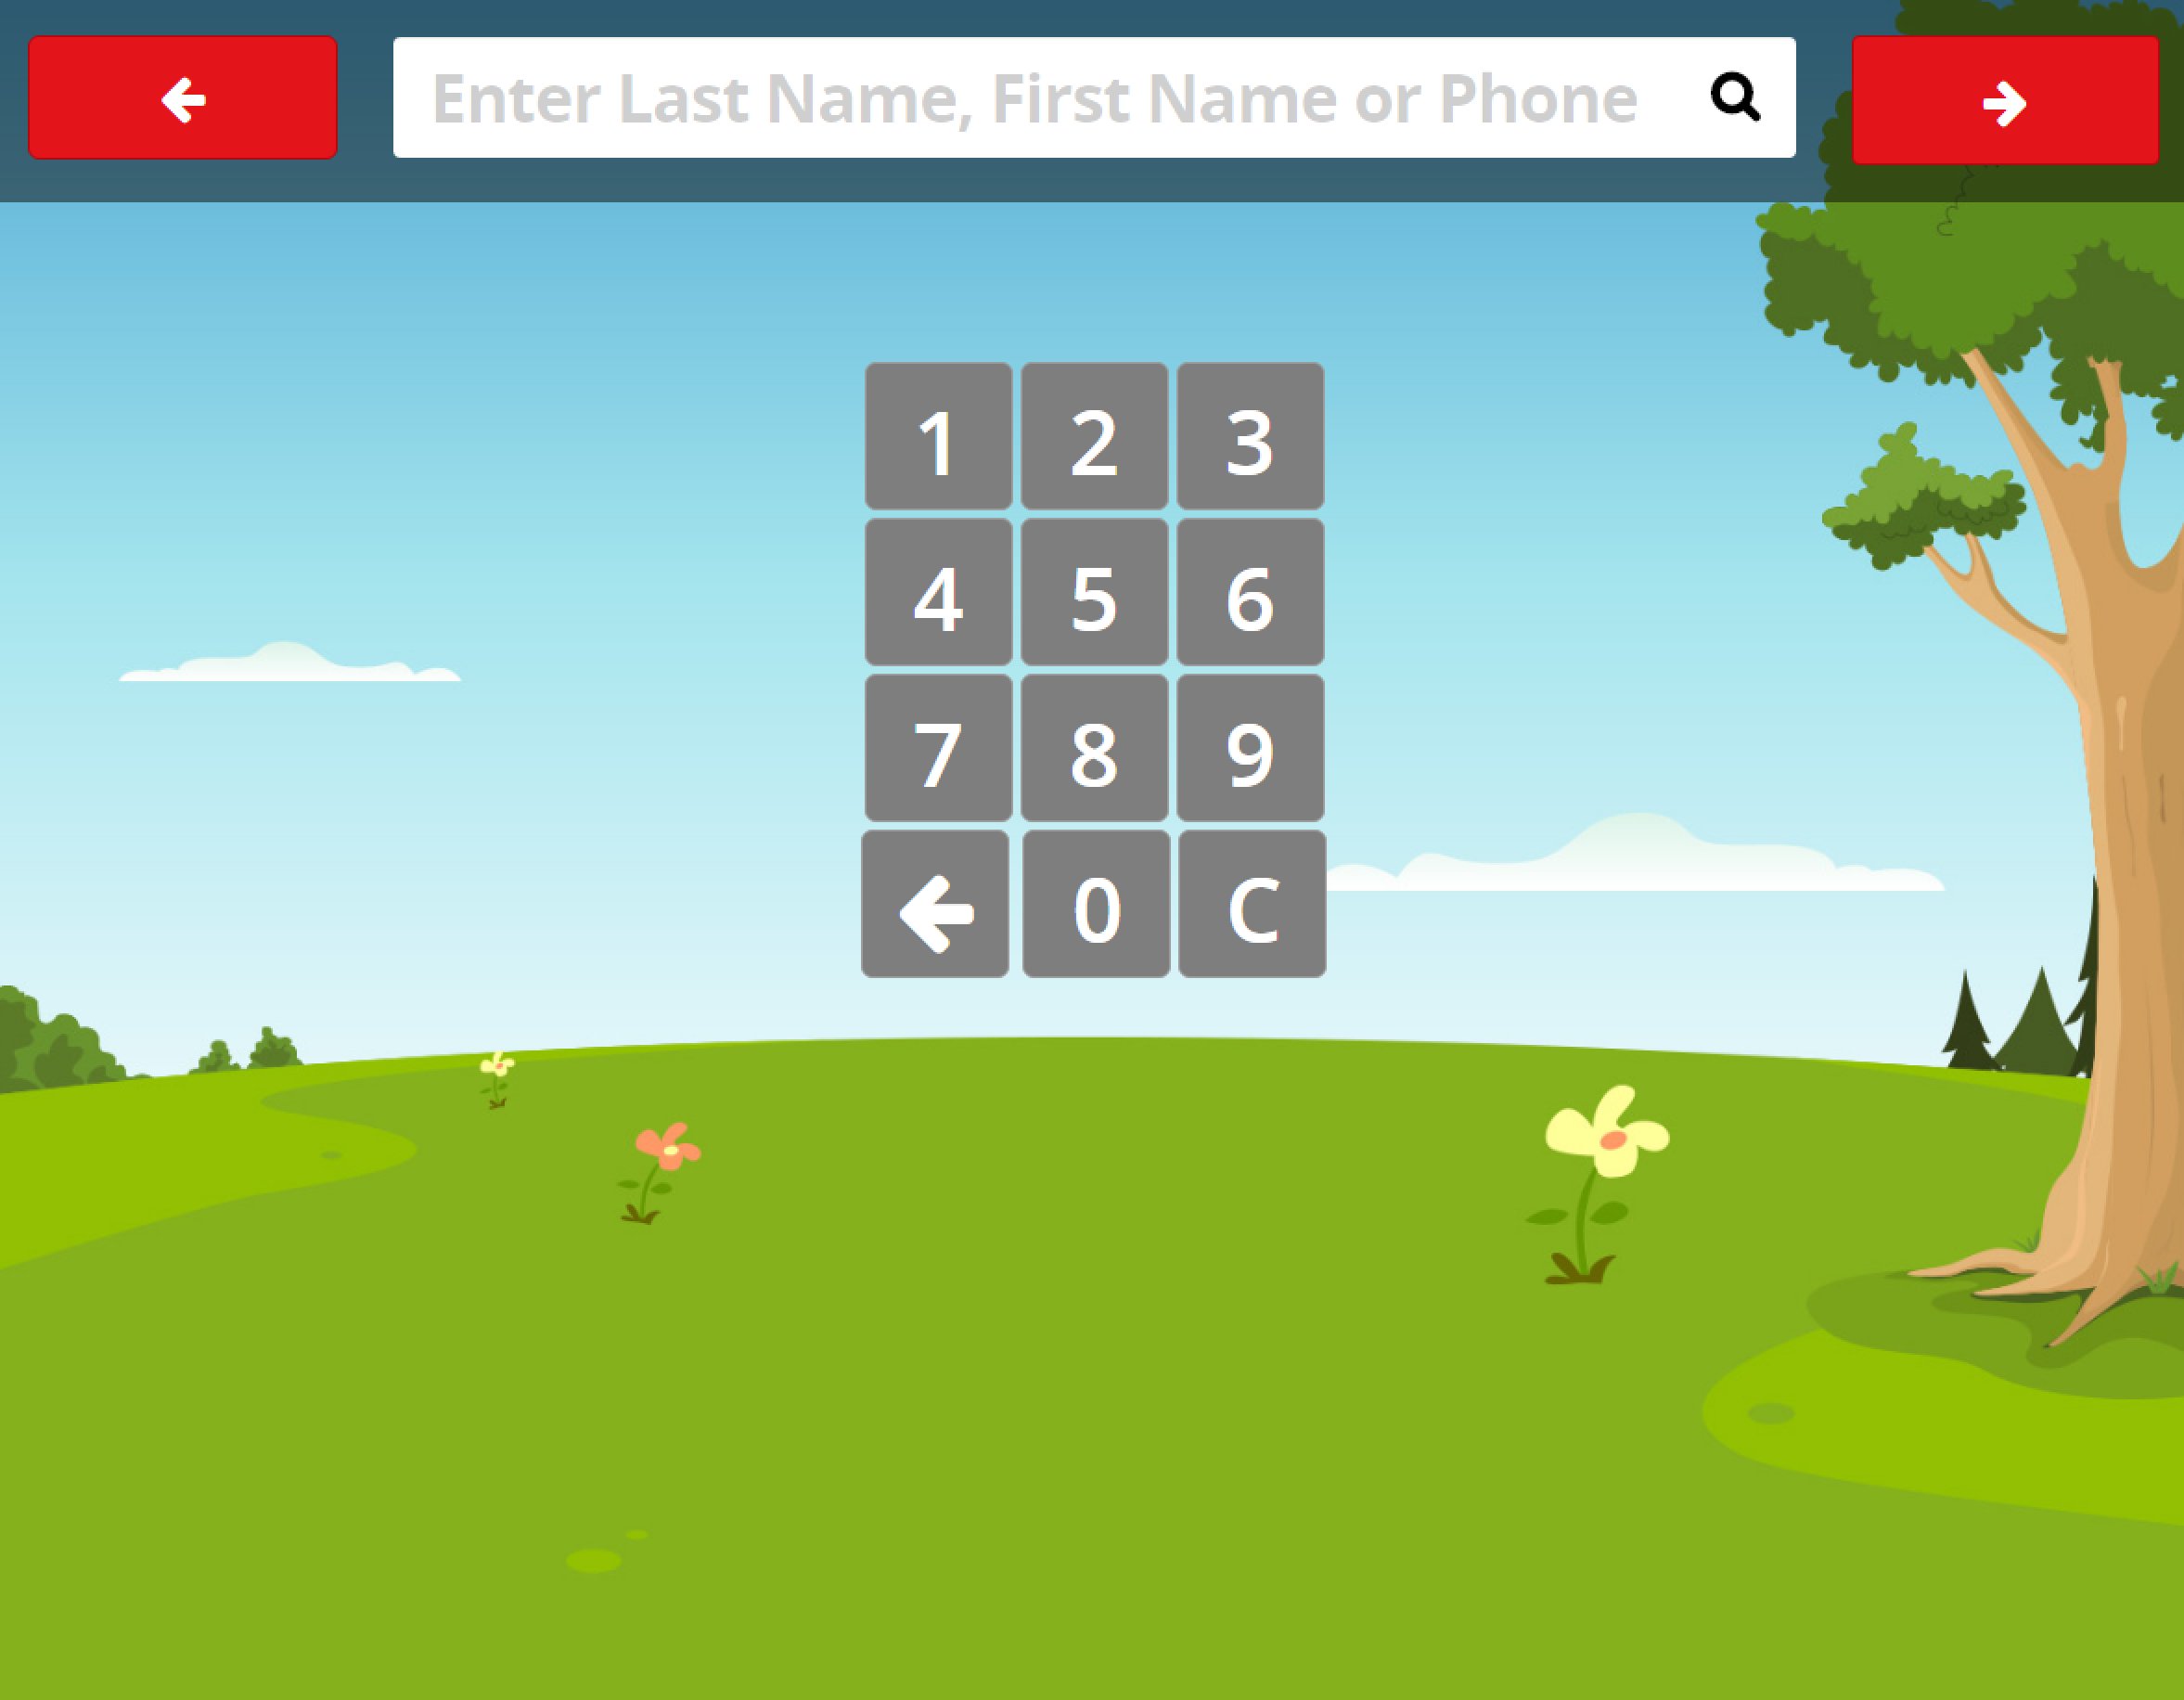
This is the default screen in Attended Check-in and will be ready for the attendant to search at any time. The placeholder text and number pad visibility are determined by your Check-in Area's settings for Search Type: Phone Number, Name, or Name & Phone. Enter a name or phone number to search and click the Next arrow.
Note: The Search page uses your Check-in Area's setting for Refresh Interval (under Advanced Settings) to refresh the page and check for active schedules. The default value is 10 seconds, which is faster than most check-in attendants will be able to type when searching by name. You may want to increase this to 60 seconds or more.
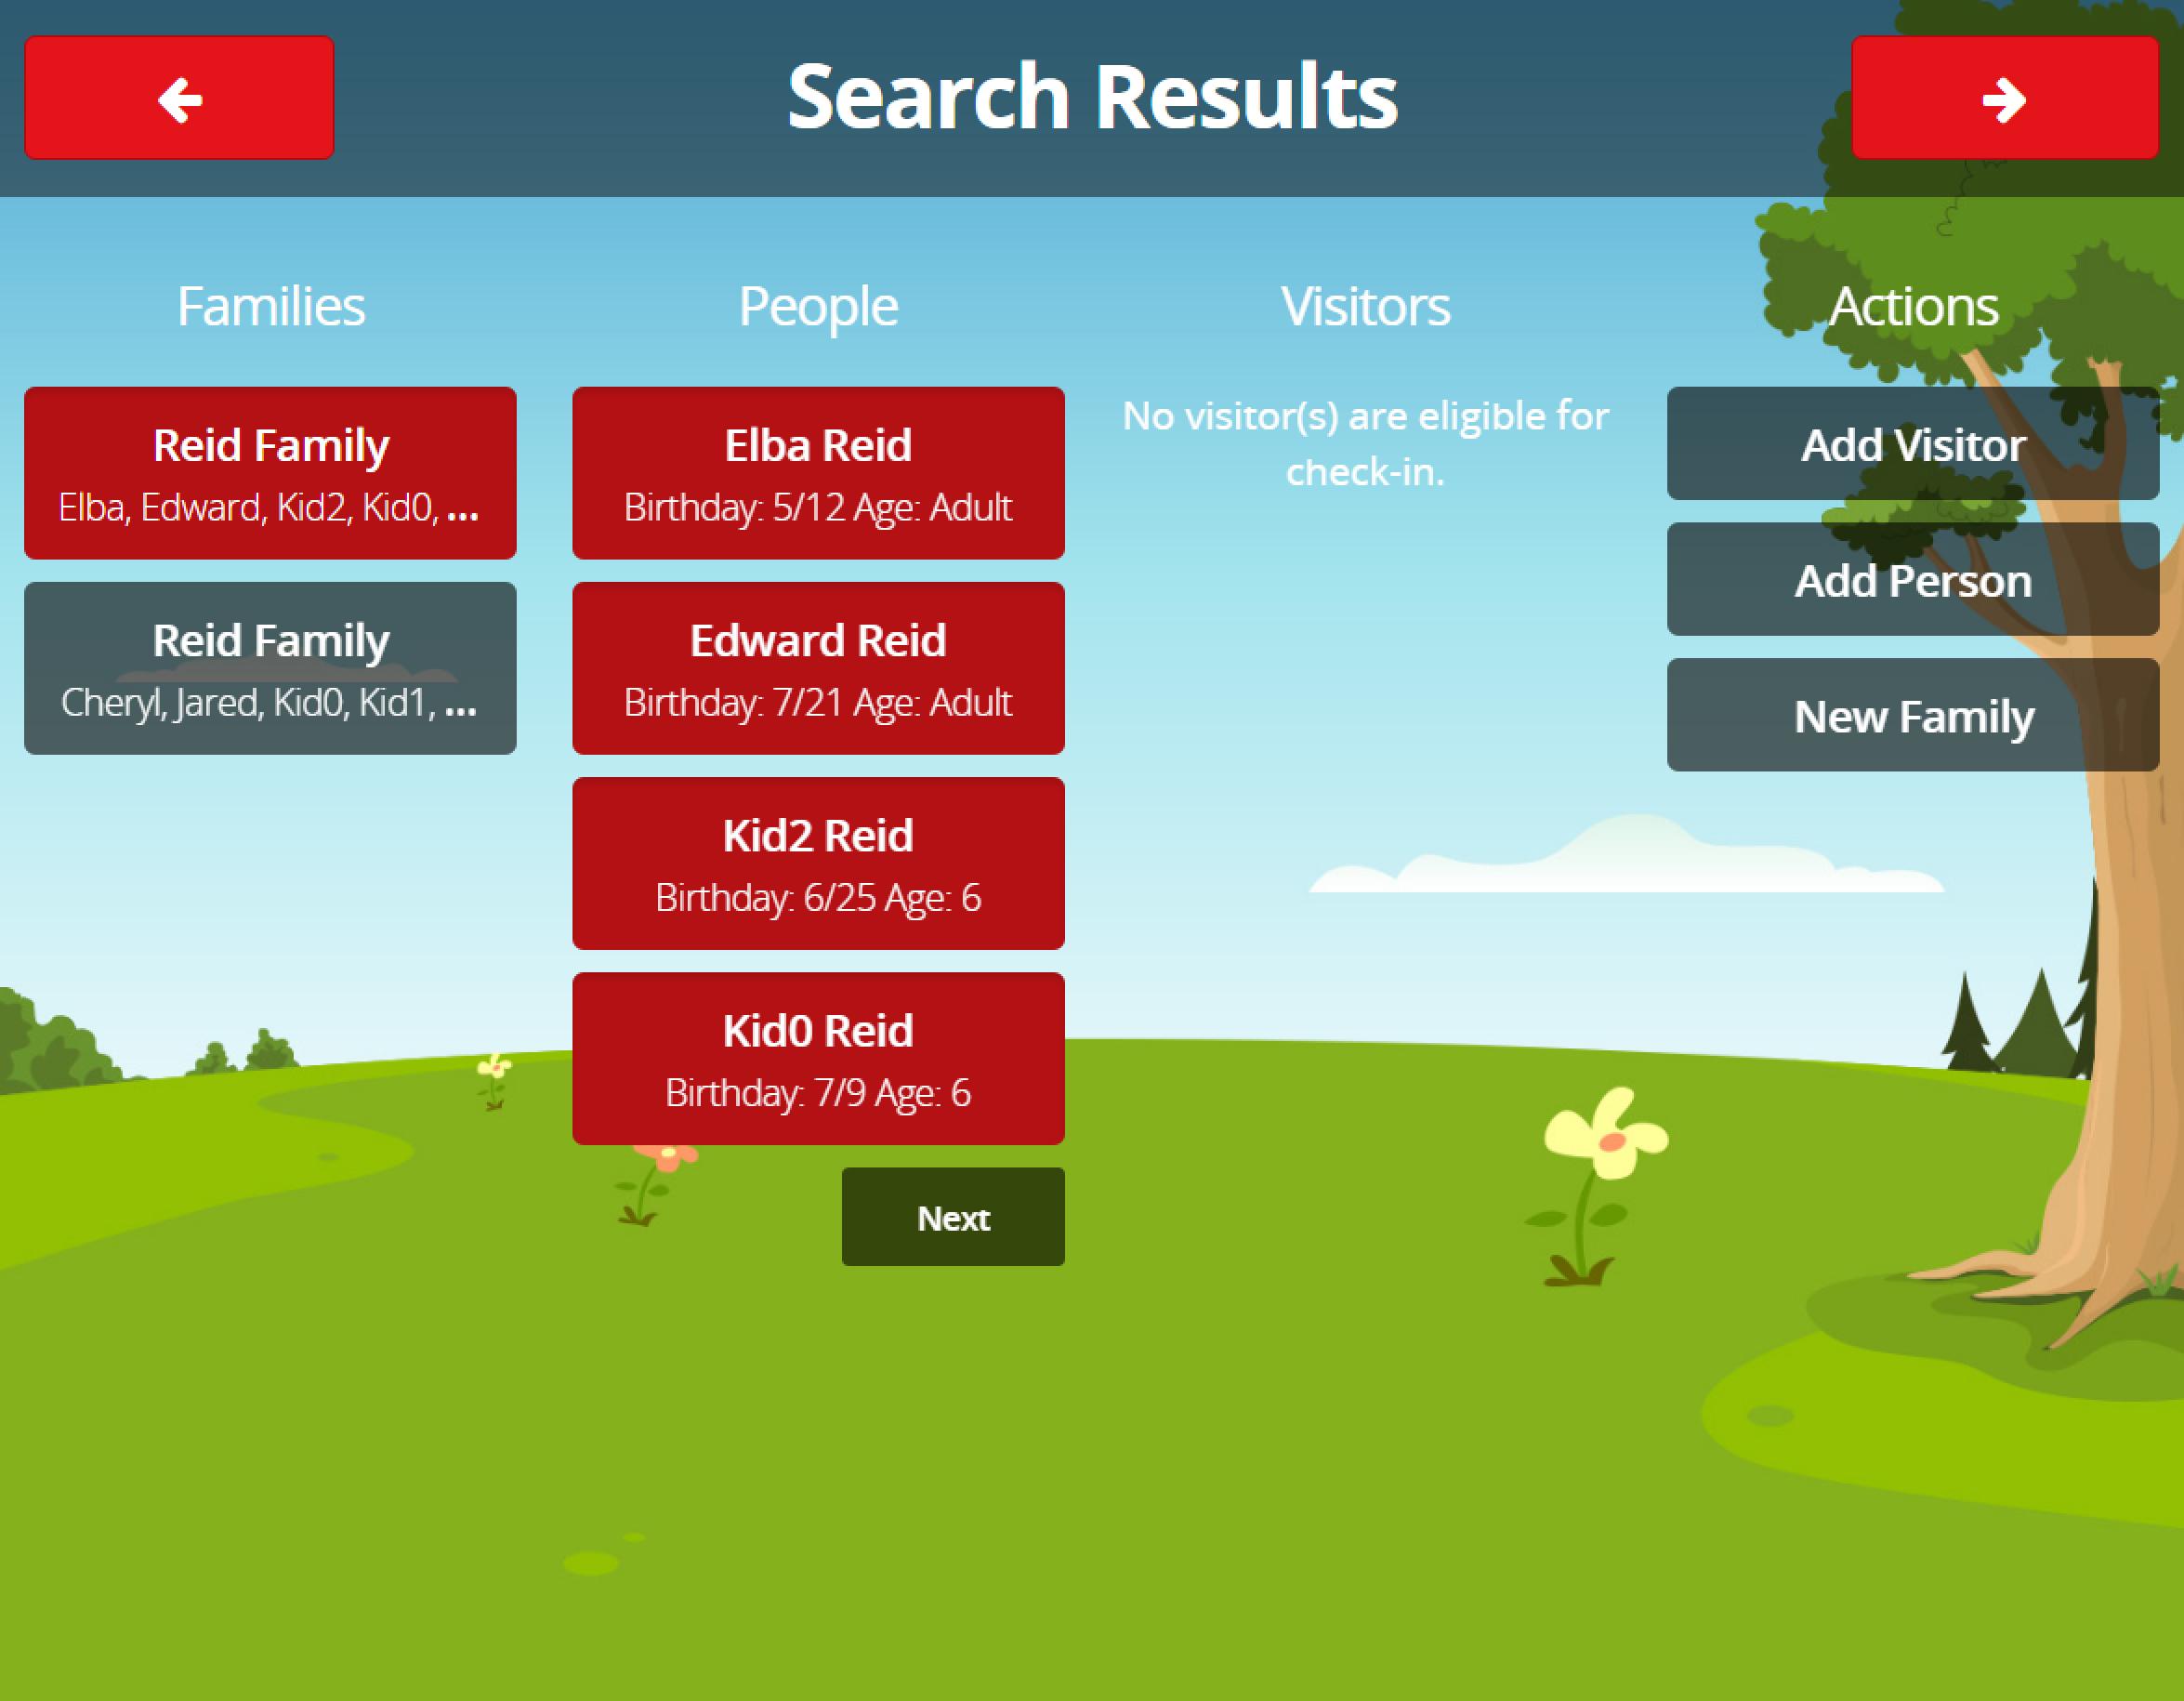
This screen will list the families and people that match the name or phone number you entered on the previous screen. If your organization has multiple sites, families will be sorted first by those that match the current Kiosk's campus. Select the family you wish to check in, then any family members eligible to check-in at this Kiosk will display in the second column. If there are visitors associated with the family, they'll be displayed in the third column. Select (or unselect) the desired people to check-in, then click the Next arrow.
Note: By default, family members are pre-selected to reduce check-in time (shown in bright red for the theme used above). However, visitors are never pre-selected.
By default the Add Visitor / Add Person / Add Family buttons are enabled, but you can disable them in the page Configuration.
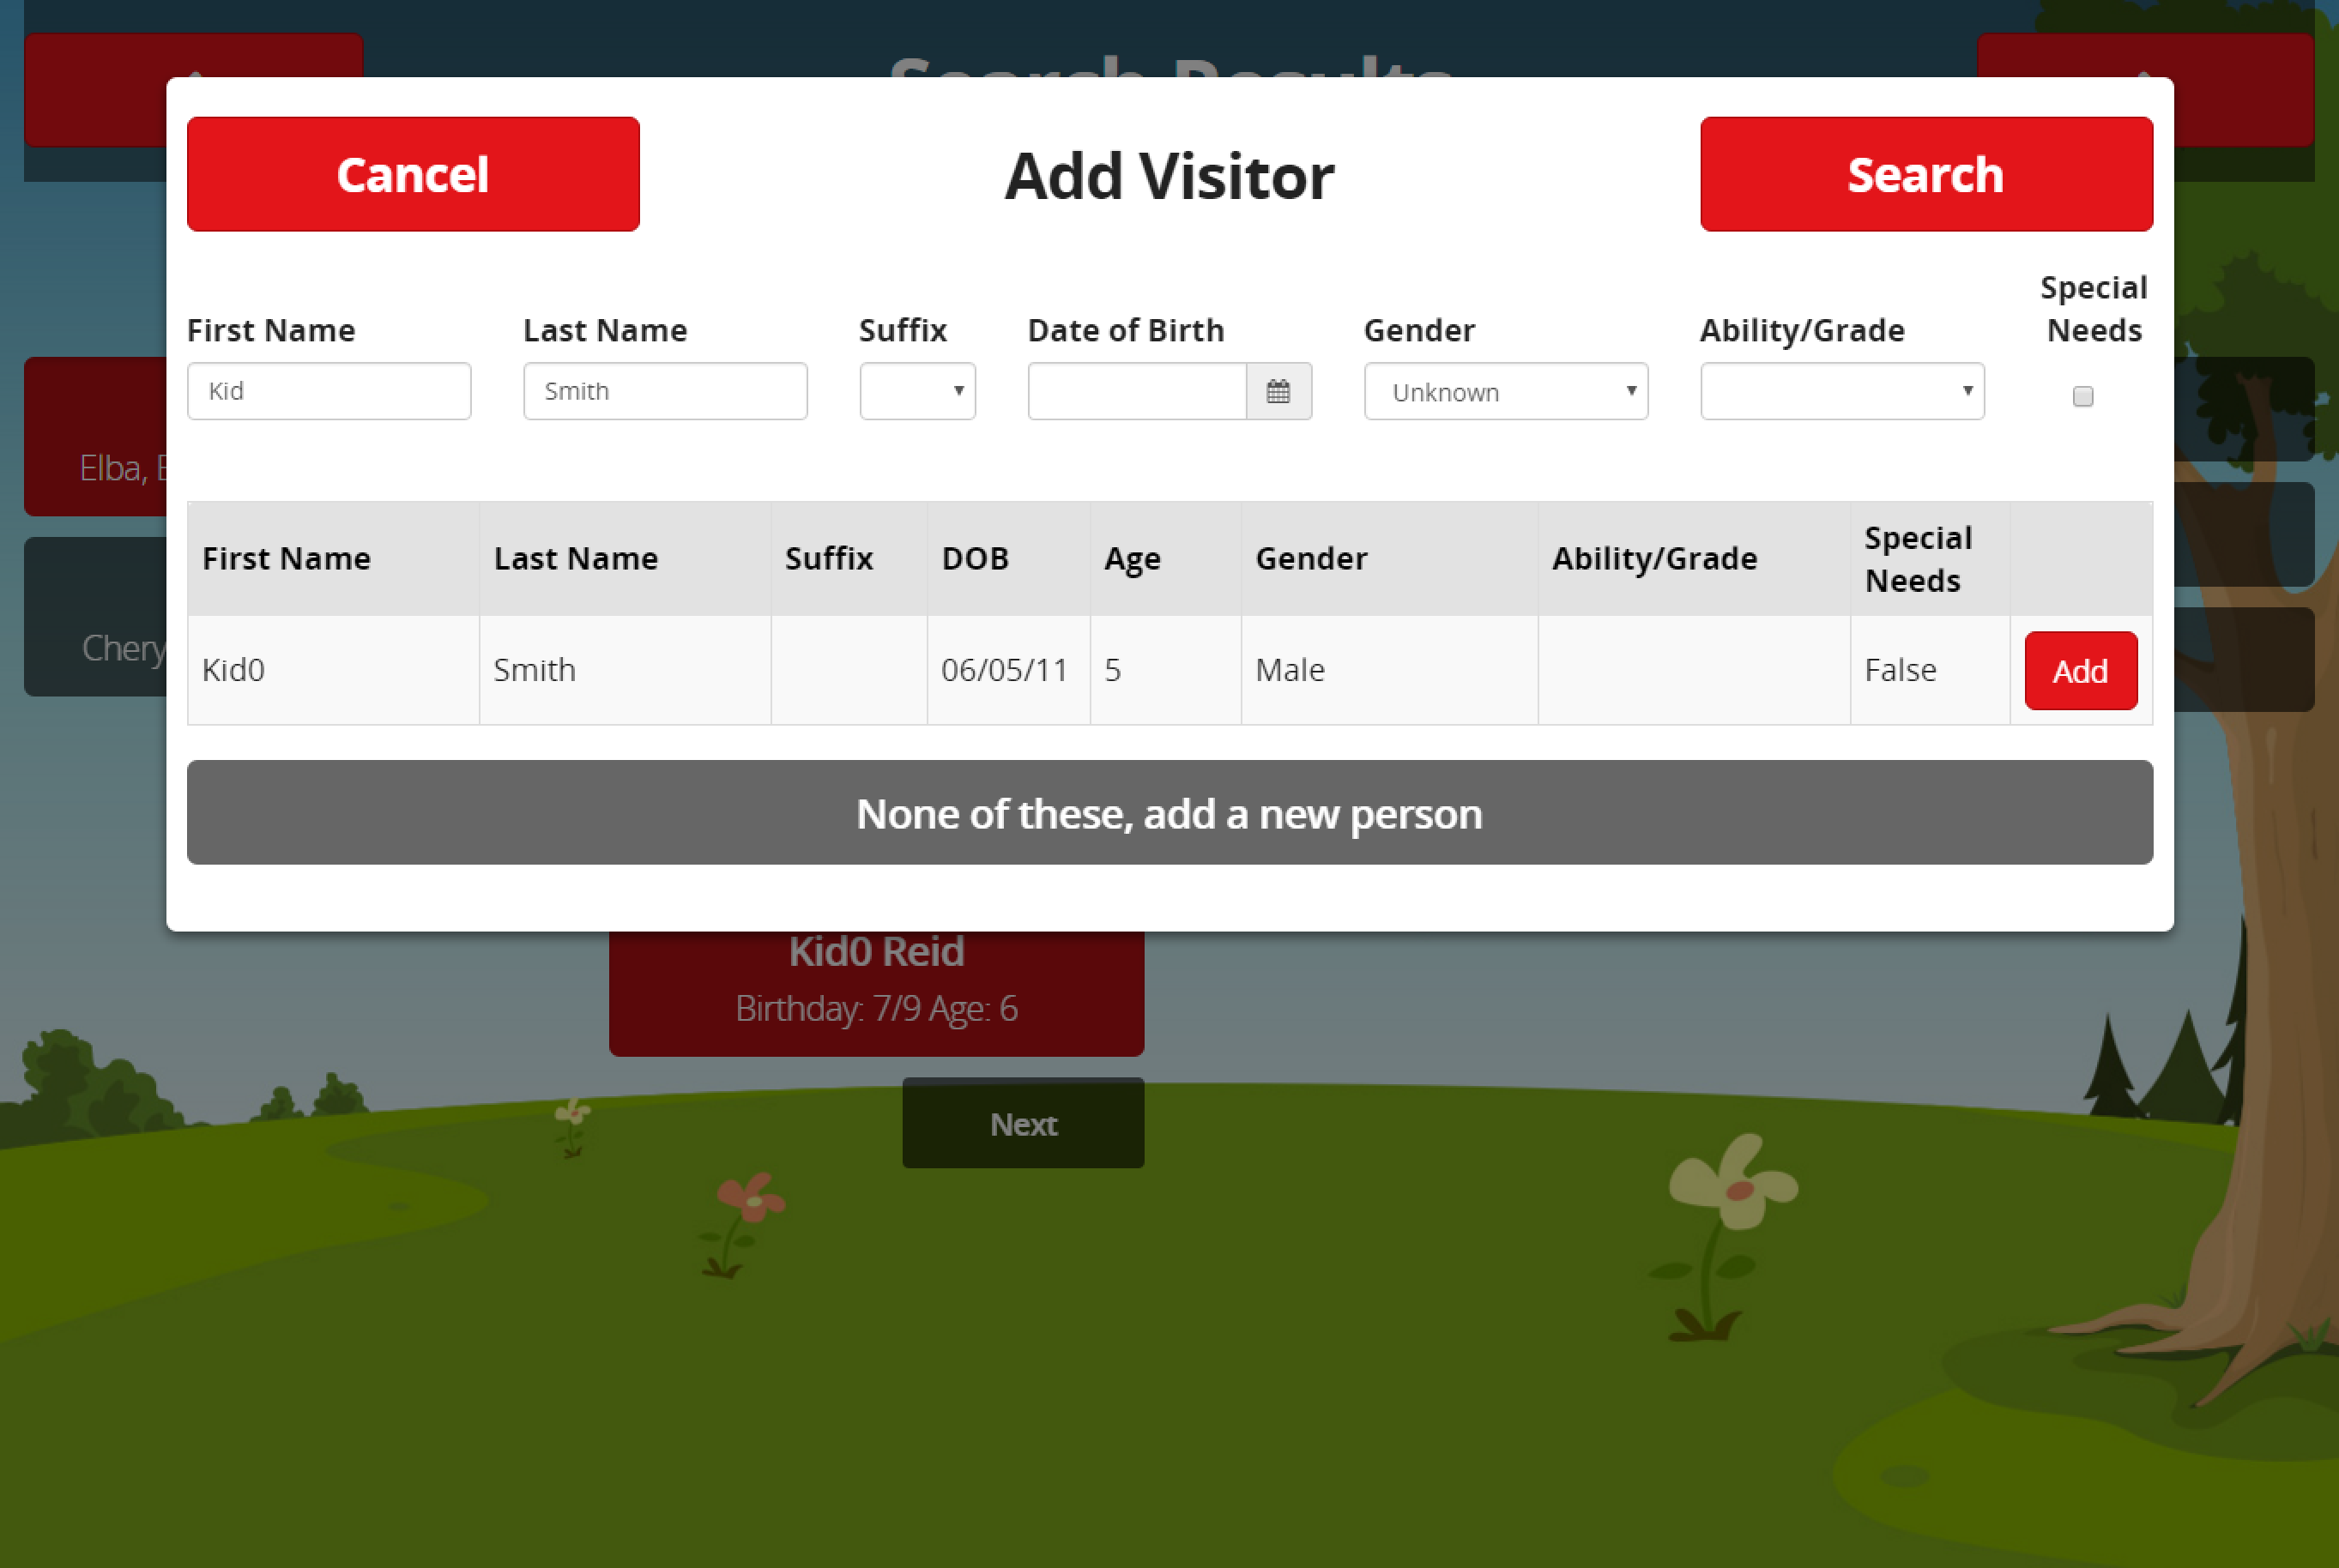
This screen allows you to add a visitor during the check-in process. Entering at least a First and Last Name will check for anyone that already exists by that criteria in your database. If an existing person is found, click Add to create a check-in relationship with the currently selected family. If you're sure the person isn't a duplicate, click None of these, add a new person.
Note: the Add Person screen behaves exactly the same way as Add Visitor, except it will add the new or selected person as a family member instead of a visitor.
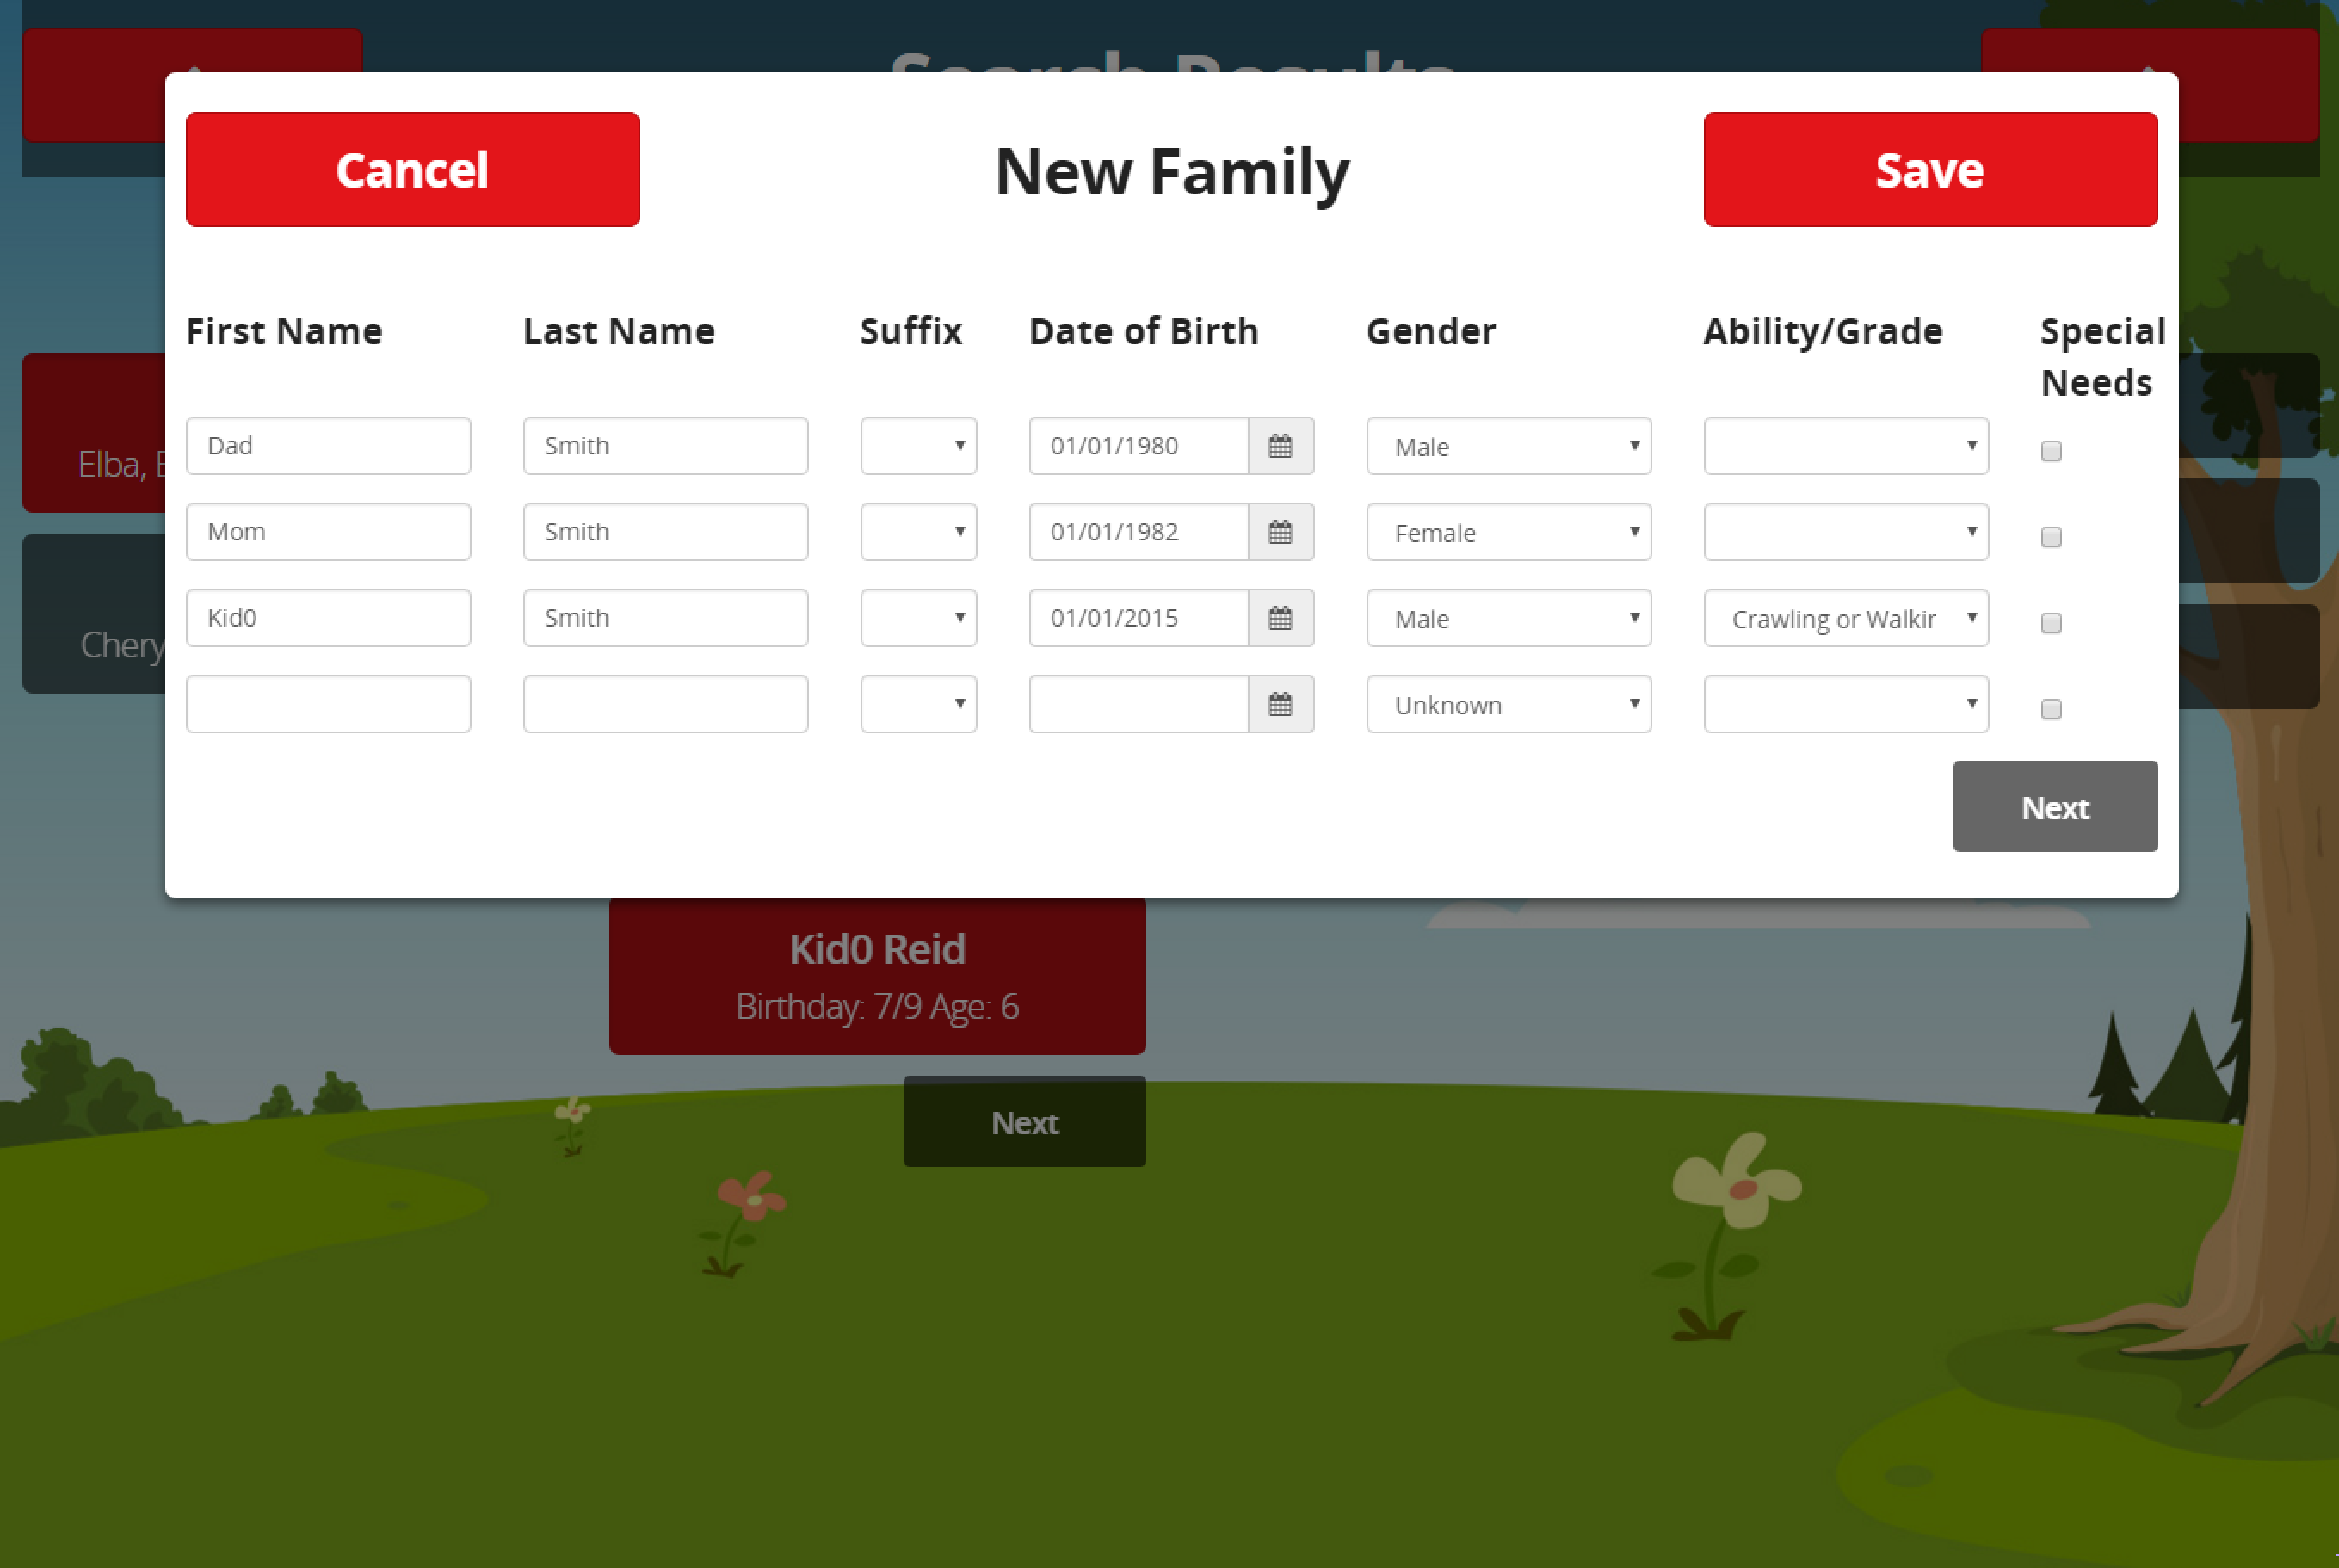
This screen allows you to add a new family during the check-in process. Enter at least a First Name, Last Name, and Gender for each person, plus any known information, then click Save. If the family has more than 4 people, clicking Next will save the current family members and give you room to add 4 more.
Note: Due to limited screen real estate, only the basic fields needed for check-in are visible on the Add Person and Add Family screens. Allergies and legal notes can be entered from a later screen. You should have an additional form or process that captures helpful fields like Email, Address, and Phone Number.
If your organization has multiple sites, the current Kiosk's campus will be used as the new family's campus.
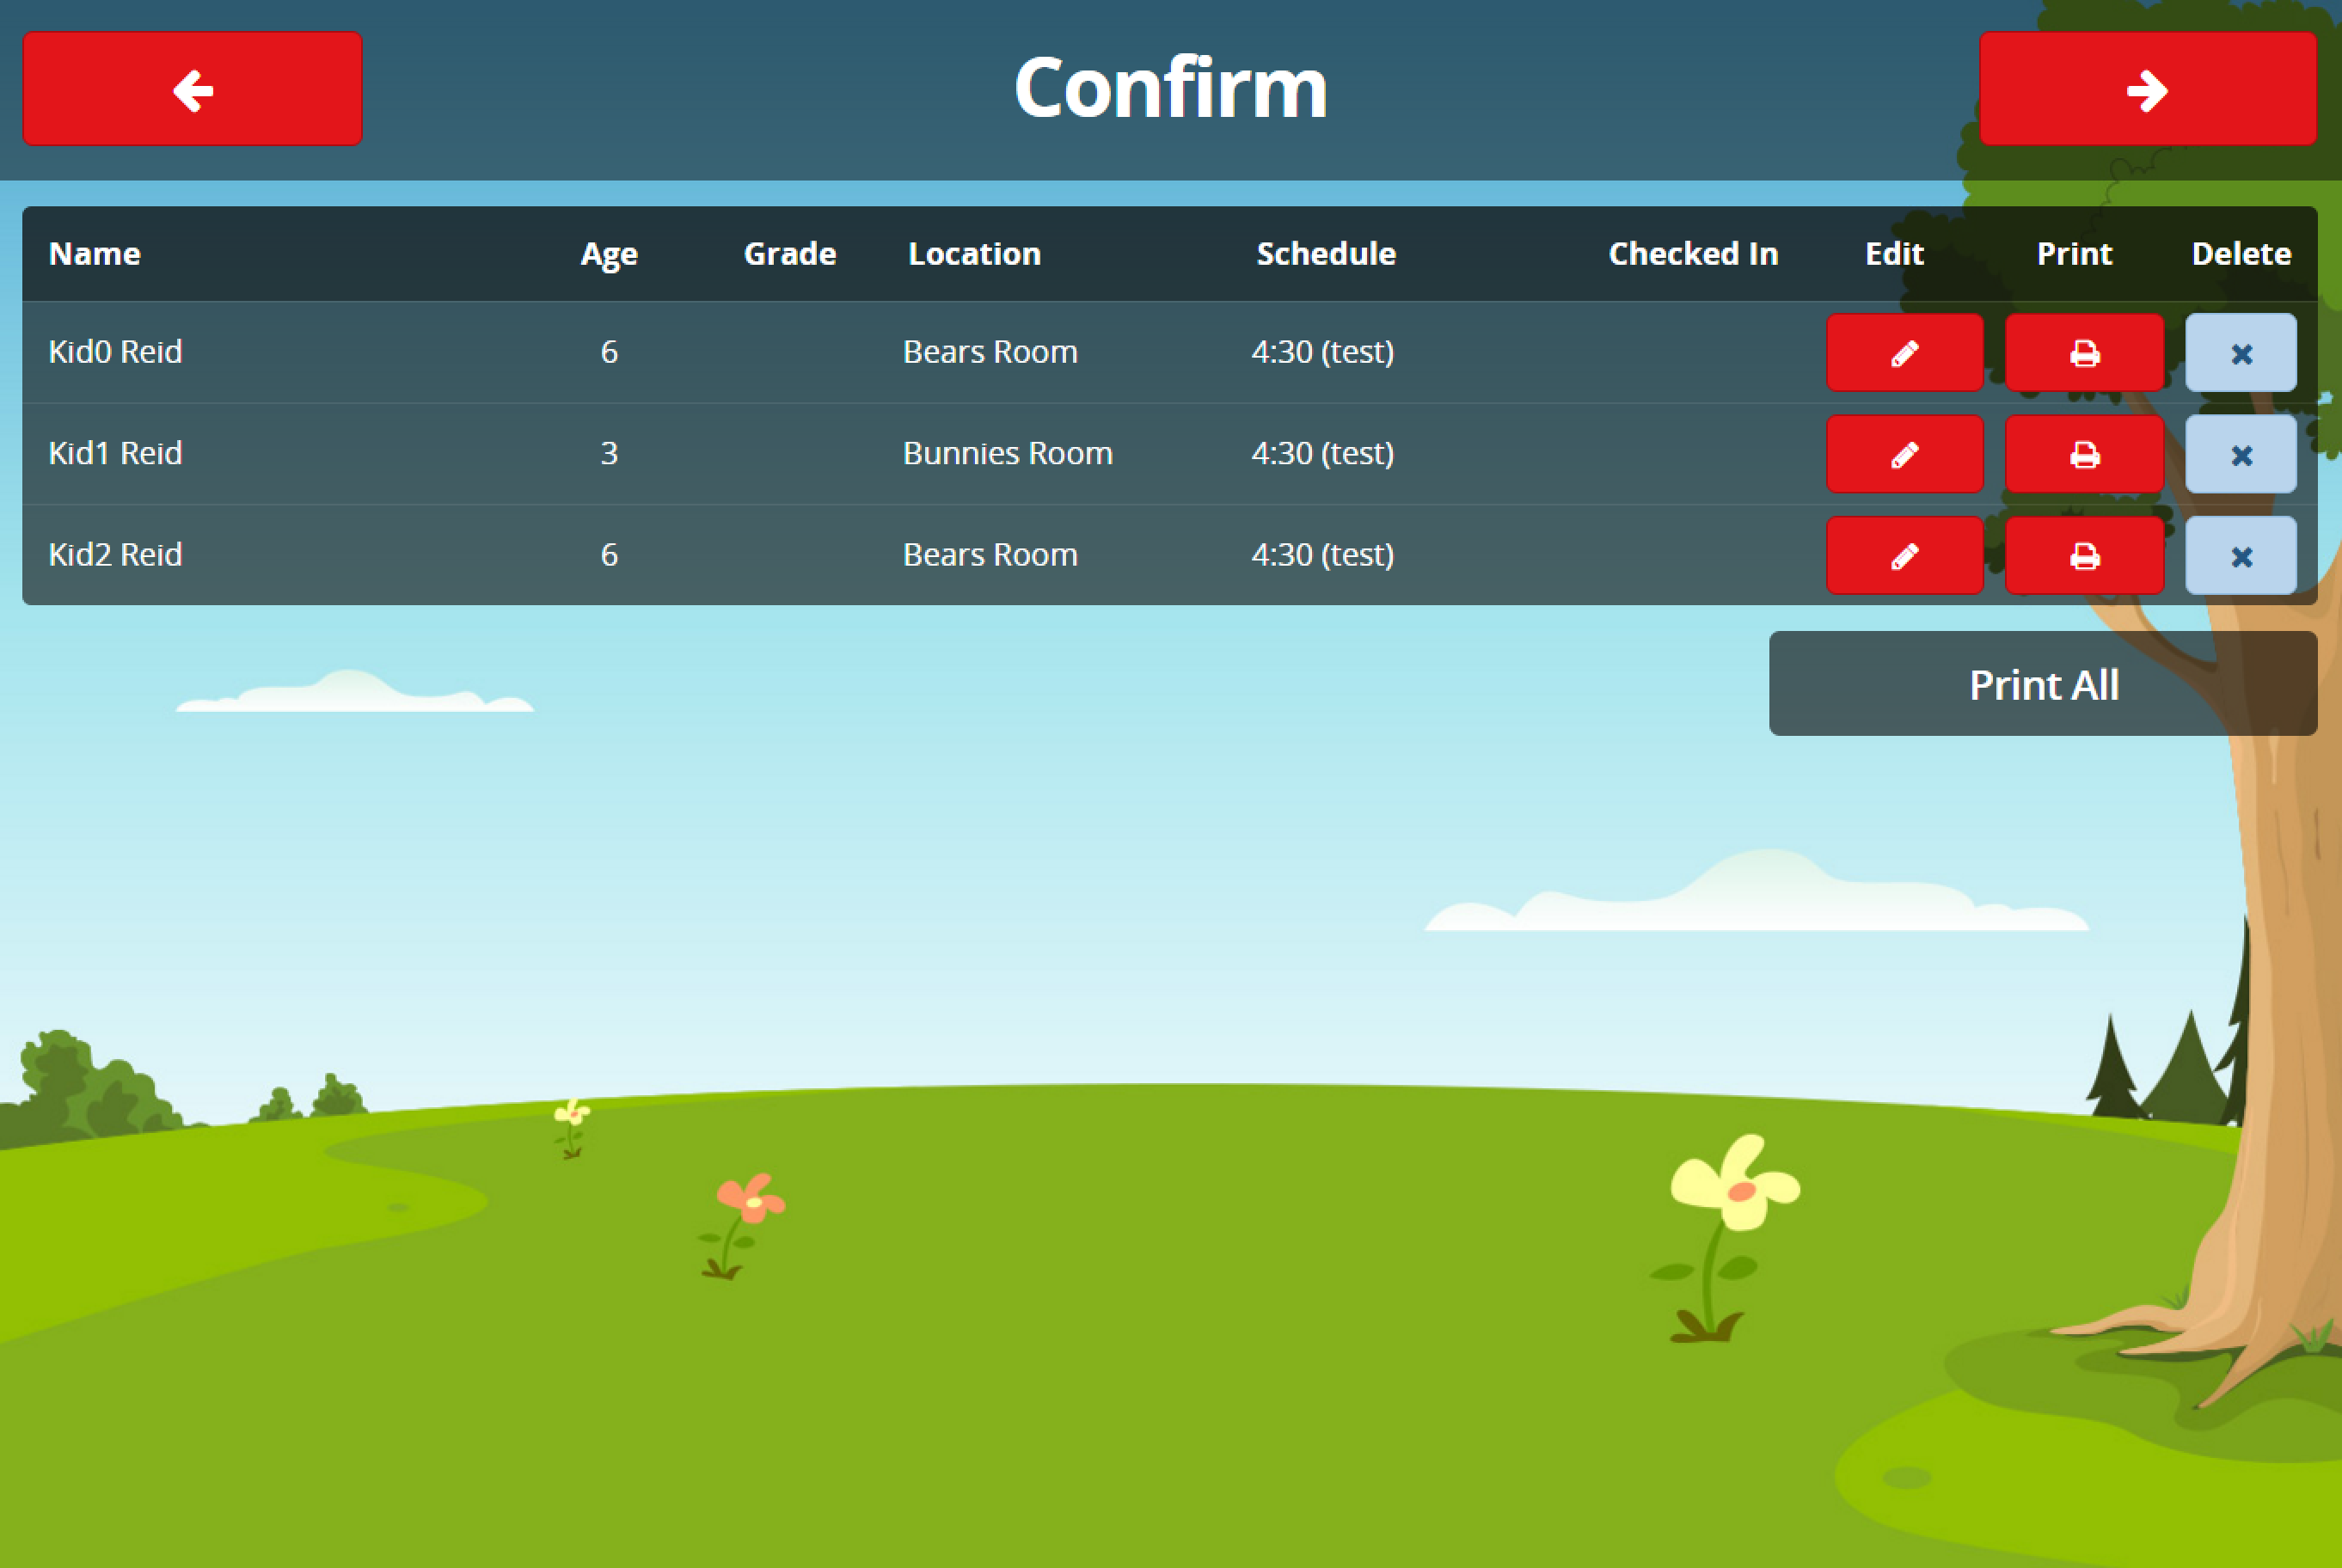
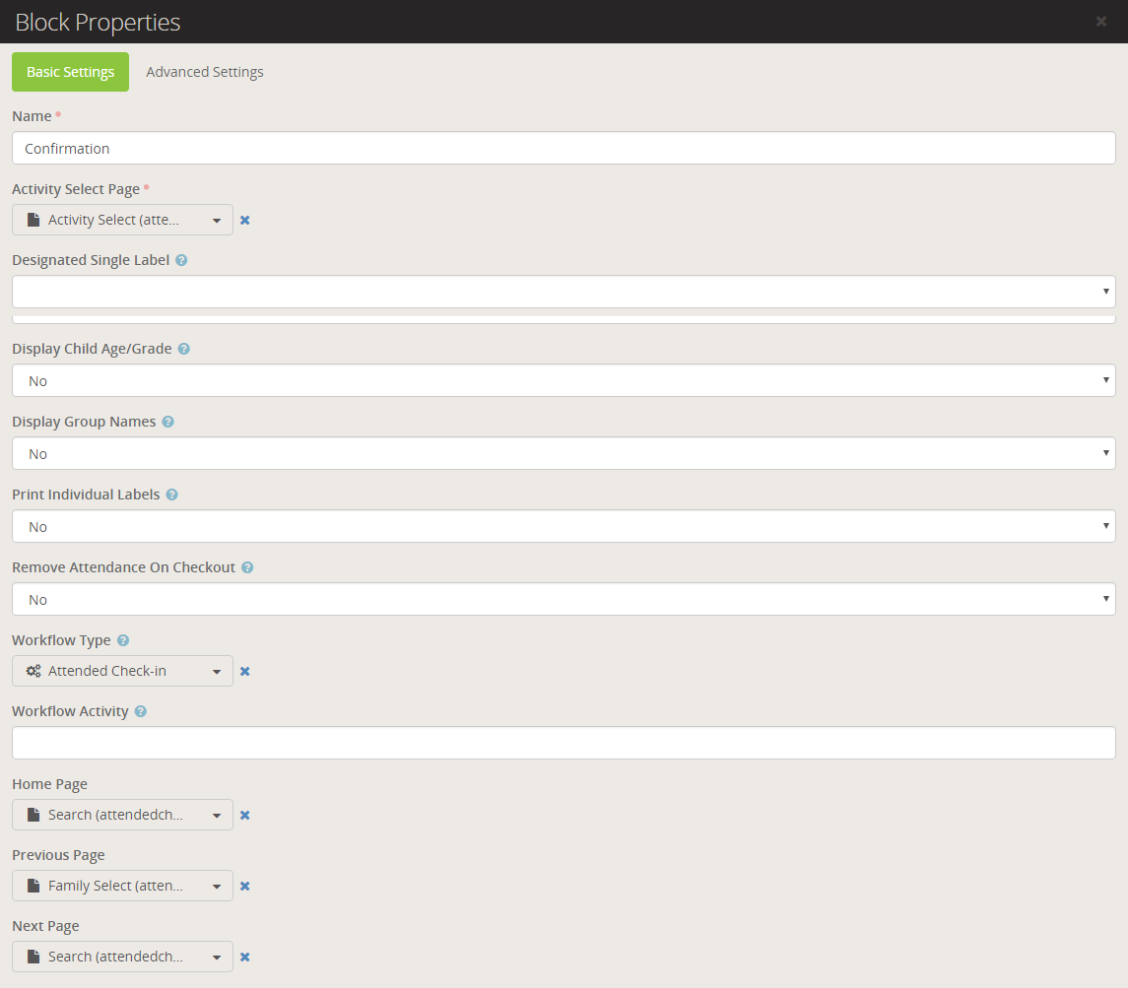
This screen shows the intelligent assignments given to all the people selected from the previous page. If all the assignments are correct, click Print All to print labels or complete the check-in process by clicking the Next arrow.
If any assignments are incorrect, click Edit to go to the Activity Select screen. If you want to generate a single label for a particular assignment, click Print on that assignment. If you want to remove an assignment, click Delete on that assignment.
Note: In a perfect world, clicking Print on a single assignment would only check in that specific person and generate a single label. Instead, everyone is checked in with their current assignment. This is a known limitation with the label printing action but is necessary to support families that need the same security code on all their labels.
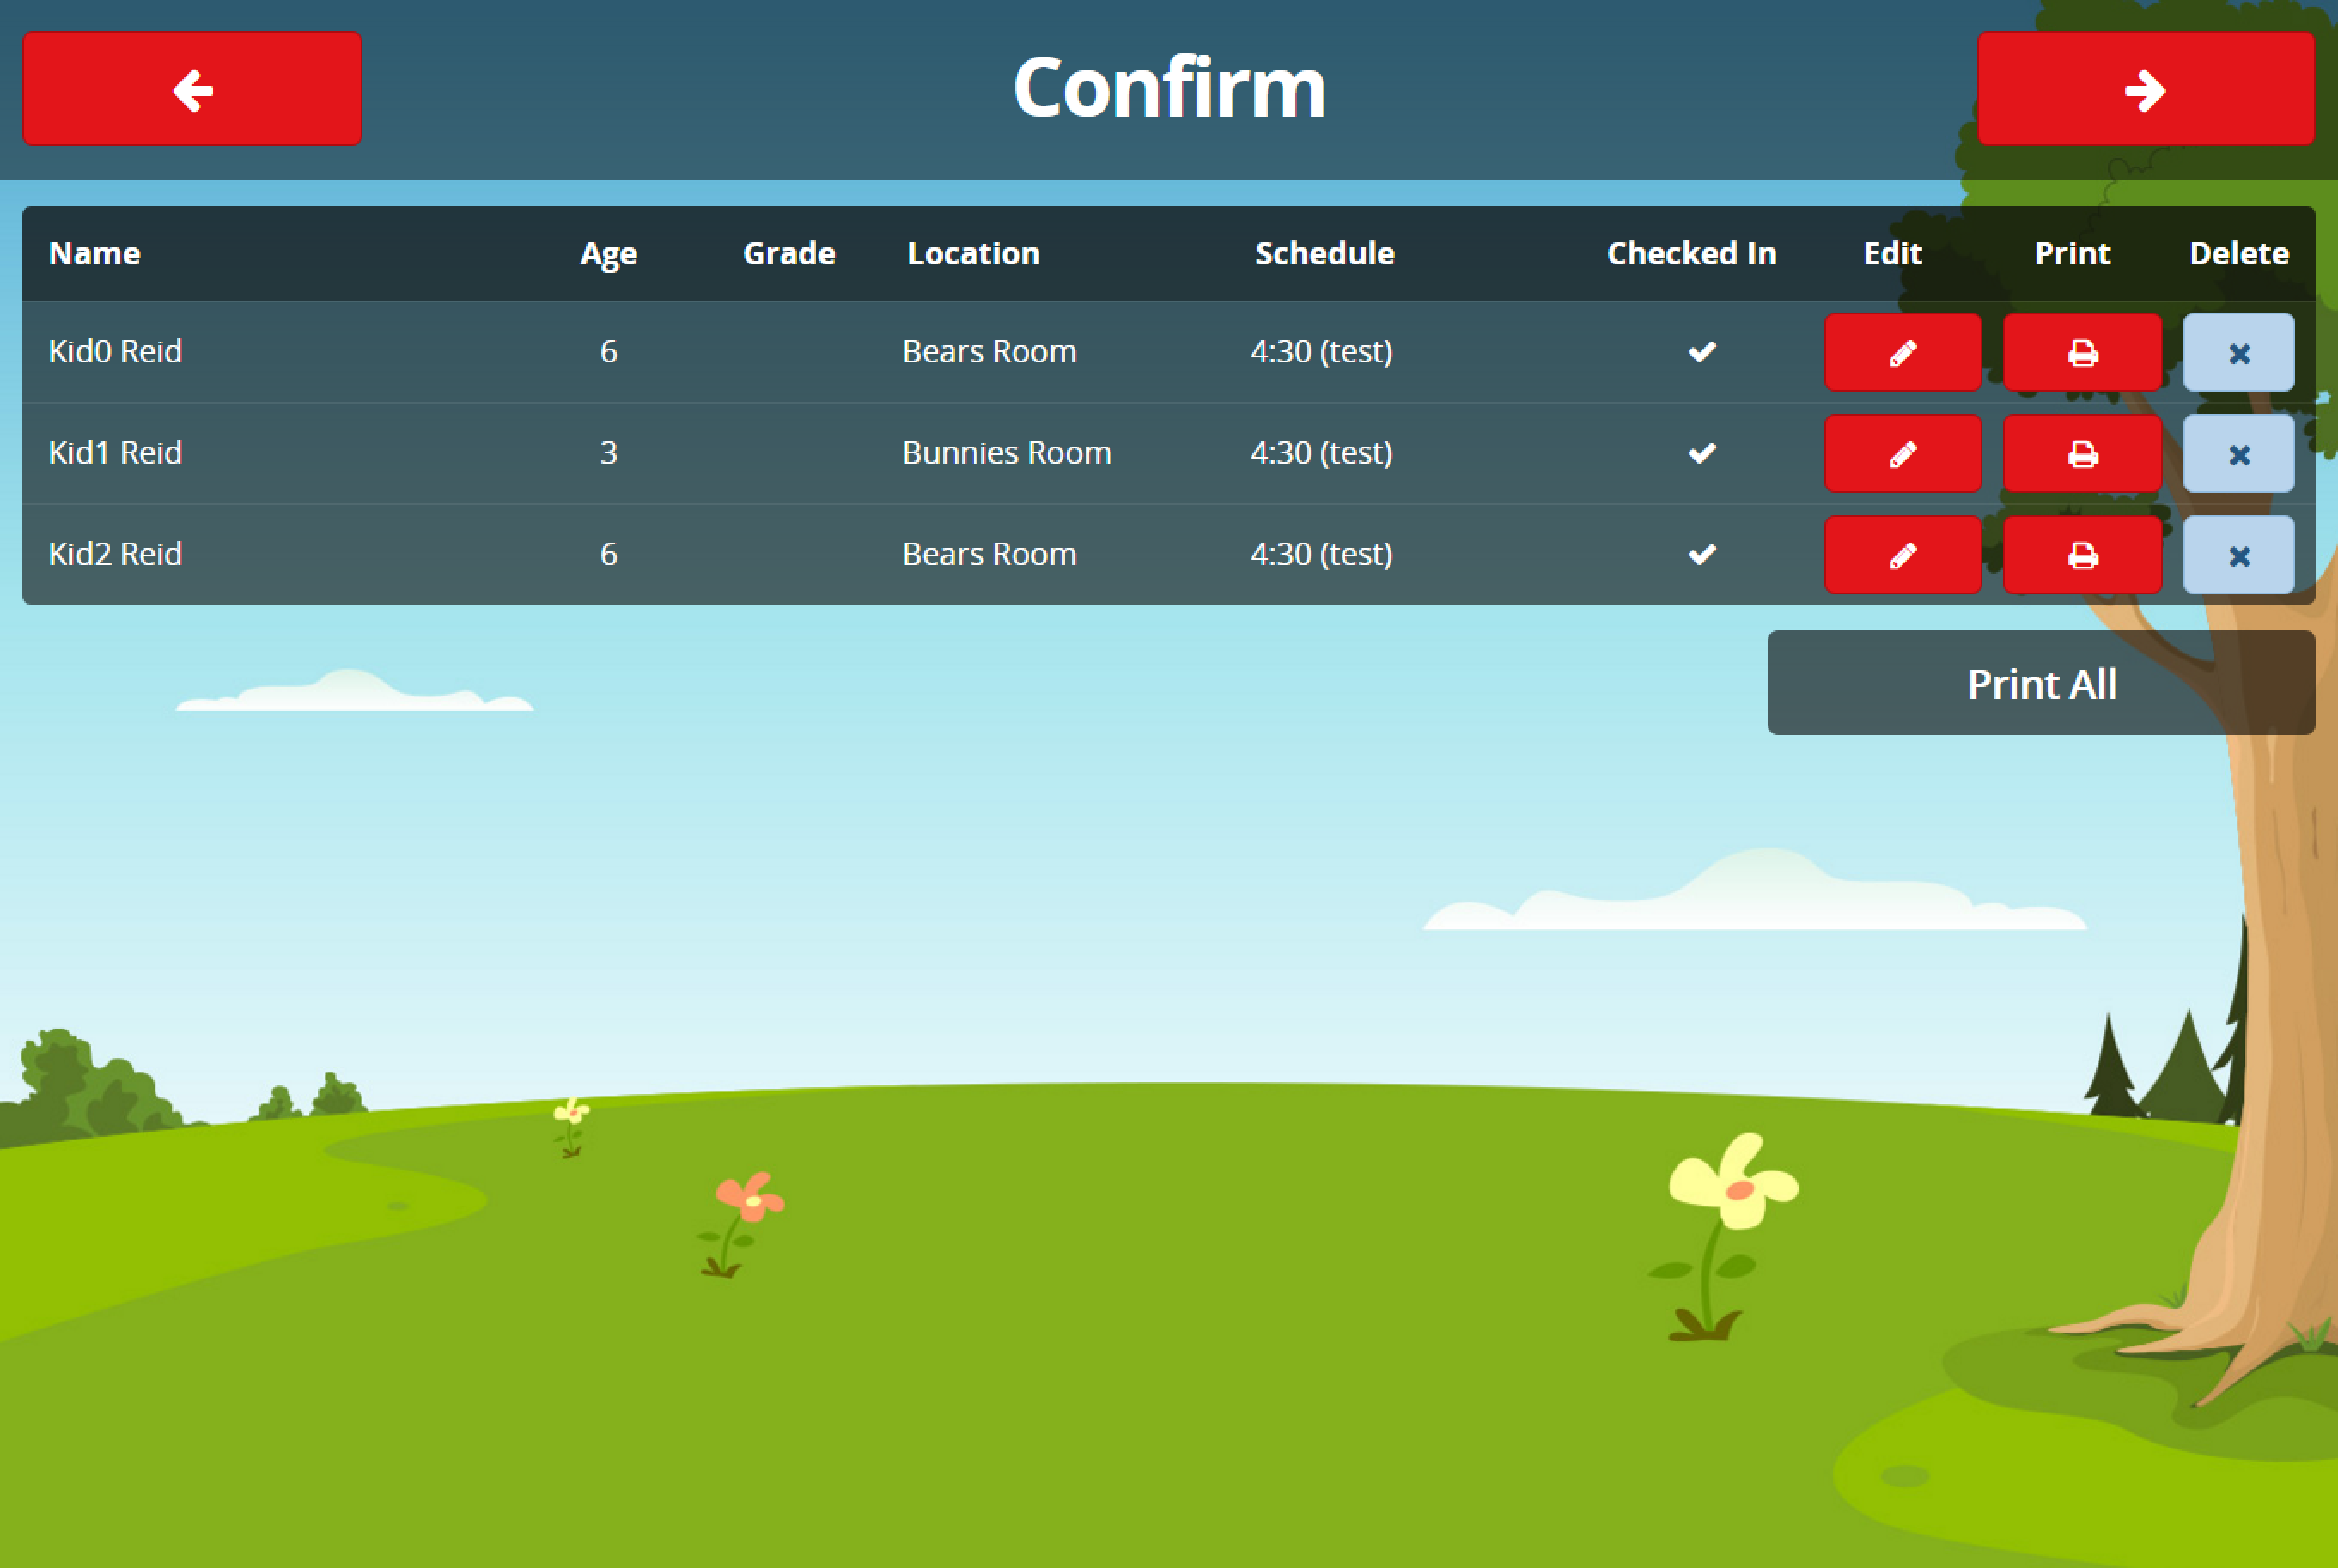
Once you click Print or Print All, everyone currently visible will be checked in with their current assignment(s). A checkmark will be displayed next to the assignment indicating that person has been checked in. The checkmark will be displayed at check-in for as long as the selected schedule is open.
Once a person has been checked in, clicking Delete on their assignment will either mark them as "checked out" or remove the assignment completely. See Configuration for more details.
Note: If you've configured your Kiosk with server printing and the printer is offline, a message with the printer IP will be displayed next to Print All indicating that printer couldn't be reached.
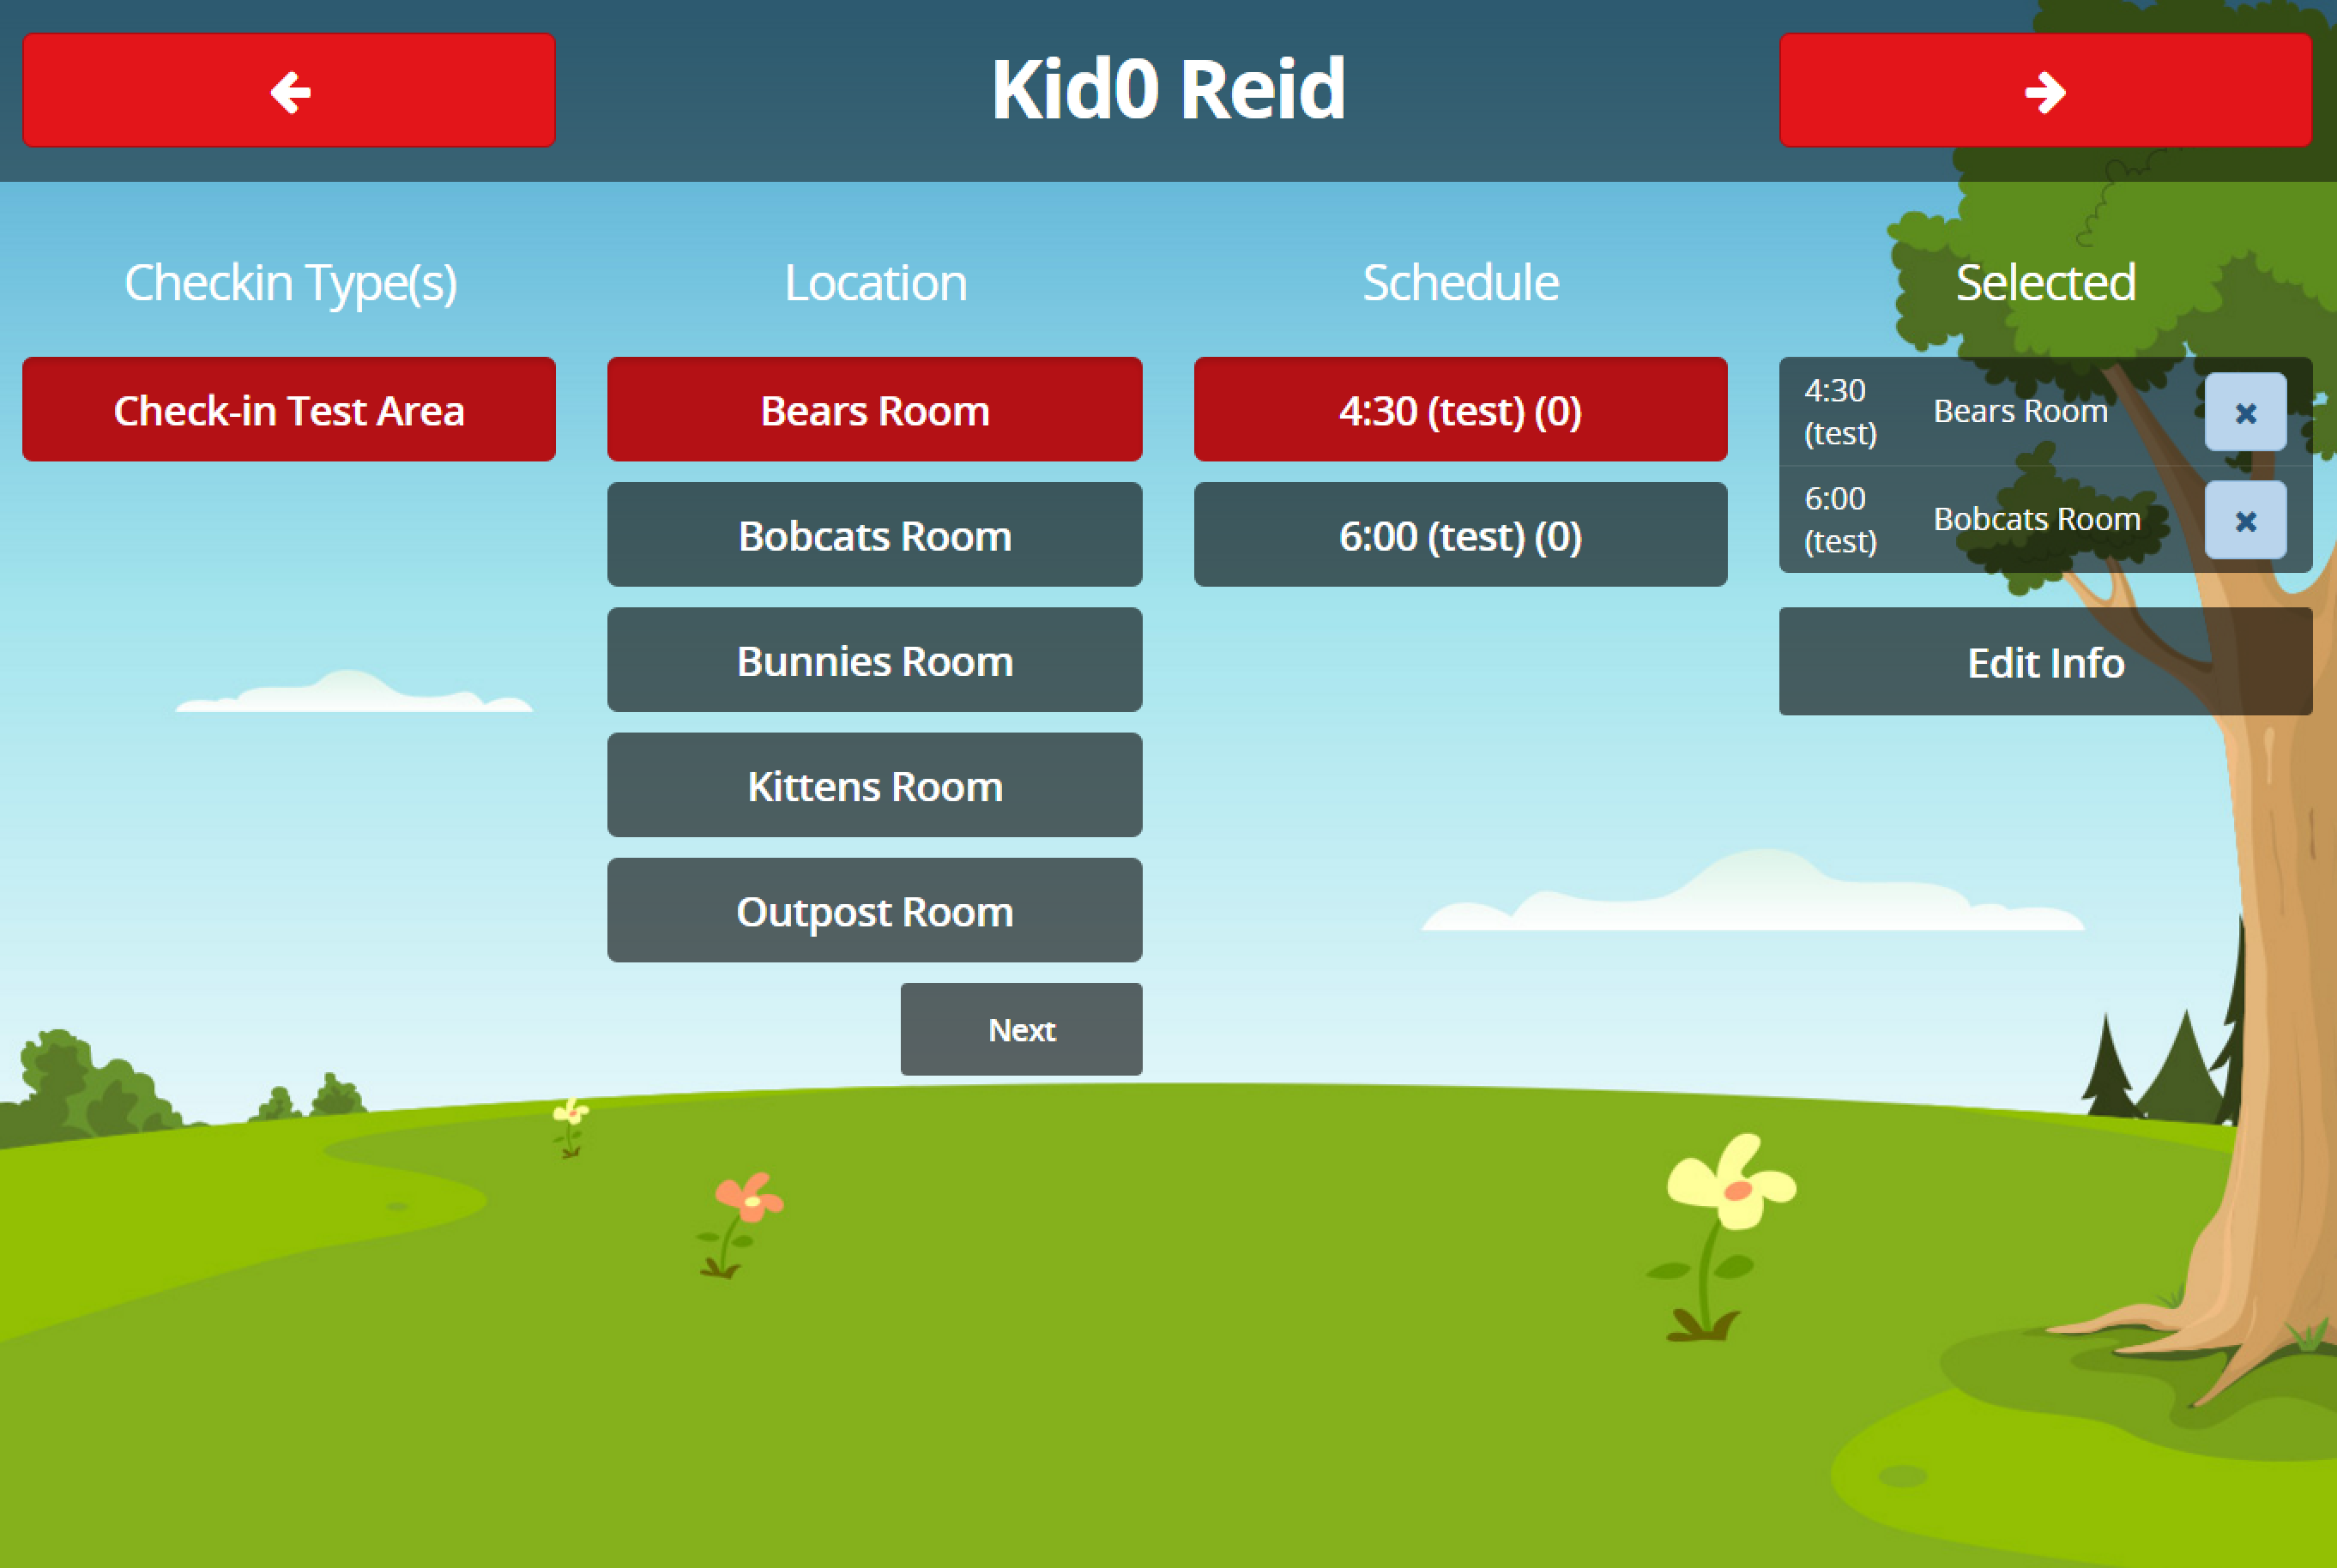
This screen lists all open areas, locations, and schedules configured for the current Kiosk, even those that were automatically filtered out for the current person. This allows the attendant to override a room assignment by request. The Schedule column will show a count of how many people are checked into that assignment combination.
If a new or existing assignment is incorrect, click the X button to remove it.
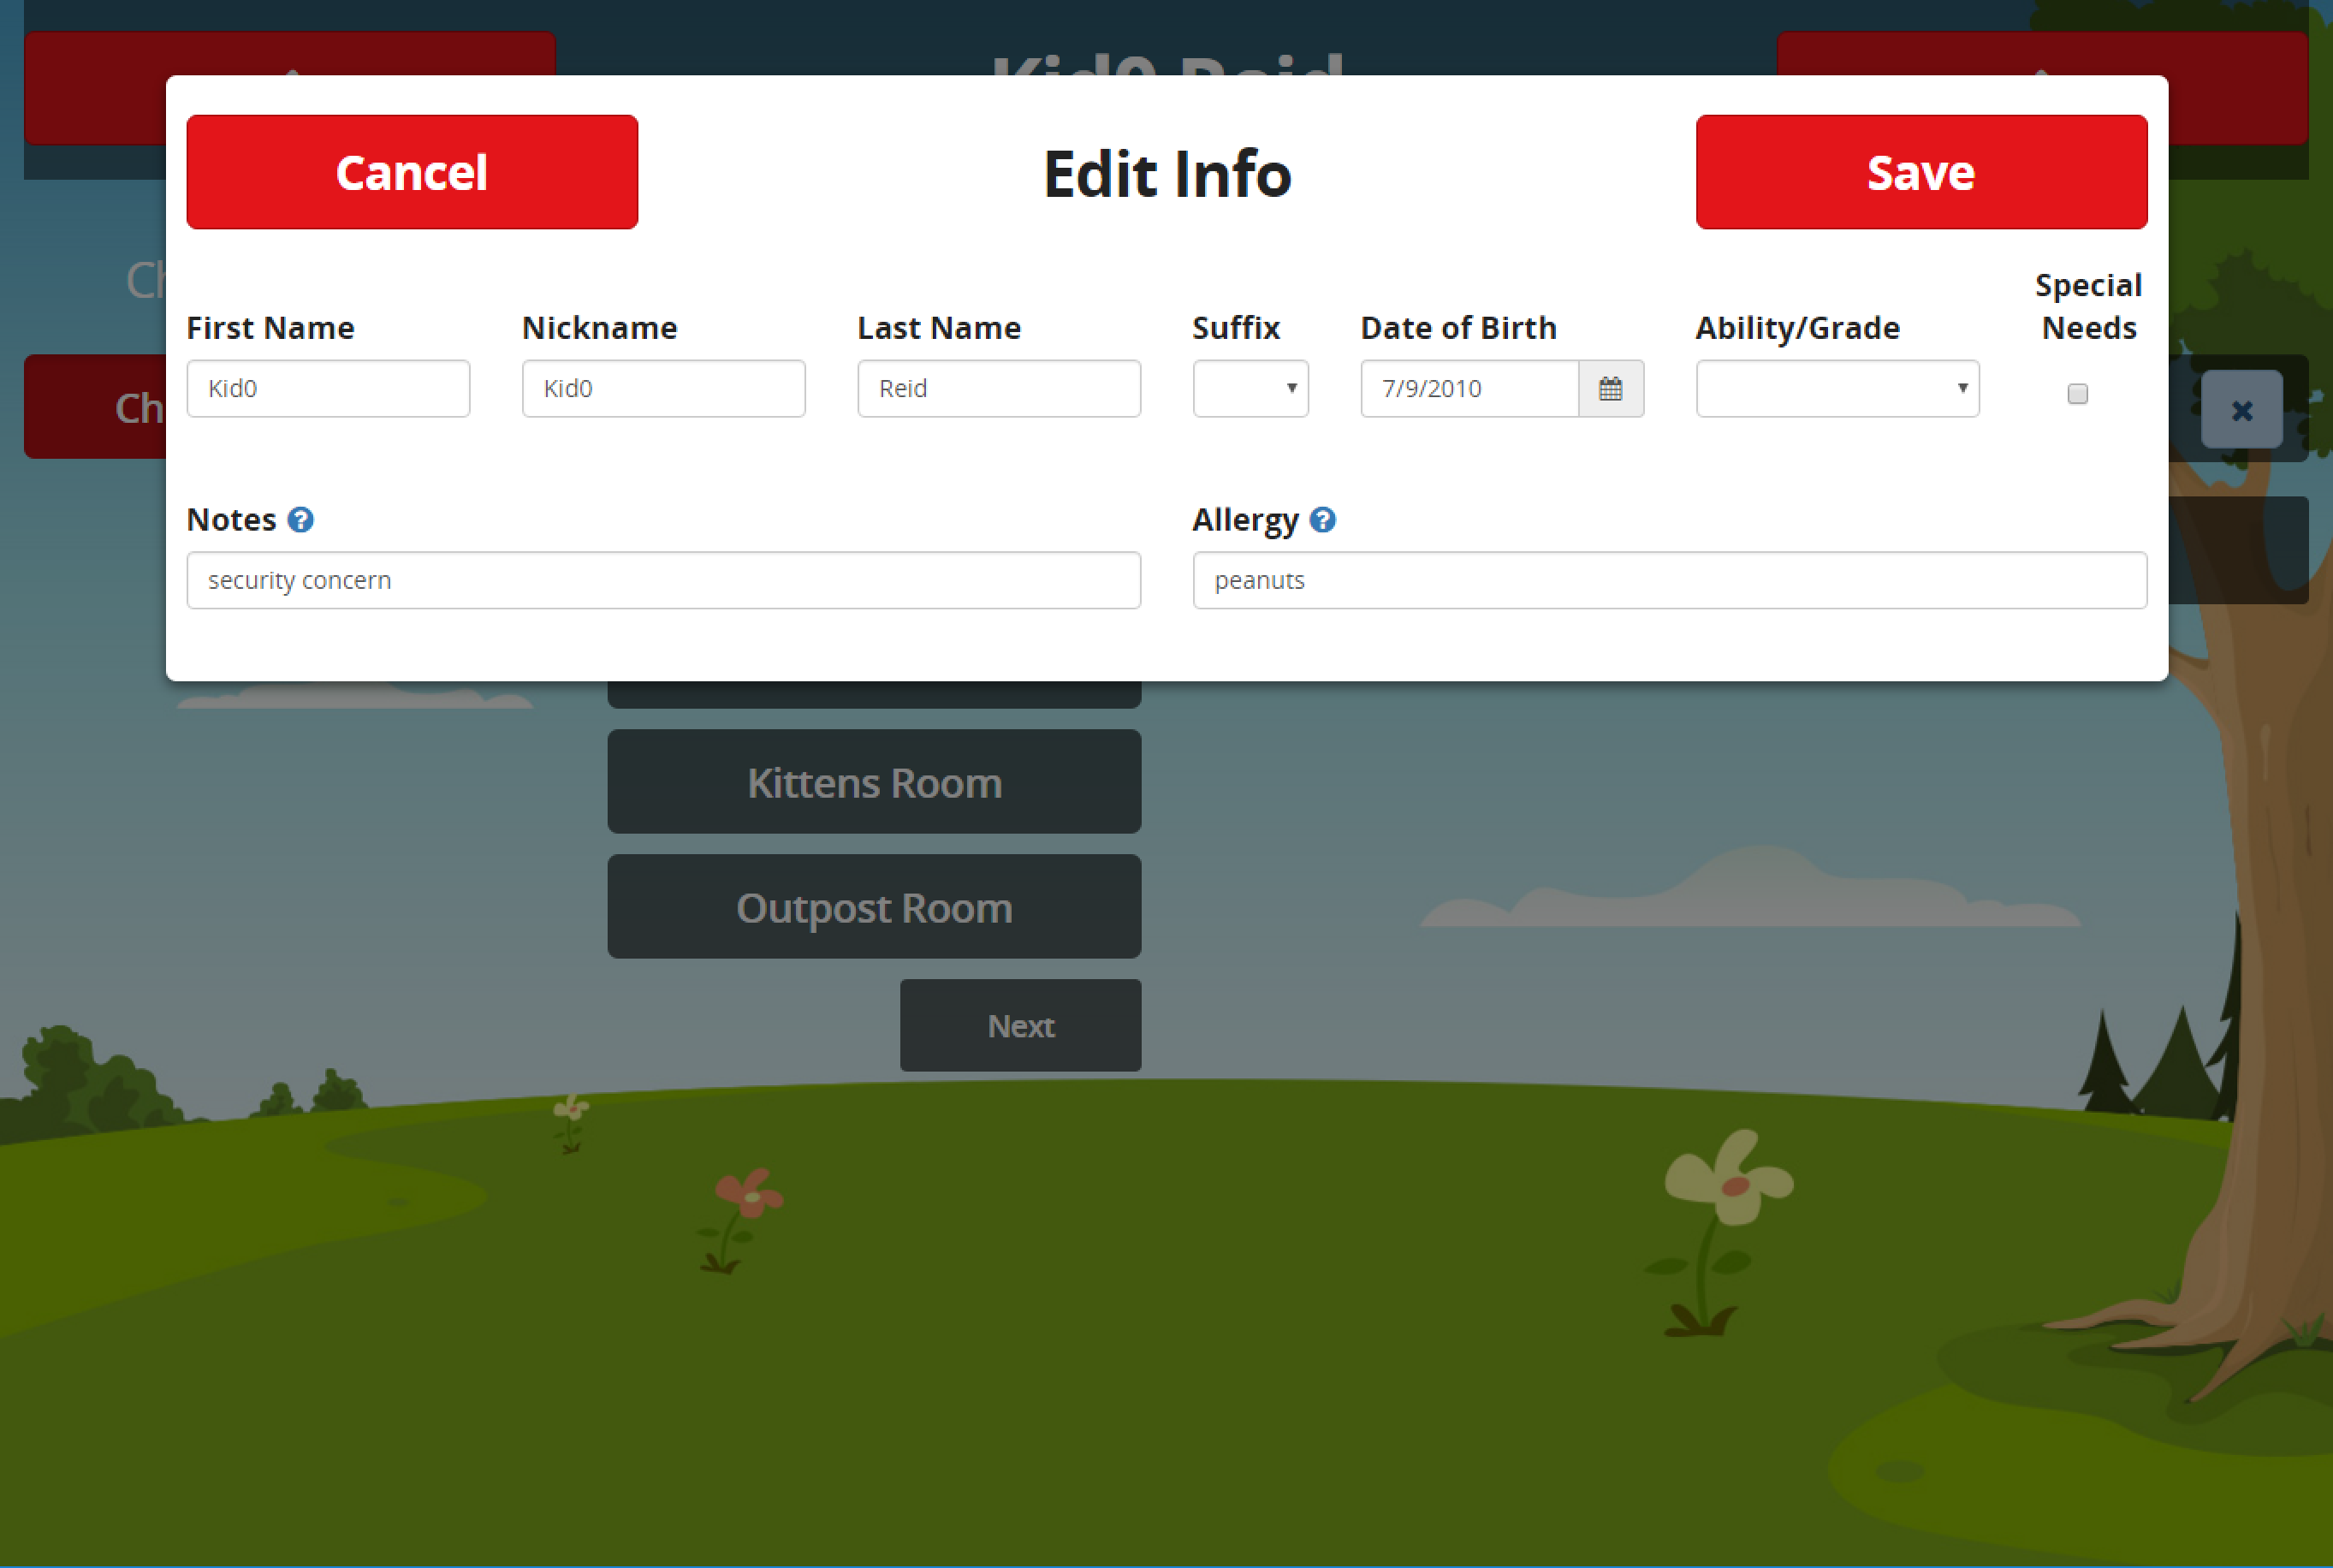
This screen allows you to edit a person's biological information or add a note or allergy to their label. You will need to have the note and allergy fields added to your check-in label for them to print.
Once your edits are complete, click Save to update the person. Then finish the activity selection process and return to the Confirmation screen by clicking the Next arrow.
Note: Due to various check-in structures and processes, Attended Check-in allows you to check-in to multiple assignments at the same service time. For example, someone could have a greeting assignment for the beginning of a 10am service, as well as a care assignment for the end of the service. You should always confirm assignments for accuracy.
Since Attended Check-in is a plugin, configuration is controlled through the Workflow or contained in the Block Settings for each page. The list below documents what Block settings are available for each page.
You can access these settings from Admin Tools > CMS Configuration > Page Map, expanding the Attended Check-in section, expanding the Page, then clicking the Gear icon for the Block.
-
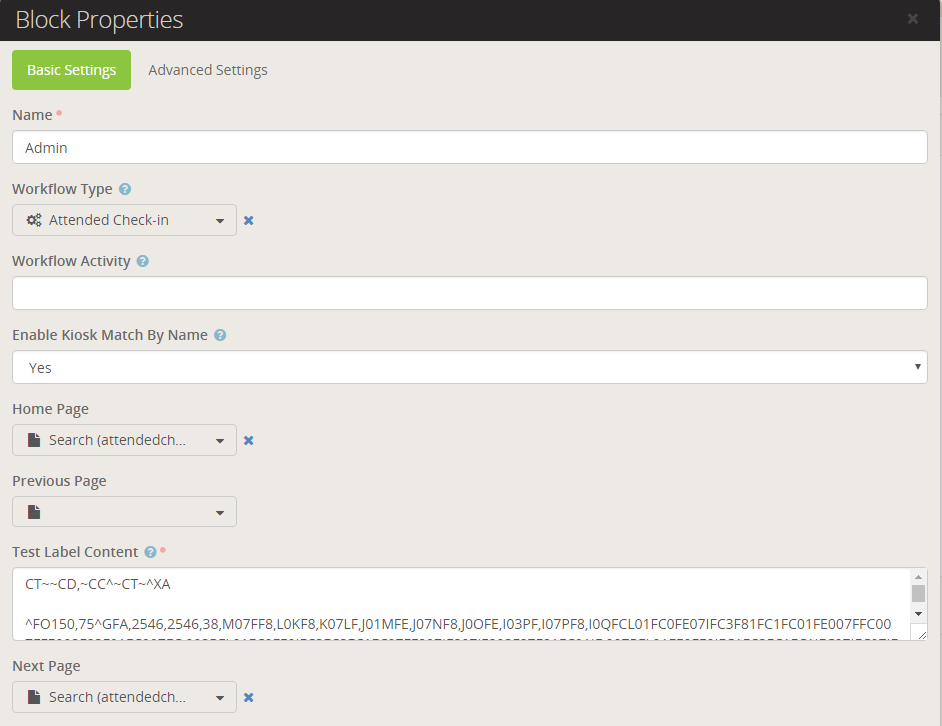
Enable Kiosk Match By Name
By default, Kiosk devices are matched by IP address. This option enforces higher security for Kiosk devices by also requiring the Name to match.
-
Test Label Content
This field contains the ZPL content to send to the printer configured for this Kiosk. This does require a printer configured for Server printing. If you want to preview or adjust this content, use the Labelary Viewer.
Note: The Home and Previous Page navigation options are visible for each check-in page, but the page order is specific and should not be changed.
-
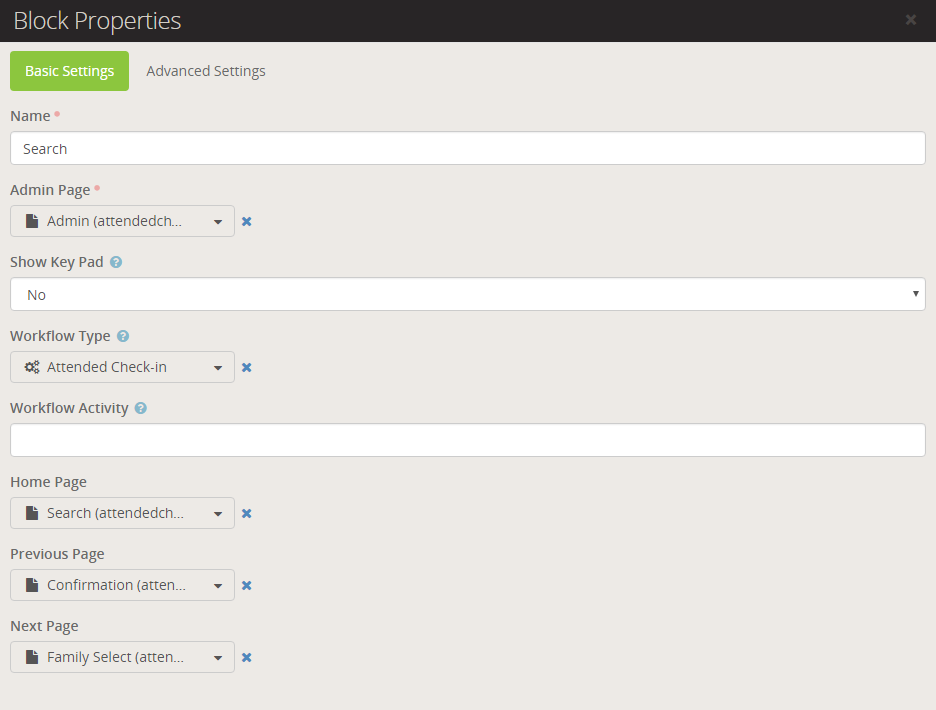
Show Key Pad
By default the number pad keypad only displays if the Kiosk check-in area is set to Search by Number. If you want to display it or hide it at other times, change this option.
-
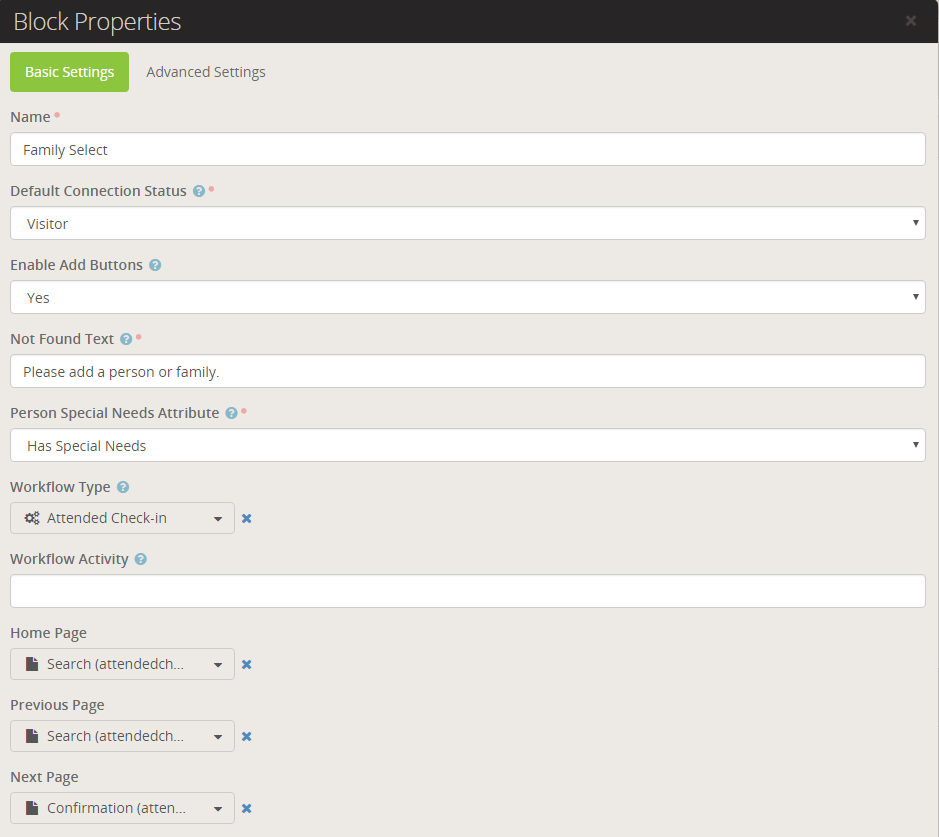
Default Connection Status
By default, a new Visitor, new Person, or new Family is added with a status of Visitor. If you want them to have a custom status like "New from Check-in", select that option here.
-
Enable Add Buttons
Toggle this option if you don't want the check-in attendant to be able to add Visitors, People, or Families.
-
"Not Found" Text
This text is displayed when no families are found for the number or name entered in the Search box.
-
Special Needs Attribute
Select the Person Attribute that you want to use when the
Special Needs?checkbox is selected from the Add Visitor/Add Family screen.
Note: If a family is found, but no one in the family is eligible to check-in at the current Kiosk, a "No family member(s) are eligible for check-in" message will be displayed.
-
Designated Single Label
This option limits the number of tags that are printed for family check-in. For example, for a multi-child family, multiple Parent labels would be printed if all your child grouptypes were configured with a Parent label. If you select the Parent label from this option, only a single Parent label would be printed with multiple child labels.
-
Display Age/Grade
This option toggles the display of a child's age or grade on the Confirmation screen (can help highlight incorrect biological information or help override incorrect assignments).
-
Display Group Names
By default, the Location names are displayed on the Confirmation screen. This is best for a 1:M or M:M Group to Location check-in configuration. However, if your organization isn't multi-site, or you use a single Location as a catch-all for every Group (M:1), you'll want to display the Group name instead.
-
Print Individual Labels
The standard check-in behavior assumes you want a label that contains all of that person's assignments. Toggle this option if you want a label printed for each of that person's assignments.
-
Remove Attendance on Checkout
By default, Attended Check-in "checks out" a person when their assignment is removed, meaning their Attendance record will be marked with an EndDate timestamp. Toggle this option if you want to completely remove the assignment on checkout (helpful for error-prone attendants).
-
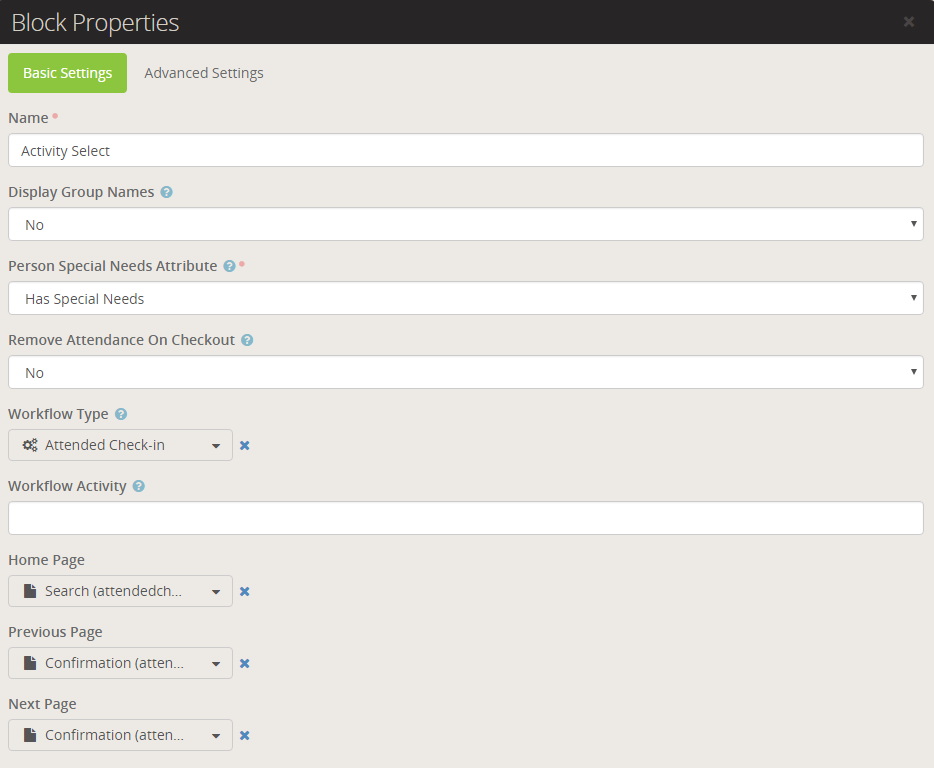
Display Group Names
By default, the Location names are displayed on the Activity Select screen. This is best for a 1:M or M:M Group to Location check-in configuration. However, if your organization isn't multi-site, or you use a single Location as a catch-all for every Group (M:1), you'll want to display the Group name instead.
-
Special Needs Attribute
Select the Person Attribute that you want to use when the
Special Needs?checkbox is selected from the Edit Info screen. -
Remove Attendance on Checkout
By default, Attended Check-in "checks out" a person when their assignment is removed, meaning their Attendance record will be marked with an EndDate timestamp. Toggle this option if you want to completely remove the assignment on checkout (helpful for error-prone attendants).
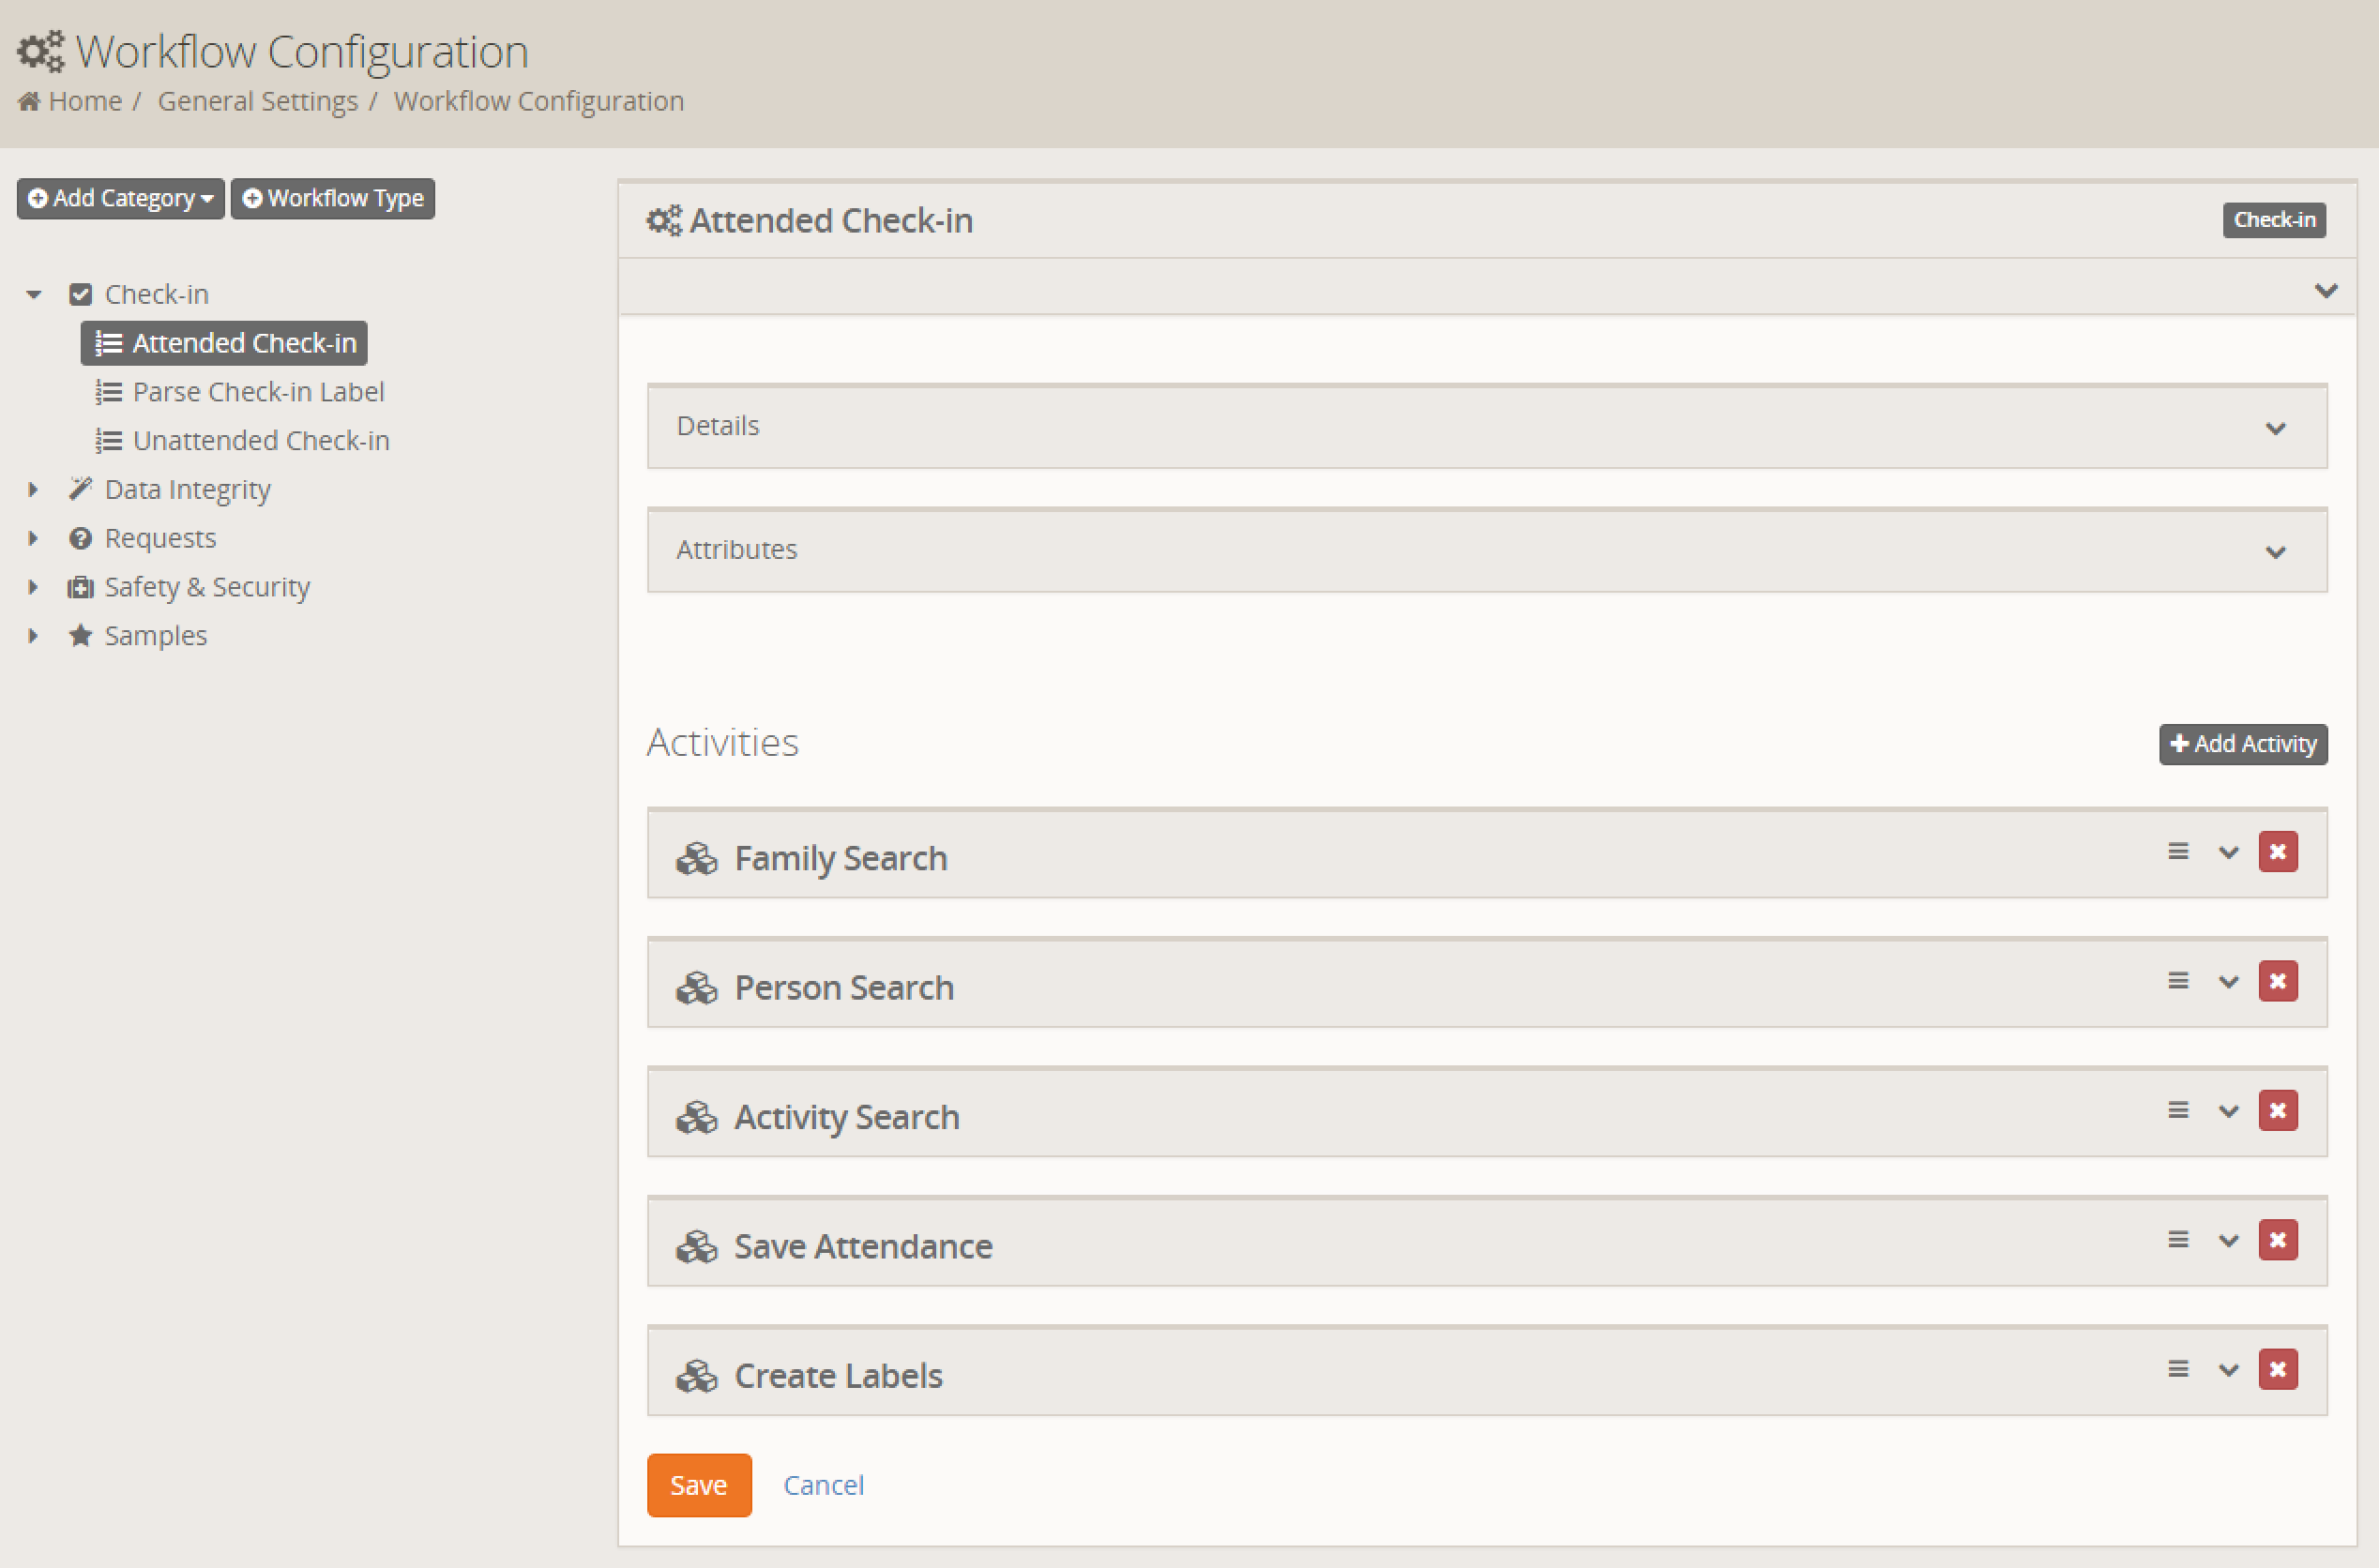
In Rock, the Workflow engine is a crucial part of any automated process, and Attended Check-in is no different. If you haven't read the Rock Workflow Guide, start there to get a good understanding of workflows. The list below highlights specific Attended Check-in workflow actions.
Attended Check-in uses almost all of the same actions as unattended check-in. However, intelligent assignments and ability to override a location require a different activity and action order.
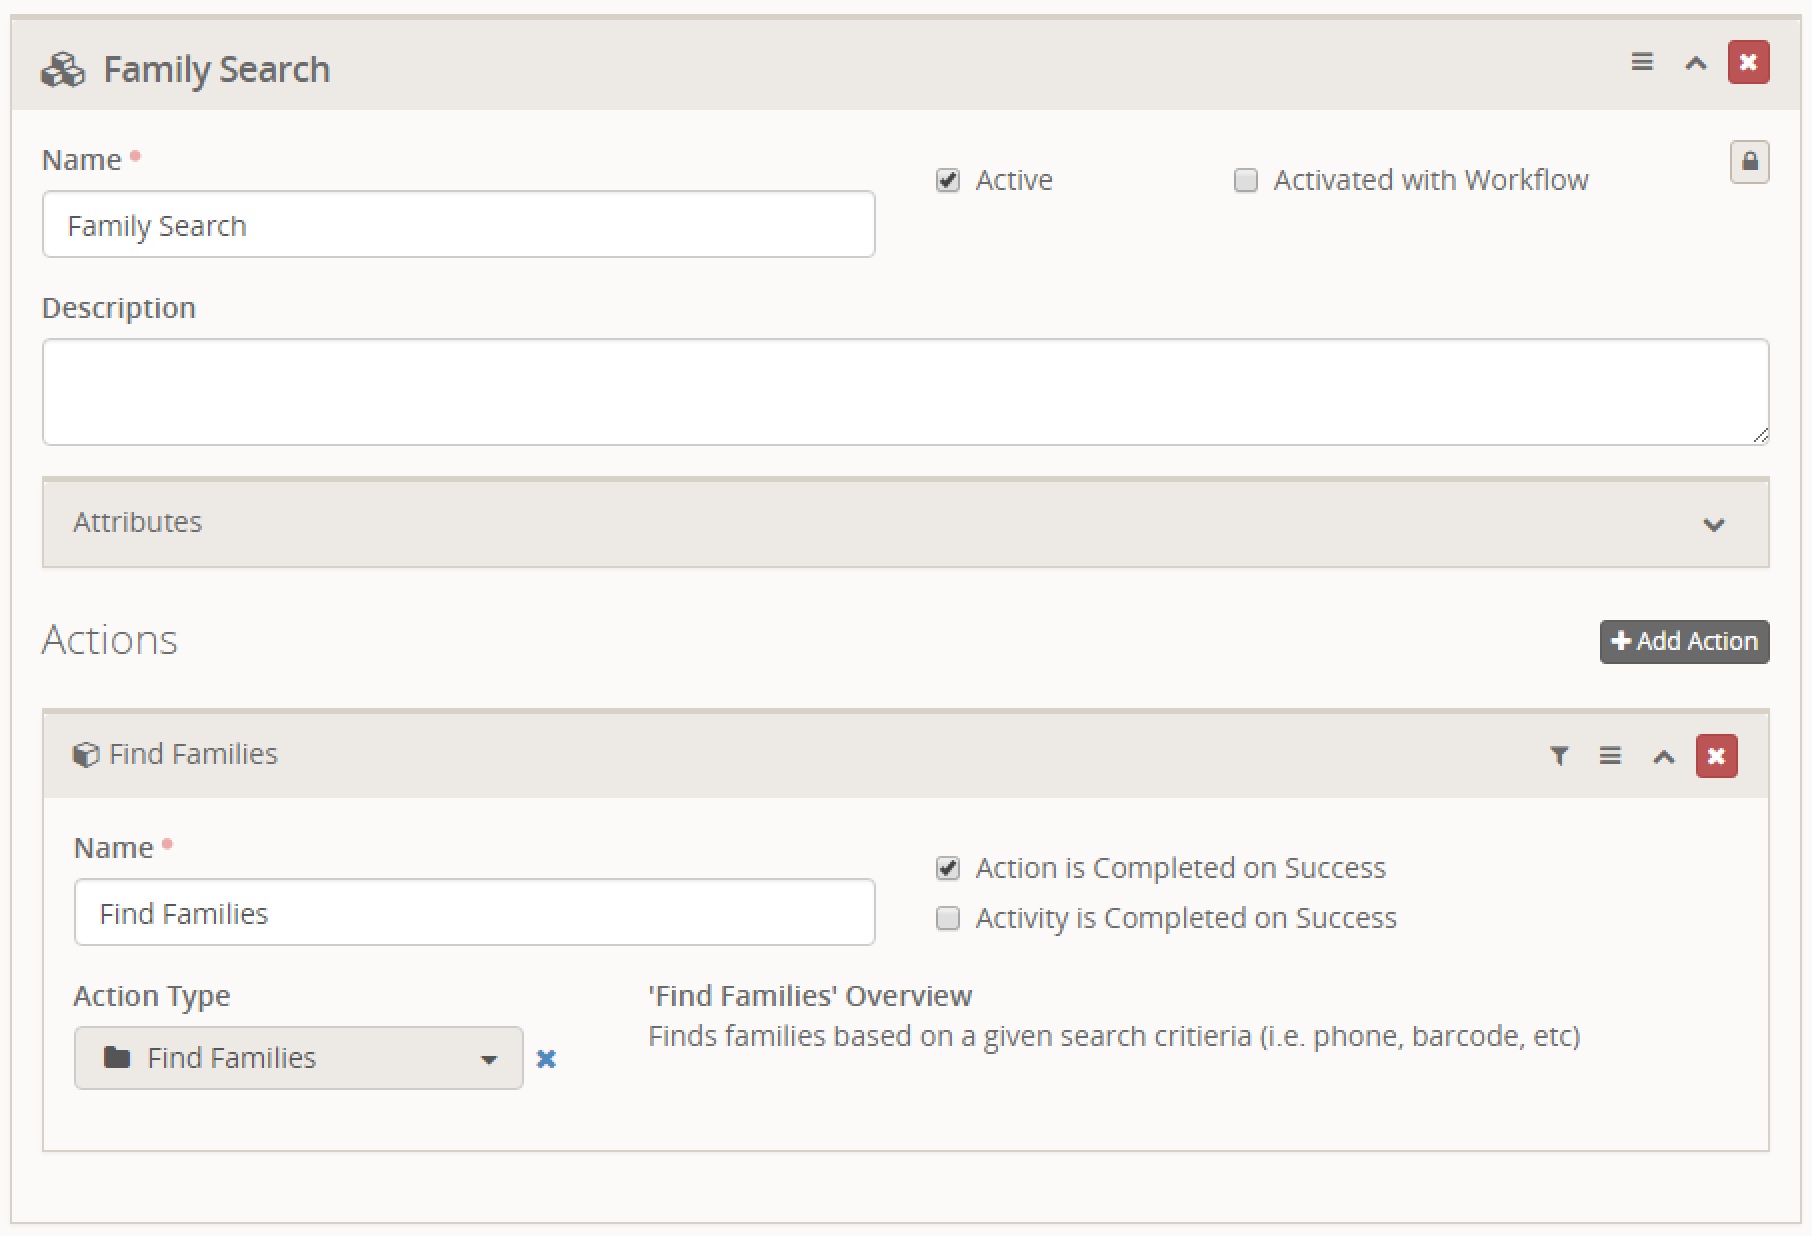
This workflow activity finds any family that matches the name or number that was entered into the Search bar. It will run when you click the Next button on the Search screen.
This workflow activity finds all members of the currently selected family, as well as any related visitors, then filters their check-in groups by Special Needs, Grade, and Age. It will run whenever a family is selected on the Family screen, including when the page is first loaded.
Note: By default, only Groups that are selected are loaded, but we need to Load All Groups to be able to determine assignment eligibility. You also don't want to Remove Groups, as the attendant may need to override an assignment to pick a Group that's technically ineligible.
This activity loads the locations and schedules for each person, then create an intelligent assignment. If a person's Grouptype is eligible for Room Balancing, Select By Multiple Attended and Select By Best Fit will calculate the lowest attended eligible group or location. If you have an "in-between service" group or location, add the name to Excluded Locations.
This activity will run when you click the Next button on the Family screen.
Note: By default, only Locations and Schedules that are selected are loaded, but we need to Load All to be able to determine eligibility. However, you do want to Remove inactive locations as no attendant should be choosing an assignment to an inactive Location.
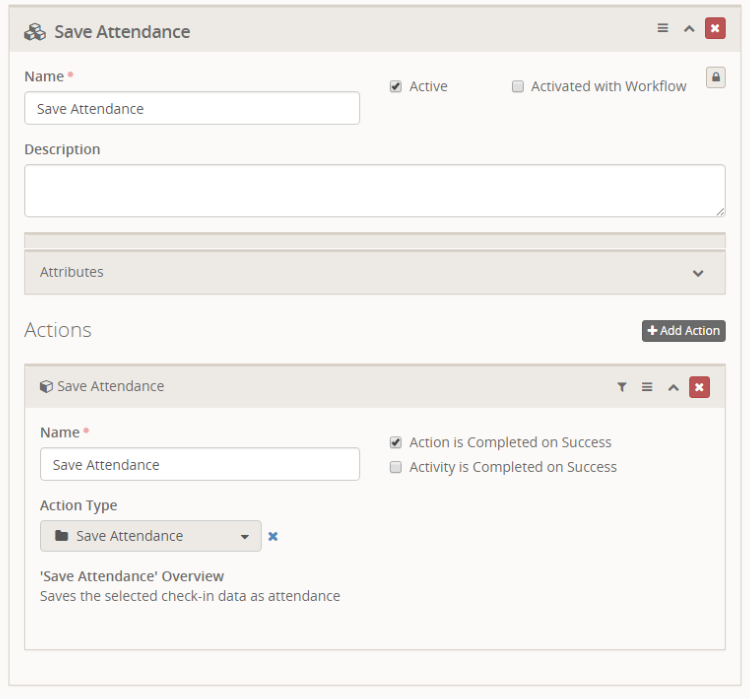
This activity generates a security code and saves an Attendance record for each selected Person, Group, Location, and Schedule. It will run whenever you click Print, Print All, or Next from the Confirmation screen.
Note: If you navigate Back to the Confirmation screen and click Print or Print All, this activity will generate a new security code for the label. If you have Use Same Code for Family selected in your check-in area, this will create inconsistencies between the family members' security codes.
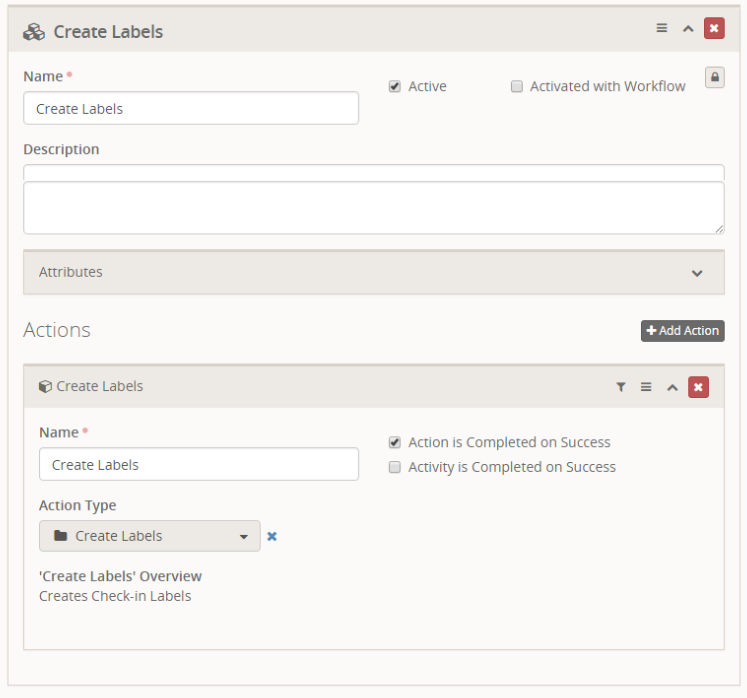
This activity generates labels with their merge fields for each selected person. It will run when you click Print or Print All from the Confirmation screen.
Attended Check-in ships by default with the CheckInPark theme but can be used with other themes. A stylesheet is included in the Attended Check-in site with custom column layouts and spacing.
If you're not familiar with Git and Visual Studio, you may want to start with the guide for NewSpring/Rock. If you're already familiar with the development environment, then clone the project and add it to your local Rock solution.
Once you build Rock locally, the check-in Blocks will be copied to ~/Plugins/cc_newspring/AttendedCheckin. A Plugin migration will also run to add the Attended Check-in workflow, site, and routes to your local database.
Note: You can debug or modify the code in the Plugins folder, but you'll need to copy those changes back to the source project to prevent them from being overwritten the next time you trigger a build process.
With the addition of Family Check-in in Rock v6+, not all the check-in area options are currently supported. For example, checking the Use Same Service Options or Prevent Duplicate Check-in option will have no effect on Attended Check-in.
If any current or future check-in options are enforced through Workflow actions, that will affect Attended Check-in.
NewSpring runs Attended Check-in every week on ChromeOS kiosks, using the Asus C201. If you're interested in running the same setup, our ChromeOS app and Getting Started guide are available here.

